

Steps to Setup an Email Client in Outlook

Email Client is a desktop application through which one or more email ids will be configured to send, receive, read and compose emails from the mail address through desktop or mobile interfaces. Email Client is also called as Email Reader or Mail User Agent (MUA).
Important things to be taken care during the Email Client Configuration are choosing the method of accessing or storing the mail on mail server. Some of them will configure with POP3 Configuration without knowing its disadvantage or its access type and will face the data loss issues. It is recommended to use the IMAP configuration because it will not delete any data from the server.
Steps to Setup Email Client in Outlook
- Launch Outlook Application Software.
- Click on “Tools” from the Menu Bar.
- Select “Account Settings” shown in the Tools Menu.
- Under Email Tab click on “New” to add new email account.
- Fill the Details and Choose the server type “pop3”, “IMAP”, “HTTP”.
- If Outlook is unable to identify the email server setting, try through Manual Configuration by Checking the box “Manually configure”.
- Fill all the Login Details Requested.
- Choose the Email Service type.
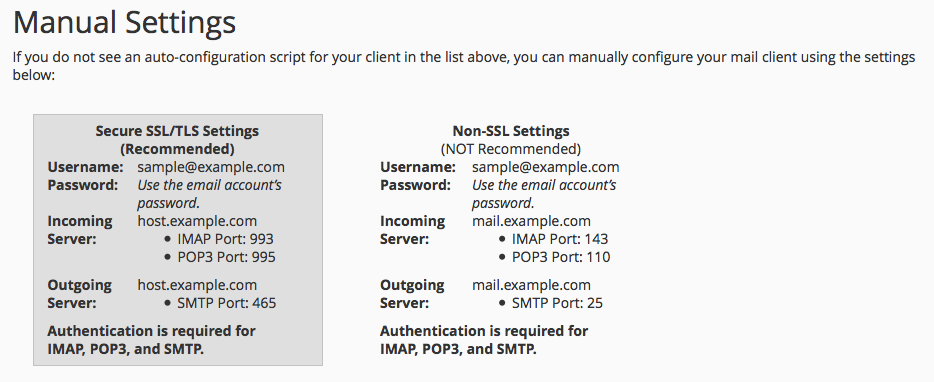
- Choose Appropriate Incoming and Outgoing mail Server address as recommended by the mail server.
- Click on More Setting and click “Outgoing Server” tab.
- Mark Tick on the Check Box “My Outgoing Mail Server needs authentication” .
- Choose “Use same setting as my incoming mail server”.

- If you want to do the changes in the port number based on the
- Click on “Test Account Setting” to test the configuration of the Email Client. Once everything is success then it will be collecting the mail data from the server.