 SeekaHost.com Client Area
  SeekaHost.app
  SeekaHost.co.uk
  SeekaHost.in
How to Install Free SSL in cPanel?

Before getting into the topic “How to Install AutoSSL in cPanel?” we should be clear about why we need to install SSL for the websites?
One of the most important backbones of online business is just creating a secured and trusted environment.
So an SSL certificate creates a foundation of trust by providing a secure connection. It creates a secured connection between the client and a server. SSL encrypts the data/information sent across the internet.
This is because; the information that you sent on the internet will travel from one computer to another computer to reach its destination place.
Anyone in between you and the server can be able to access your data/information that passes through the internet if it’s not encrypted. If you installed an SSL certificate for your website, the information that you send through this site will become unreadable except the destination server.

Auto SSL
AutoSSL is one of the best features in cPanel & WHM. By using AutoSSL, it automatically installs and renews Let’s Encrypt SSL certificates for every domain. SSL Installation and Renewal is one of the complex tasks. So most of the web hosting providers comfort the clients with Auto SSL to do the tasks easily. Here, you don’t want to fill out any forms or install the certificates manually. Once you enabled AutoSSL, your websites will be automatically secured free, domain validated SSL certificate. AutoSSL will not force the site to load in https, it needs to be changed manually.
Here, I have explained you how to enable AutoSSL in cPanel.
How to Install Auto SSL in cPanel?
- Login to the cPanel Account.
- Under Security section, click SSL/TLS Certificates option.

- Click “Wizard” tab.

- Click all the checkbox near each domain name or select only main domain and *.domain so it automatically take all subdomains. If you are configuring only for main domain and few subdomain, then you can select only those domain names. Click Continue button.

NOTE: If you select wildcard domain, then it will configure automatically for any subdomain you add later under the main domain in cPanel. If you remove and readd the same subdomain, it will not cover the subdomain so you have to select the subdomain and install SSL separately.
- Now click Let’s Encrypt Certificate button.

- Now in the popup window, click checkbox to accept the terms of Let’s Encrypt. Click Continue button.

- Now the SSL certificate will be installed in the cPanel for the website.

- If you add subdomains after installing the certificate, then the subdomain will be automatically covered under the existing certificate if you have selected the wildcard domain option while installing the certificate.

- If the website loads with both http and https but you want to load only withhttps, kindly update the URL in phpMyAdmin -> Database -> wp_option and update the website name with HTTPS.
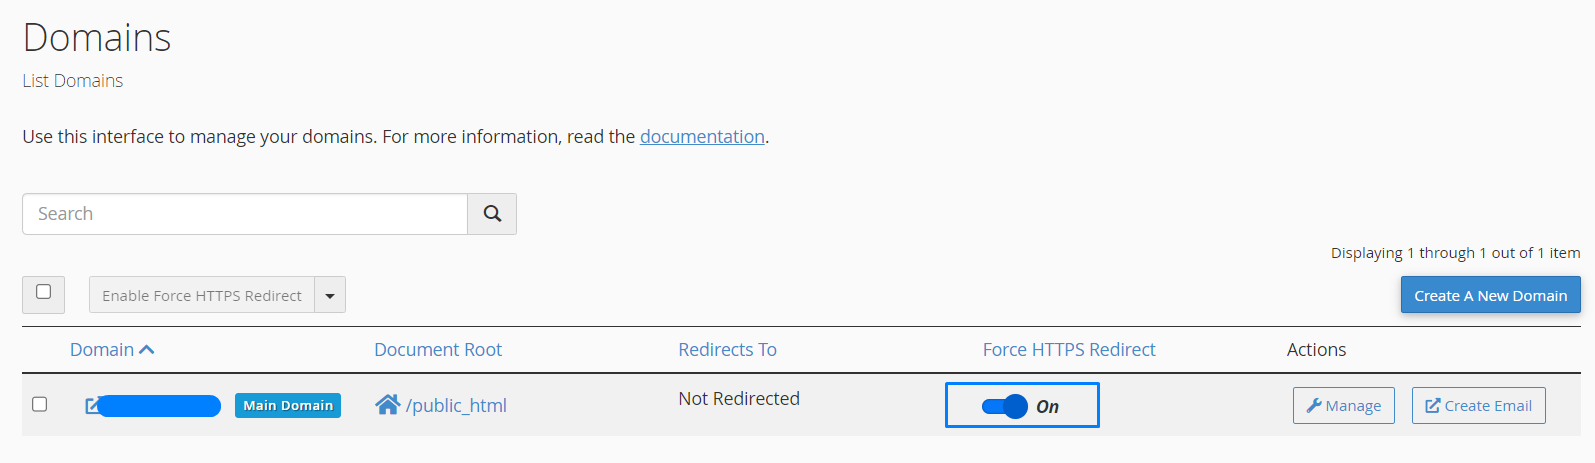
- Also do force redirect on the “domains” section for the domain to redirect the website from http to https if visitor visit the website on http.
- If you want to uninstall the SSL certificate, go to Installation tab

- Now click “Uninstall” option near the installed certification.

Things to Consider for SSL Insecure Error:
1. If you pointed the A record or nameserver for the domain to the hosting provider, wait for 24 to 48 hours before install or Auto run SSL for the website.
NOTE: If your website is hosted with SeekaHost, SSL will be automatically installed within 12 hours after updating the nameservers—no need for manual installation.
2. Check Disk Usage exceeded for the website in cPanel. If exceeded, then remove bigger size files to reduce the disk usage and install SSL.
3. If disk Usage not exceeded, then check File usage/Inode count exceeded for the website in cPanel. Remove more number of files to reduce the count and install SSL.
NOTE: If you don’t see such option, then contact the hosting provider to enable that option.
4. For website loading with both http and https version, make sure you have enabled “Force https redirection” toggle on under domains option in cPanel to load only in https version.
5. If your website redirects to another website when load with https version, then check if any of your files is mentioned with http version. If not, install “Really simple SSL” plugin and configure to avoid mixed content.
6. If your website is pointed through Cloudflare and showing an SSL mismatch or insecure error, ensure your Cloudflare settings match your hosting server. Follow our step-by-step guide on How to Update DNS Records in Cloudflare to configure your SSL/TLS settings properly.