 SeekaHost.com Client Area
  SeekaHost.app
  SeekaHost.co.uk
  SeekaHost.in
How to Install Cockpit in Linux server

Cockpit GUI
Cockpit is a Remote server management tool that is web-based and enables administrators to manage Linux systems using a browser-based interface. It provides a user-friendly interface.
The cockpit helps to perform restart services, view hosted users, server updates, and reboot. It’s a user-friendly interface, so we don’t require LINUX commands.
Cockpit GUI Features
- System CPU & memory monitoring
- Add multiple hosts to manage & monitor
- Management of users, services, and container.
- Log management and auto updates
- Network and firewall management
The following steps guide you on how to install Cockpit on AlmaLinux / CloudLinux.
To prevent any performance issues, it is crucial that your AlmaLinux is up-to-date.
#dnf update -y
Before the installation of the cockpit, we can check whether the cockpit is already installed
#systemctl status cockpit
If not installed, then please follow the below-mentioned steps.
#dnf install cockpit -y
(-y means without confirmation proceeding, because you accept it)
Once the cockpit installation is complete, start the services.
#systemctl start cockpit
Enabling Cockpit will help keep services active even after restarting the server.
#systemctl enable –now cockpit.socket
Listens for incoming connections on a specific TCP port (9090 by default).
You can also use the command below to verify whether the cockpit services are running or not.
#systemctl status cockpit
Then next, if you have a firewall, then allow port 9090.
For example, if you’re using the firewalld, then follow the command below:
#firewall-cmd –add-port=9090/tcp –permanent
#firewall-cmd –reload
#ifconfig
The “Ifconfig” command is used to view the network interface details like IP address, MAC ID, and network status.
Now we can see the IP address, by using this, we can access the cockpit interface,
https://IPAddress:9090
The login page will appear like this. If a successful installation, then the server name will appear in the login page,
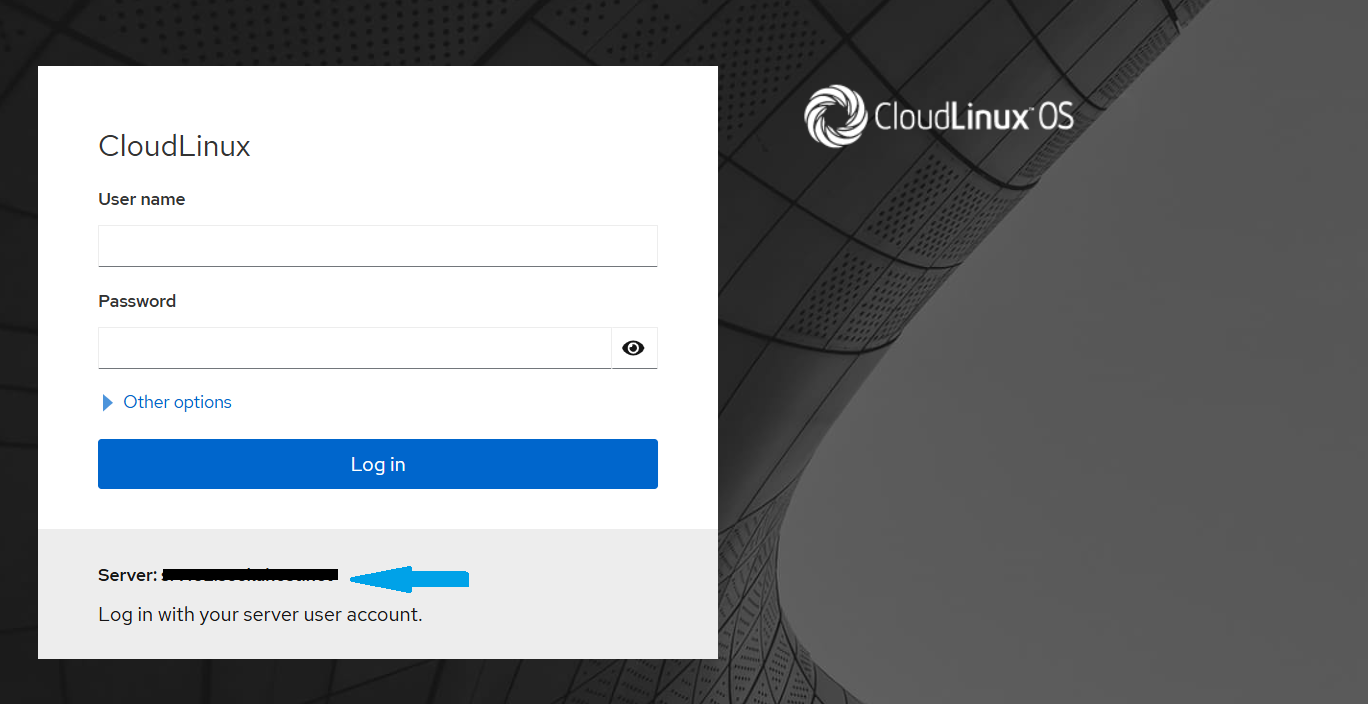
Enter the server credentials,
Username: root, or you can enter the customized user name
Password: your own password
Then log in to the web-based interface.
If you’re facing an error with root privileges denied, then follow the steps mentioned below,
Log in to the server and go to this location:
#vim /etc/cockpit/disallowed-users
It will list users who are not allowed to log in to Cockpit.
Above is the default code. You can just remove or disable the root; sometimes it will work.
Modified to disable,
#root
Then save the file.
Now restart the cockpit service,
#systemctl restart cockpit
Go back to the web-based interface and try to log in. When accessing the interface, it’s asking for the key,
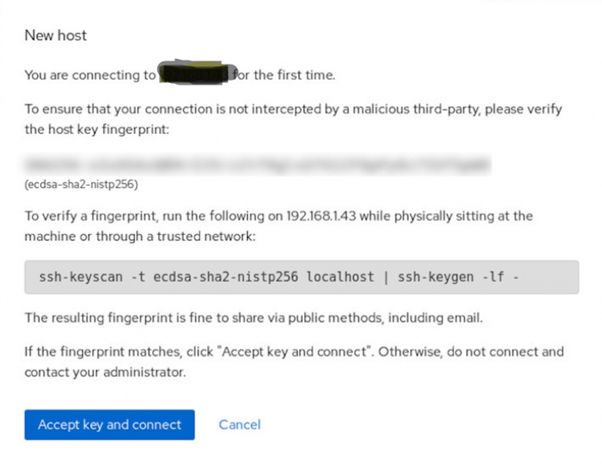
Then copy this script,
ssh-keyscan -t ED25519 localhost | ssh-keygen -lf –
Then execute on your server. If the fingerprint matches, click “Accept key and log in”. Otherwise, do not log in and contact your administrator.
After successful login, you can view the system status,

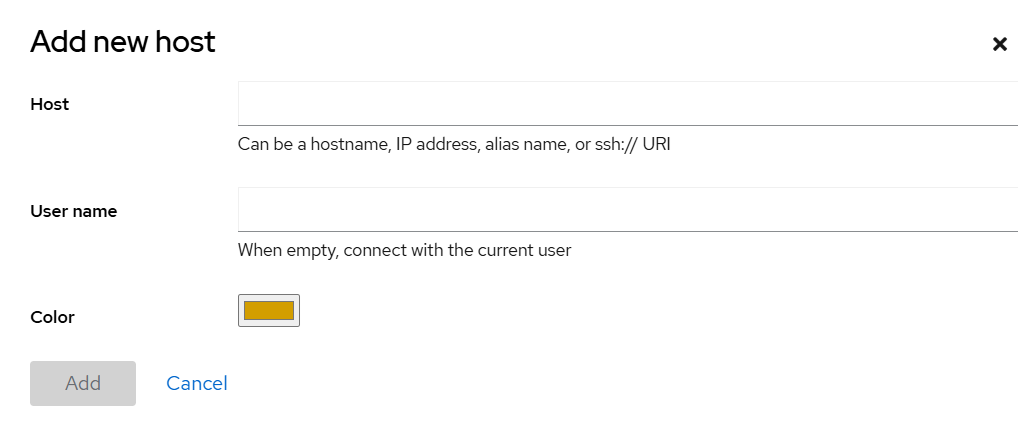
Add Hosts,
Suppose if you want to add multiple hosts, then we can add! In the secondary host, we must install the cockpit.
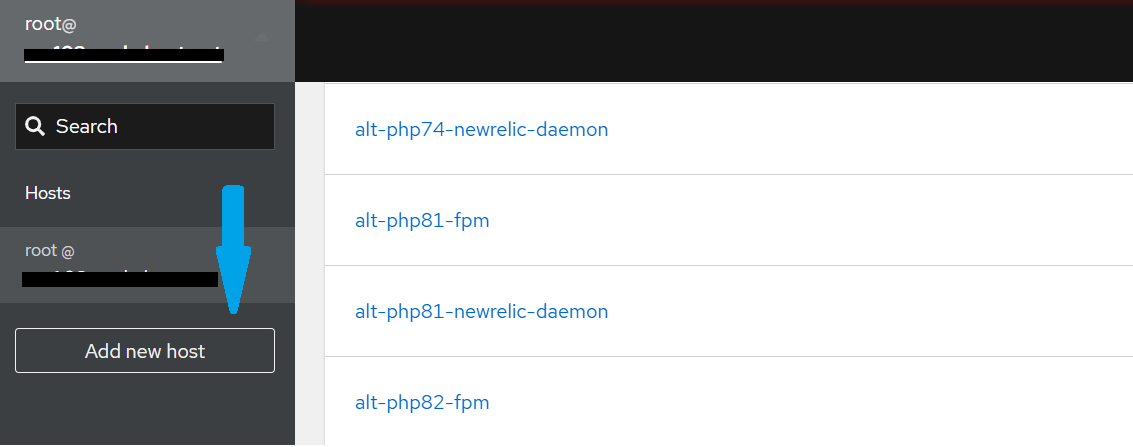
Then, the next pop-up asks for the hostname, username, and password.
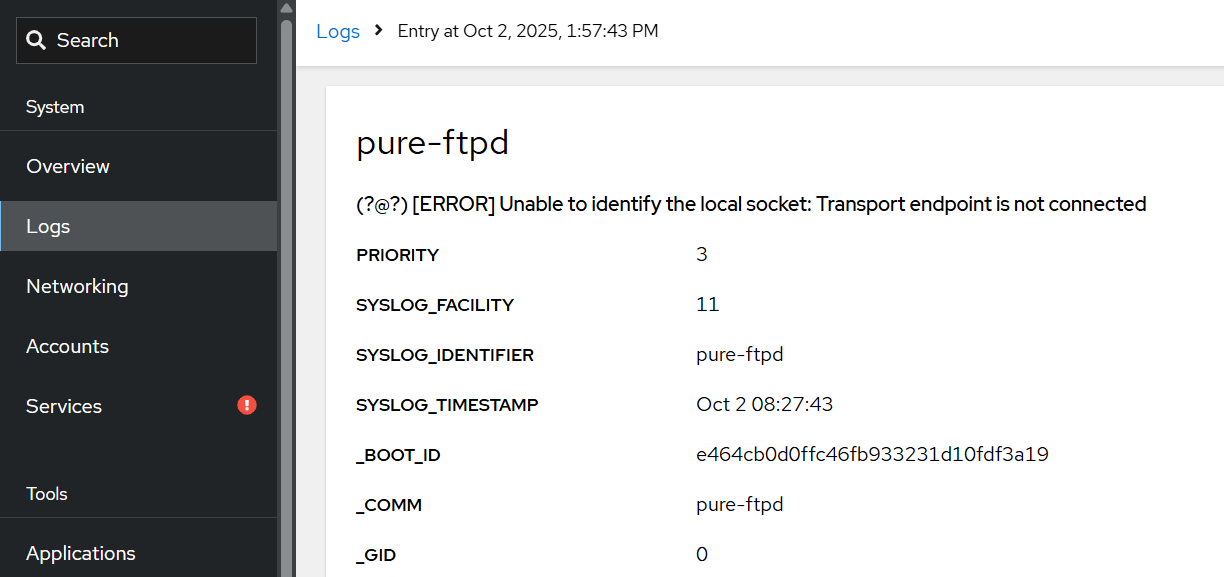
Firewall log,
Account Sections,
In the account section, you can reset the password.

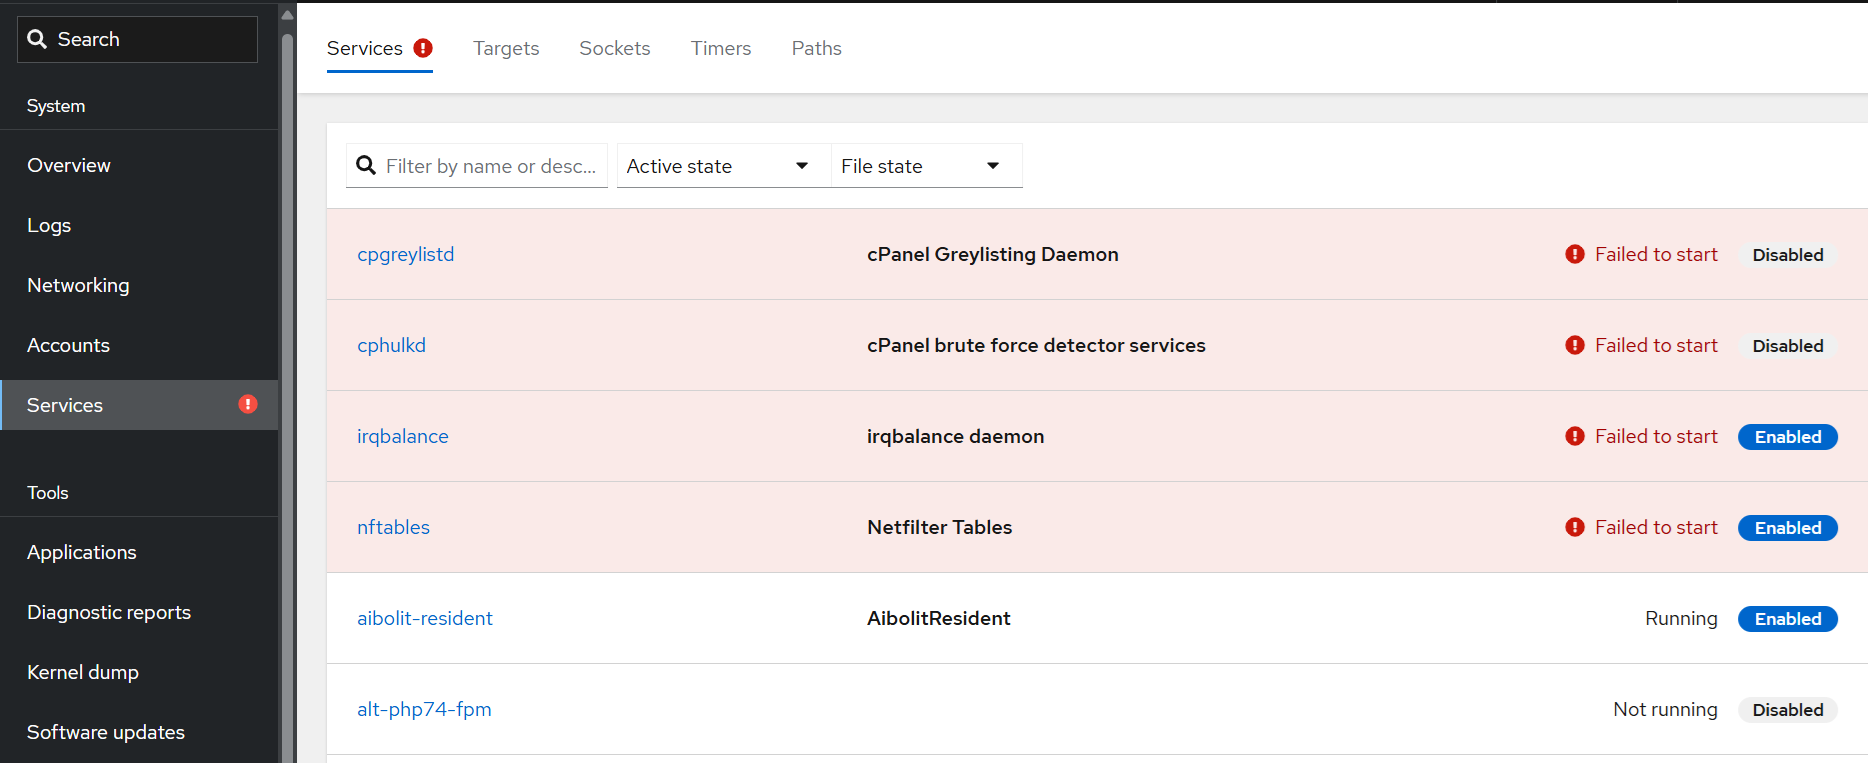
Services Section,
In the services section, you can view the status of each service.
By default, all the services added here are stopped, restarted, and masked if you want to perform.
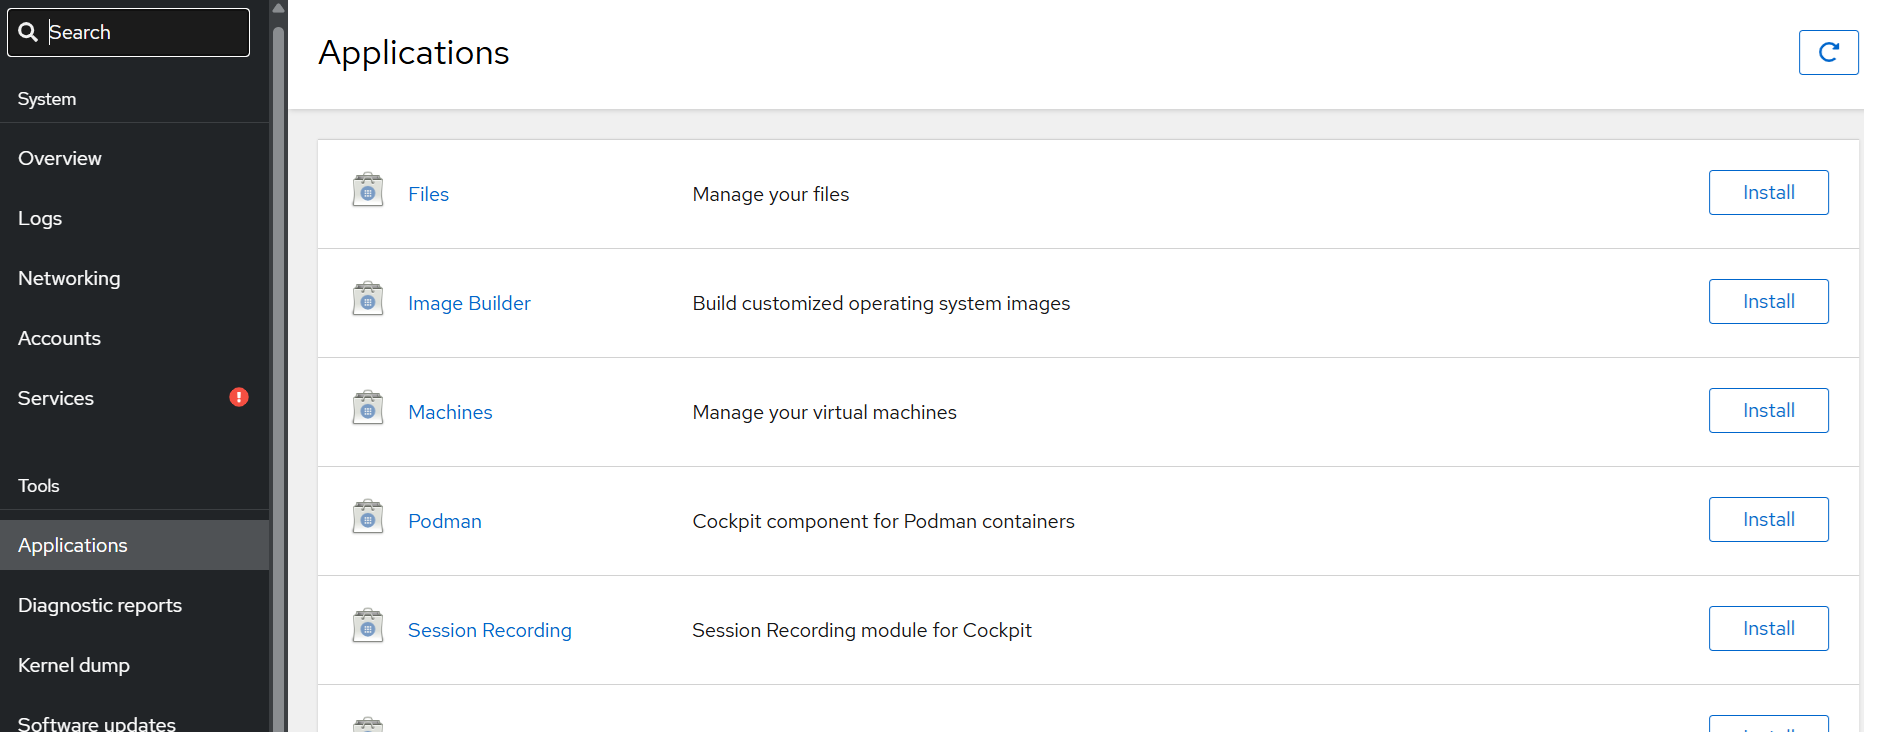
Applications,
By default, a few software programs are available for installation.
Software update section,
