 SeekaHost.com Client Area
  SeekaHost.app
  SeekaHost.co.uk
  SeekaHost.in
How to Login to Plesk From SeekaHost Client Area

Table of Contents
Want to access Plesk easily with just one click? You can now login to Plesk directly without accessing the domain/Plesk or IP:8443 through the SeekaHost Client Area for your hosting package.
This method will only apply to automated hosting plans like Business, Cheap, Personal, and WordPress. For PBN and SEO Hosting plans, you have to log in to Plesk for each website separately with the login details provided in the ticket.
Let’s find out how to log in to the website’s Plesk directly from the SeekaHost client area in this article.
What is Plesk?
Plesk has emerged as a preferred choice for website owners as it is more competent, cost-effective, and flexible than many other control panels. Besides, it also offers several extensions to manage your digital journey as the business grows.
Prerequisites:
1. Contact our live chat/support ticket to get the Plesk control panel for your Business Hosting package
2. Product must be active.
3. Update Nameserver in domain.
Step to Login to Plesk from SeekaHost Client Area:
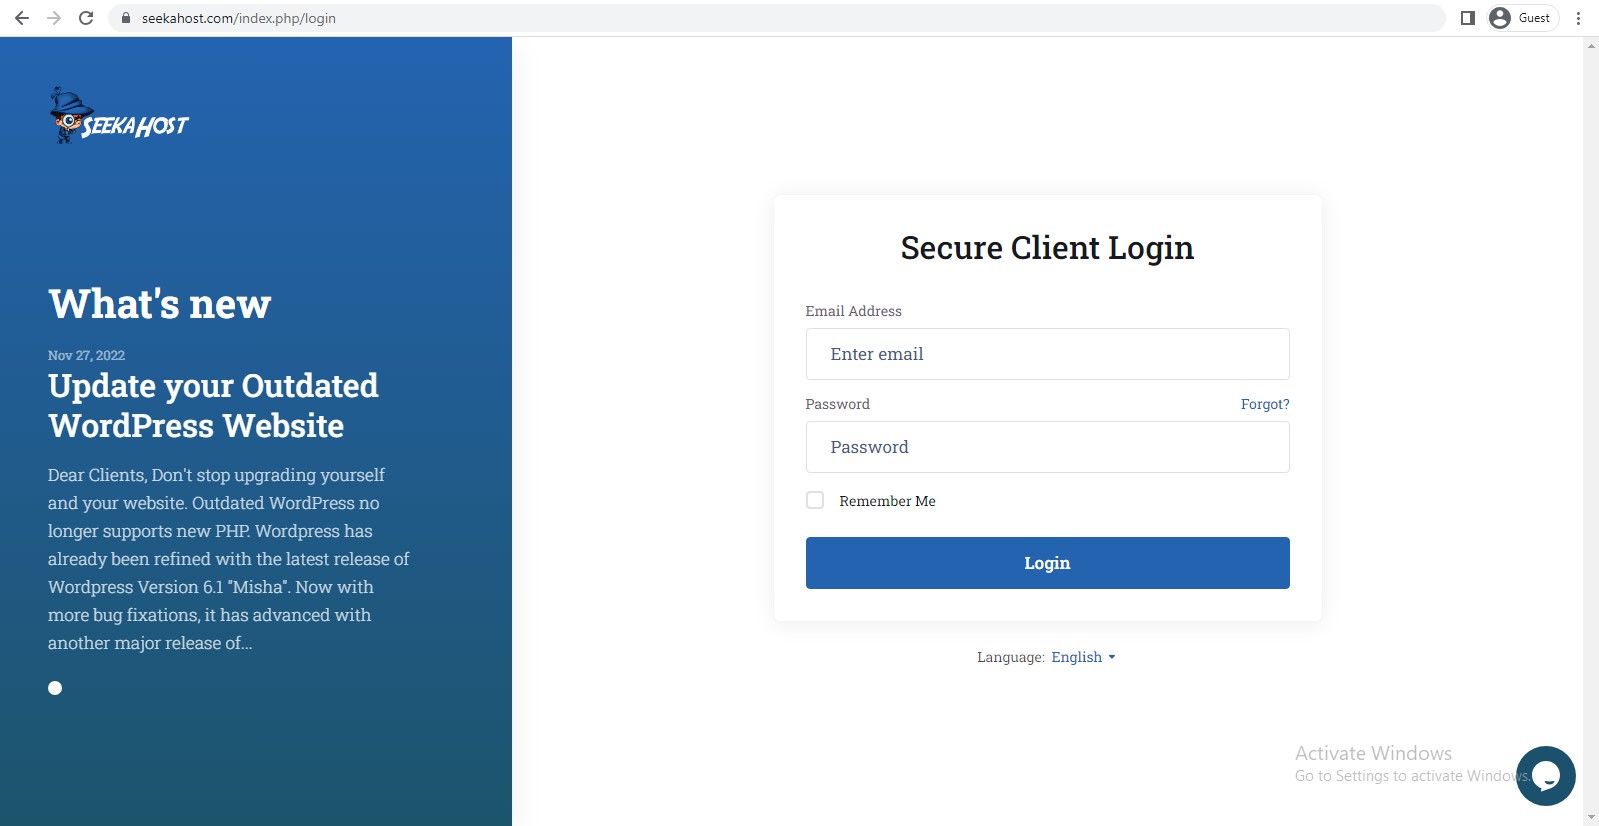
Step 1: Login to client Area with your email address and password. If you have forgot the password, you can reset the password anytime.
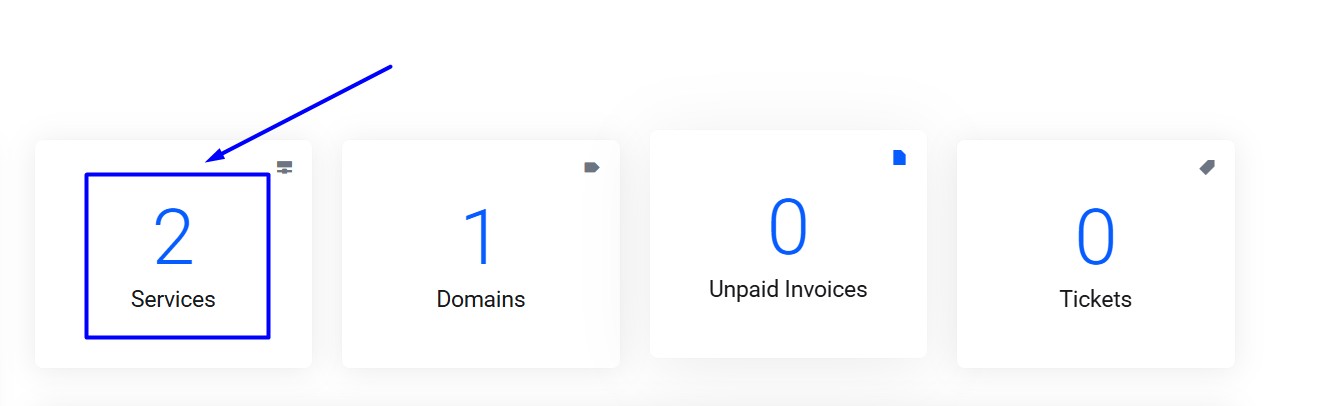
Step 2: Once you have entered into client area Click ‘Services‘
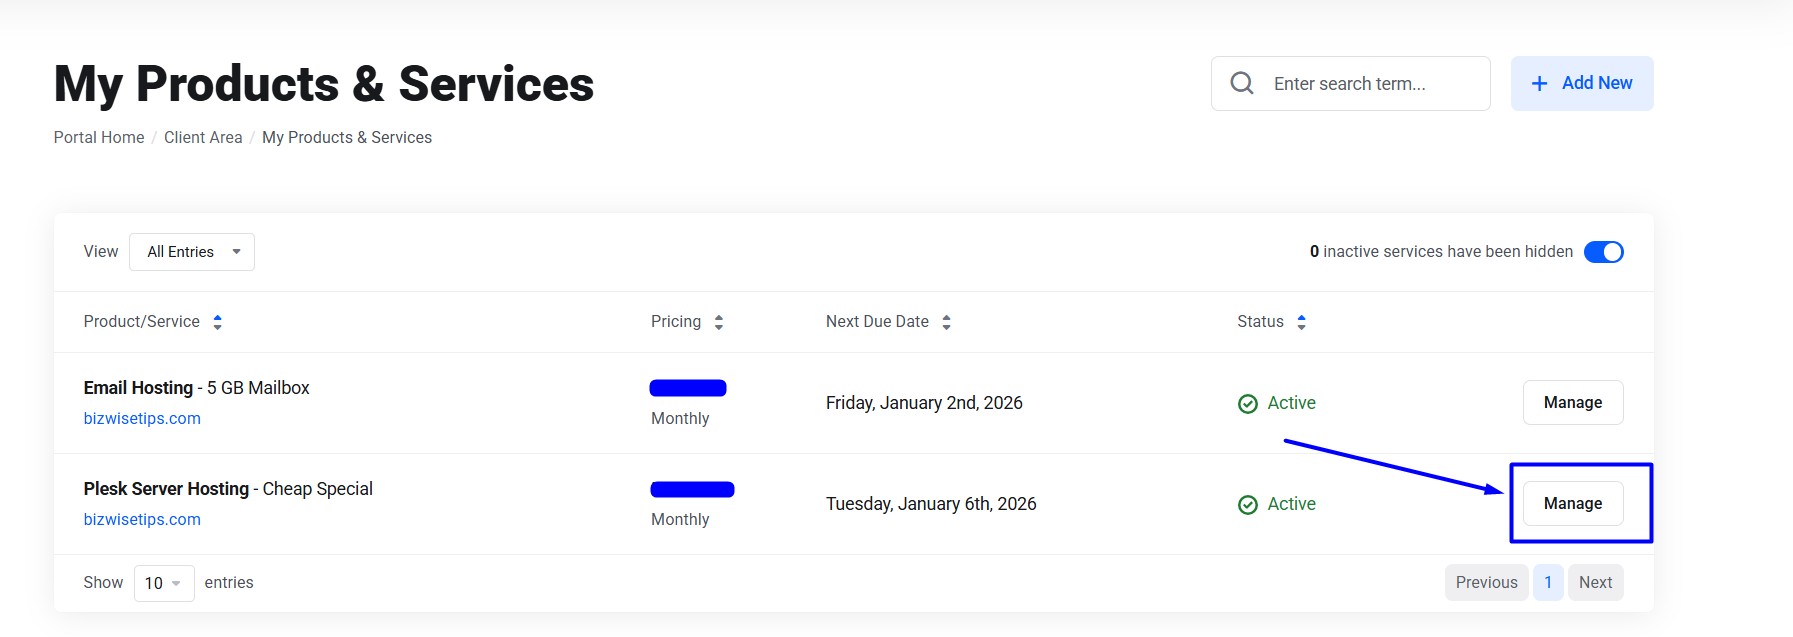
Step 3: On My Products & Services, click manage option next to your hosting package
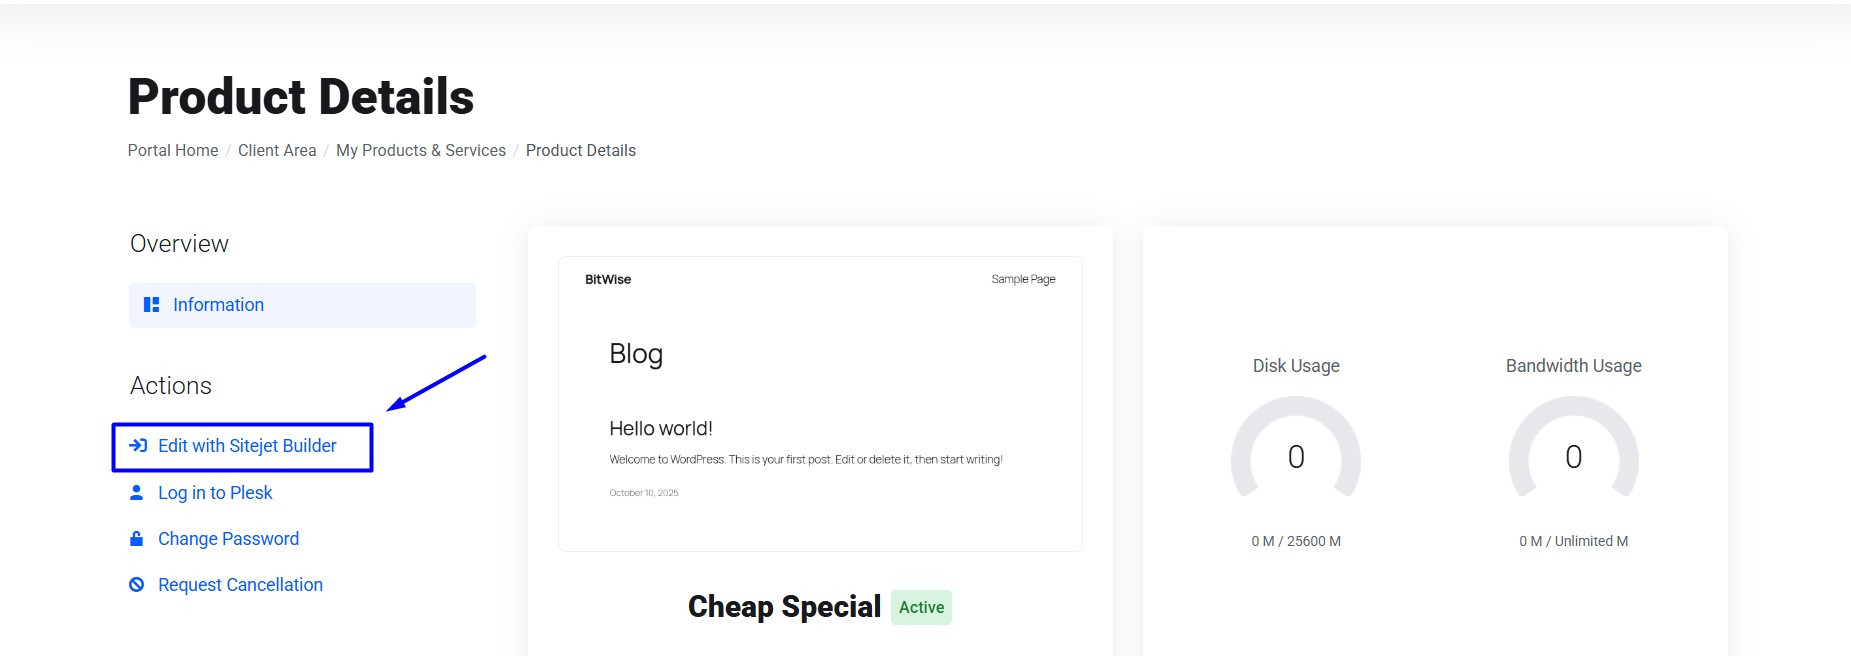
Step 4: Once entered into product details, Click the ‘login in to Plesk’ option on the left side section.
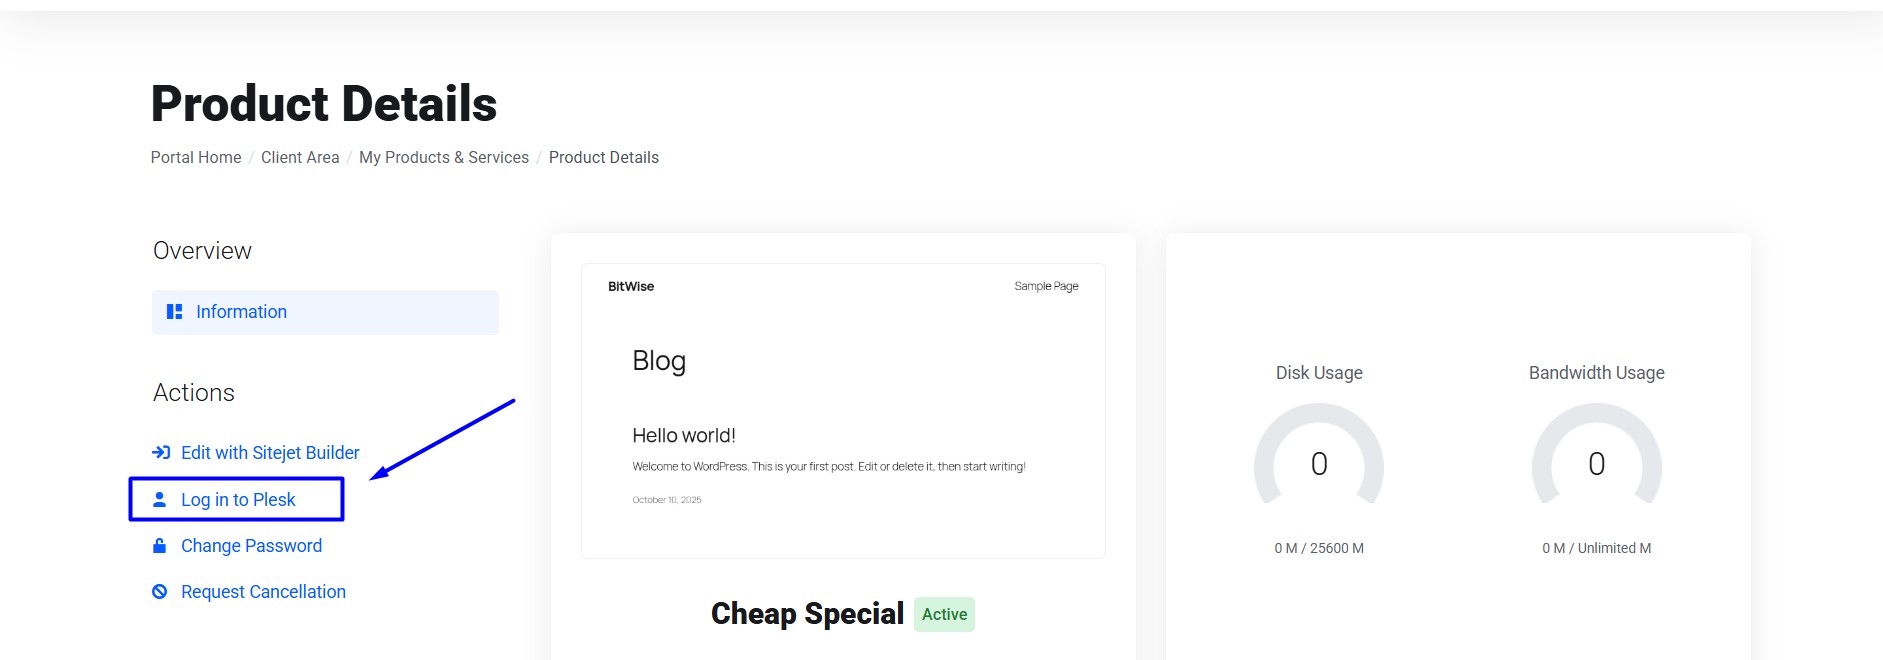
Step 5: If you want to edit and build your website using the sitejet builder click “Edit with Sitejet Builder”.
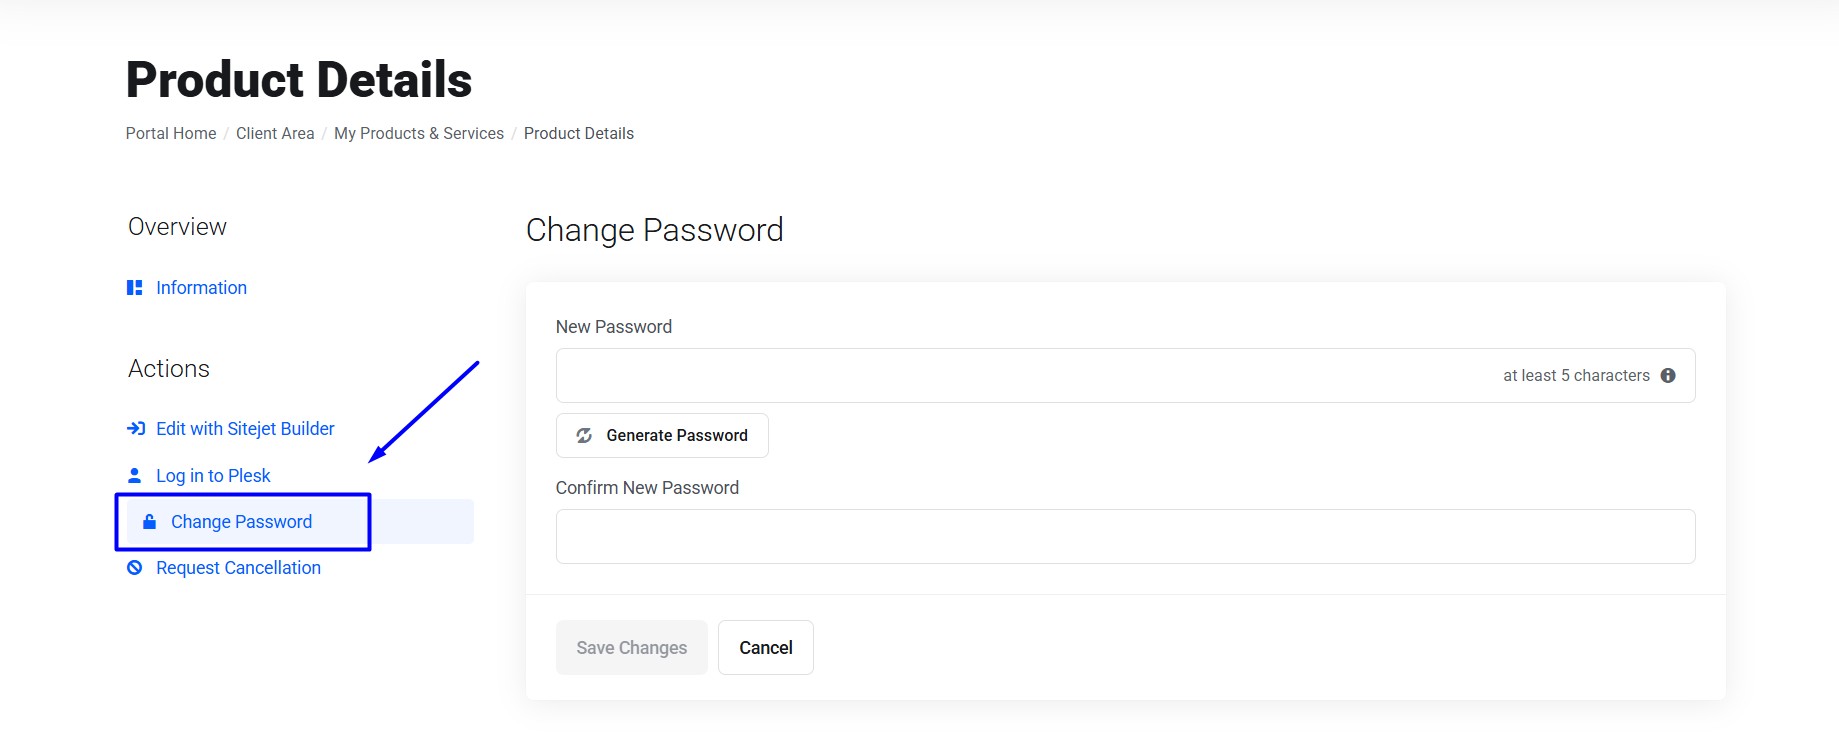
Step 6: To reset the password for the Plesk, click “Change Password”.
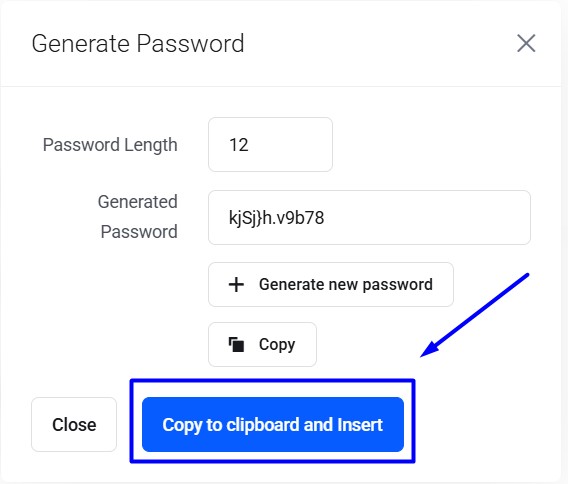
Step 7: Click Generate Password and click ‘Copy to clipboard and Insert‘. You can use the new password to login to Plesk now.
Hope this information helps you simplify the process to access Plesk of the website without much hassle.