
 SeekaHost.com Client Area
  SeekaHost.app
  SeekaHost.co.uk
  SeekaHost.in
Write a WordPress Post by Email in 2 Easy Methods

By Robert Mills
Table of Contents
Methods For WordPress Post by Email:
1. Through Jetpack
2. Through Postie
1. Through Jetpack:
As you all know Jetpack plugin is used many features like security, backup, speed, and growth in WordPress. Among that, posting by email is also the main feature.
Here are the steps for posting by email using the jetpack plugin,
Step 1: Install the Jetpack plugin.
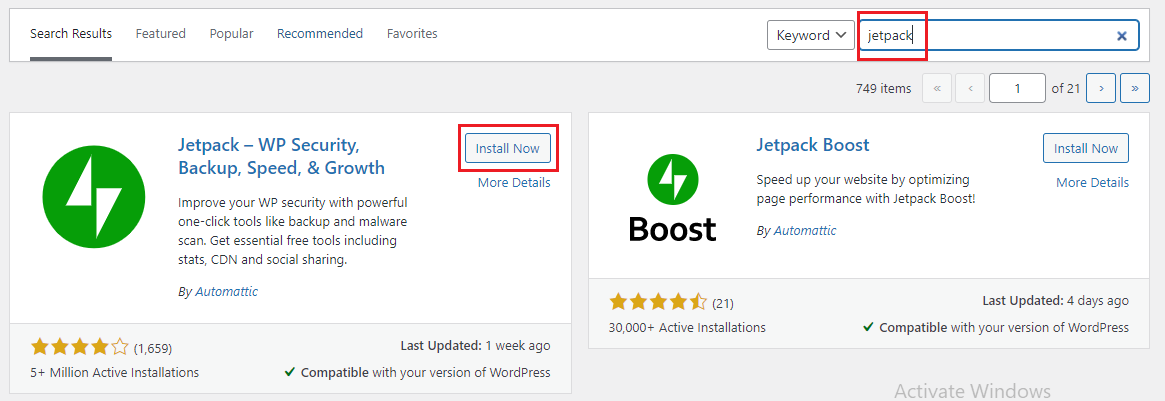
In the WordPress dashboard go to plugins and click “Add new “. Search “Jetpack”, the install option will display. Click Install and activate it.
Step 2: Connect Jetpack with WordPress
Next, connect the jetpack with the existing WordPress.com account or create a new WordPress account.
Step 3: Configure Post By Email
After connecting, in the WordPress dashboard go to jetpack and Click “Settings”.
Inside the page, you will see the option for “Post By Email” when you scrolled down the page.
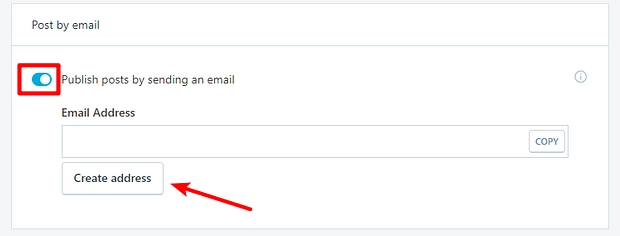
There, enable the toggle button and click “Create address”. Jetpack will create the new email address for you.
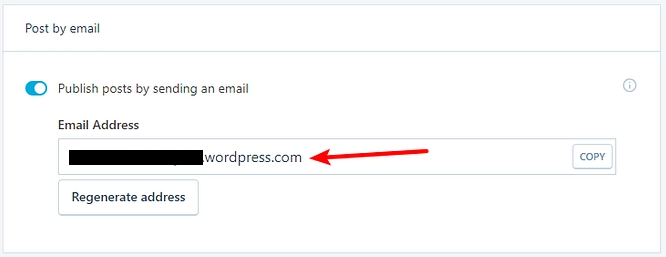
You have to email your content to this generated email id to post the content on your website.
Step 4: Formatting options
In Jetpack, you can format your emails properly by uploading images, signatures, adding tags and categories and they have dedicated support article to post by email which you can follow to easily customize settings.
2. Through Postie:
Step 1: Install the Postie plugin.
In the WordPress dashboard go to plugins and click “Add new “. Search “Postie”, the install option will display. Click Install and activate it.
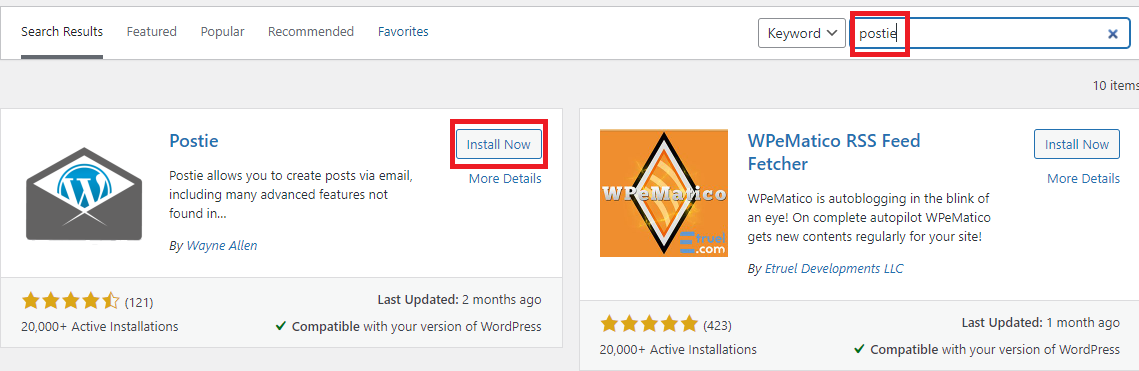
Step 2: Gmail configuration
- In your email account make sure to enable the IMAP.
- Create a new email account particularly for this posting purpose. Don’t use the existing email id.
- Login to your Gmail account and click Settings.
- Go to “Forwarding and POP/IMAP” and enable the IMAP in the “IMAP Access” Section shown below,
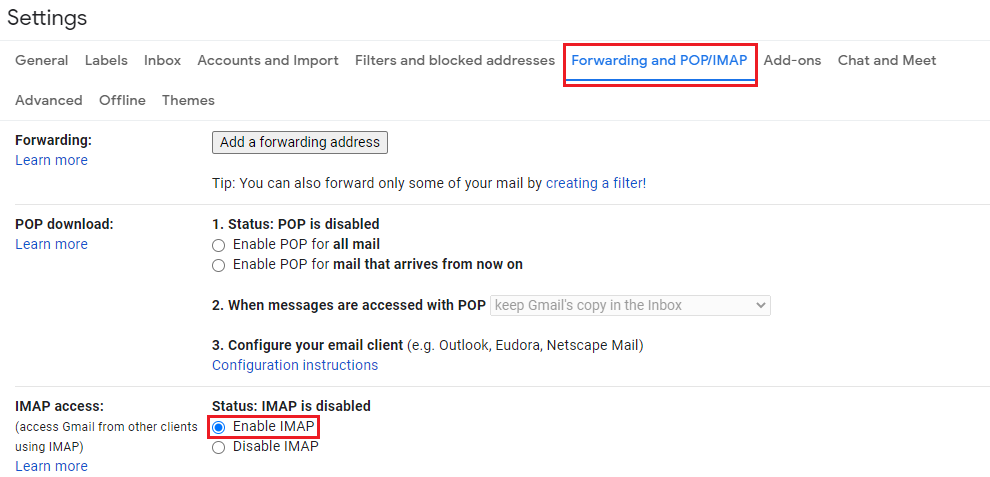
At last, click “Save Changes”.
Step 3: Configure Post By Email
Click “Postie” in the WordPress Dashboard. Then go to “Mail Server” and enter the details as mentioned below,
- Connection – Select Sockets
- Mail Protocol – IMAP SSL
- Port – 995
- Mail Server – imap.gmail.com
- Mail Userid – Enter the mail id which you want to use for posting
- Mail Password – Enter the password for the email id that you have given above
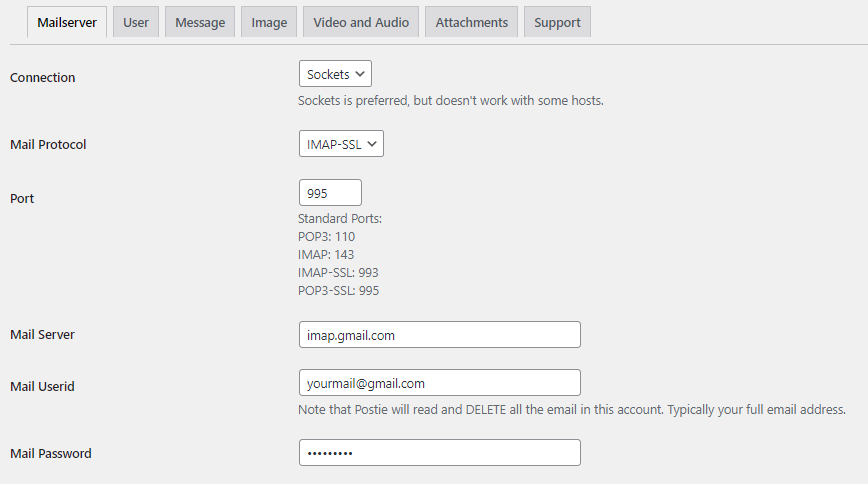
Click “Save Changes” at the bottom.
Step 4: Test Configuration
To check the configuration is correct or not, Click test “Config”.
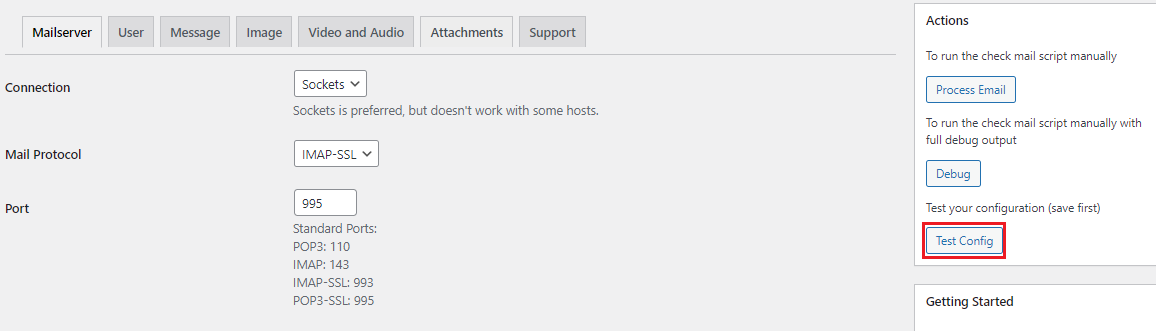
After that, you will receive the success message. After that, you just need to send mail to the email id which you have created in step 2.
Additional Post via Email Options:
- With help of the Postie plugin, you can use the advanced setting and configure it as you needed.
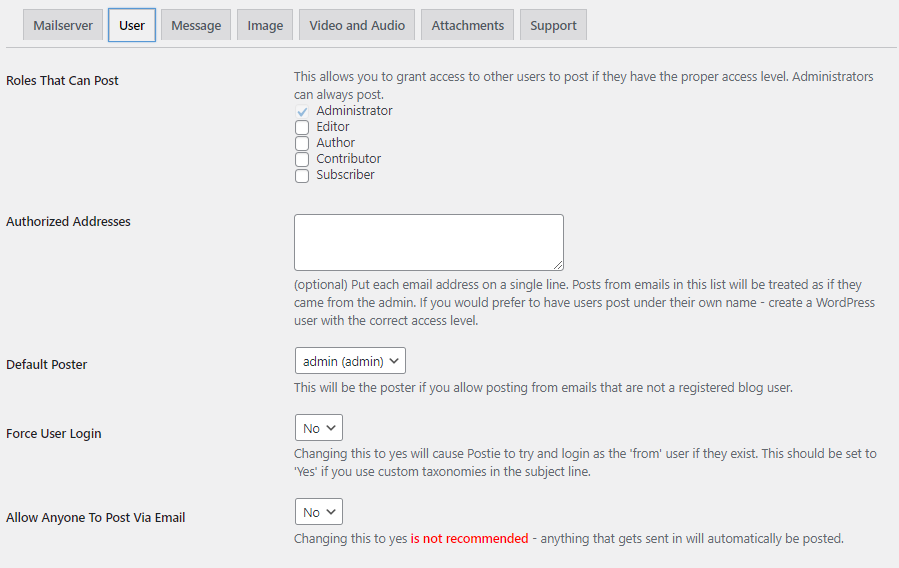
- Go to Postie settings and click “User”. This option is used to allow other email accounts to post on your website. You can include the authorized email id as per your wish.
- The Image option will help you to set the featured image for your posts.
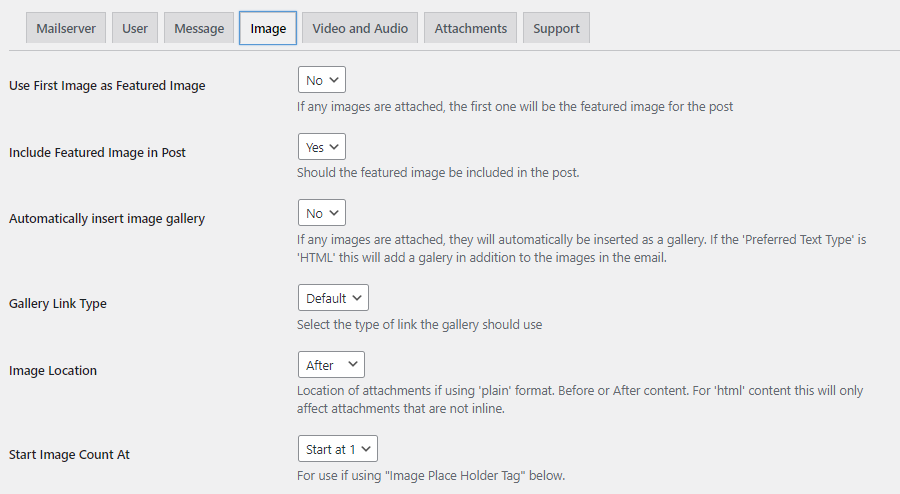
You can customize a lot using the available features in this plugin when you need. If you want to send and receive emails, then choose best wordpress email plugin that suits your needs.
That’s all. You should have learned the WordPress Post by Email from these two methods. Choose the easy method for you and publish your post by email.