
 SeekaHost.com Client Area
  SeekaHost.app
  SeekaHost.co.uk
  SeekaHost.in
How To Put Website on Maintenance Mode WordPress

By Robert Mills
Table of Contents
Are you a WordPress user? Then there will be a mandatory situation where you want to put your site in Maintenance Mode WordPress.
It allows you to display a user-friendly notice to your visitors instead of a broken site during website maintenance.
It also allows you to safely perform any task while making sure that people who need access to the website still have access.
In this article, I show you how to easily put your WordPress site in maintenance mode.
What Is Maintenance Mode WordPress?
WordPress maintenance mode is a temporary state that displays a maintenance page to visitors while you update, redesign, or fix your website. It prevents users from accessing incomplete content and helps maintain a professional user experience during site changes. Once the work is complete, you can disable maintenance mode and make your website publicly accessible again.
SEO Tip: A proper maintenance mode page informs visitors and search engines that your website is temporarily unavailable, helping protect user experience and site credibility.
Why Put a Site In WordPress Maintenance Mode?
Here are some situations, in which you need to enable maintenance mode WordPress,
• Creating own themes and plugins or configuring the plugins which change your site’s behavior
• Debugging the errors
• Introducing new products/service
• Redesigning the website
• Editing one of the popular pages on your site
Steps to Enable using SeedProd Plugin:
There different Maintenance Mode WordPress plugins available which you can choose one of them to activate maintenance mode.
We have chosen “SeedProd” plugin which is easier to enable maintenance mode WordPress. Follow the steps mentioned below to put your site using one of WordPress Maintenance Mode Plugin within a few steps:
Step1: Login to the WordPress dashboard.
WordPress Login URL: domainname/wp-admin
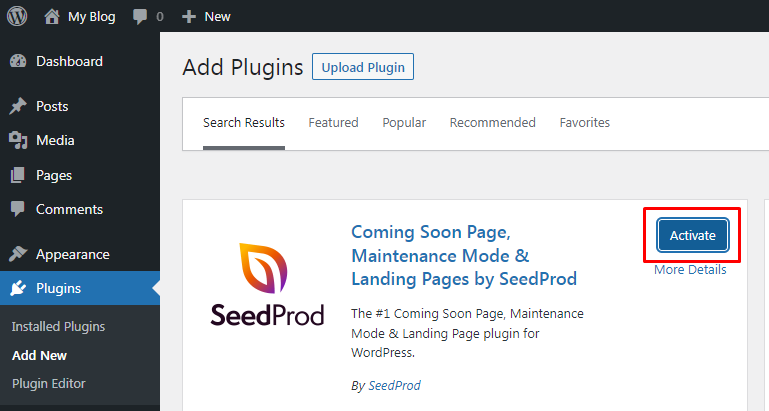
Step2: Once you have logged in, install and activate the SeedProd Plugin
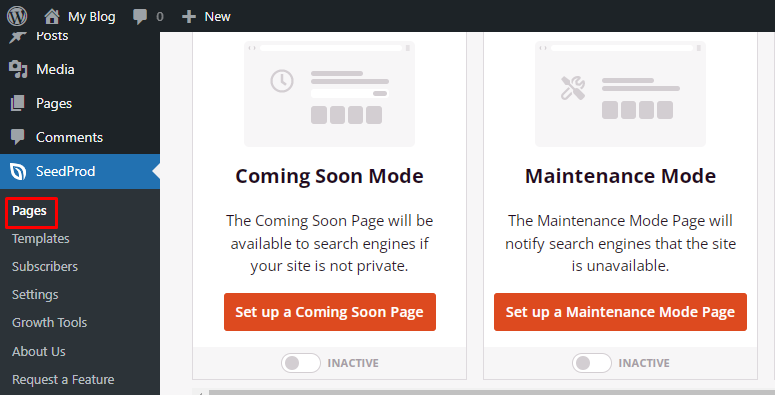
Step3: After the plugin was activated, navigate to SeedProd -> Pages and click on Set up a Maintenance Mode Page.
Step4: Now you will be on the page to select the template for the Maintenance Mode WordPress page.
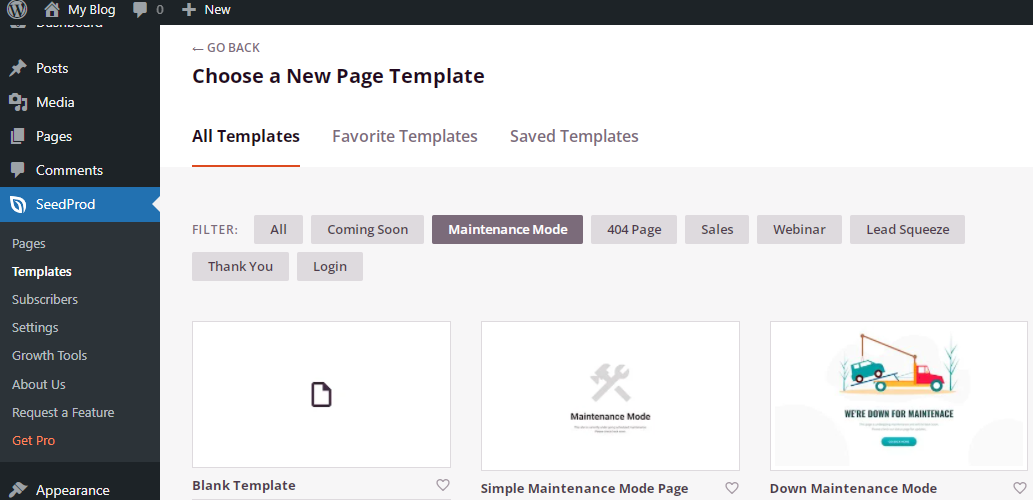
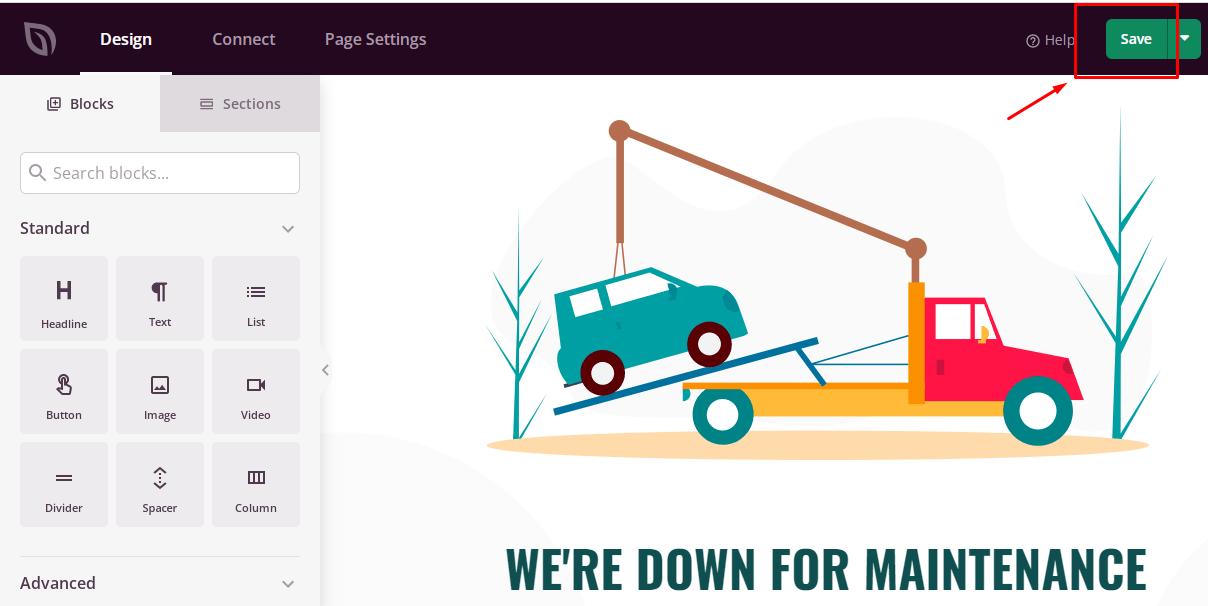
Step5: You can select the readymade template or you can choose a blank page and create on your own. Once you have selected the Maintenance Mode WordPress template, you can do the editing if needed. Finally, click on Save.
Step5: After completing the above steps, then it’s here the last step which is to enable the WordPress maintenance mode. Move to SeedProd » Pages and toggle the maintenance mode to turn on maintenance mode WordPress.
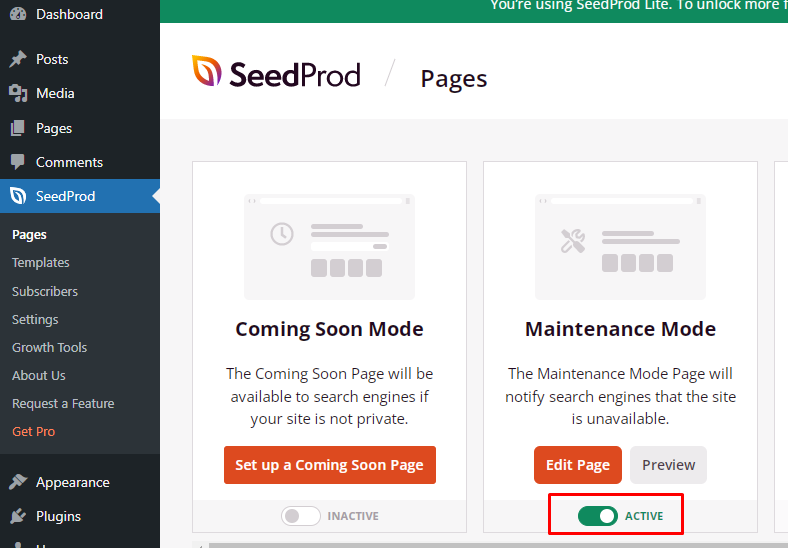
If you want to deactivate the Maintenance Mode WordPress, you can simple toggle off the same button to disable maintenance mode WordPress.
If your looking for Technical Support and Management for your WordPress website then take a look at 12 of our best maintenance services you will need.
That’s all! Now you know how to put website in maintenance mode WordPress successfully with the free WordPress plugin within a few steps.