
 SeekaHost.com Client Area
  SeekaHost.app
  SeekaHost.co.uk
  SeekaHost.in
WordPress Automatic Update: Enable, Disable and Manage

By Aravind
Table of Contents
Keeping your website updated is essential for maintaining security, performance, and compatibility. WordPress Automatic Update helps simplify website maintenance by automatically installing the latest core, plugin, and theme updates.
In this guide, you’ll learn what WordPress automatic updates are, the different types available, and how to enable, disable, and manage them using the WordPress Dashboard, Softaculous cPanel, and the wp-config.php file.
What is WordPress Automatic Update?
Automatic updates in WordPress let your site install new versions of WordPress core, themes, or plugins without manual updates. They improve security, fix bugs, and add compatibility or feature updates so your site stays current.
Different Types of WordPress Automatic Update:
- Minor core updates: Security fixes and small maintenance releases (for example, 7.0). These are enabled by default because they address critical issues.
- Major core updates: Big feature releases (for example, 6.9 to 7.0). These can introduce breaking changes; automatic application is optional and often disabled by default.
- Plugin updates: Updates for installed plugins. They may include security patches, bug fixes, or new features.
- Theme updates: Updates for installed themes. They can change appearance or compatibility and sometimes require theme-specific testing.
How to Manage WordPress Automatic Updates:
Method 1: Using the WordPress Dashboard
Method 2: Using WordPress Softaculous in cPanel
Method 3: Using the wp-config.php File
Method 1: Using the WordPress Dashboard
1. Plugins:
Step 1: Login to WordPress for the website.
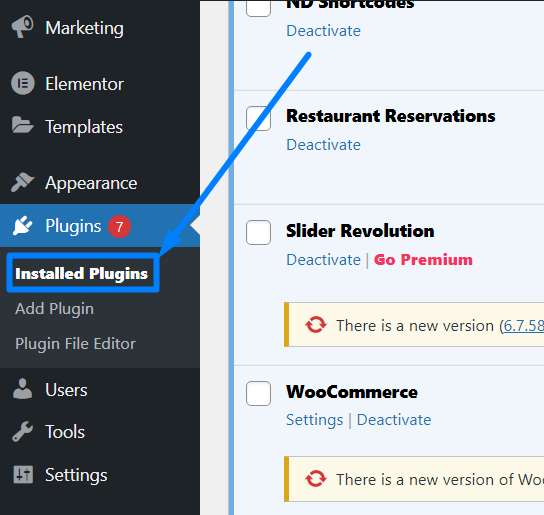
Step 2: Go to Plugins > Installed Plugins.
Step 3: For each plugin you want to auto-update, click Enable auto-updates.
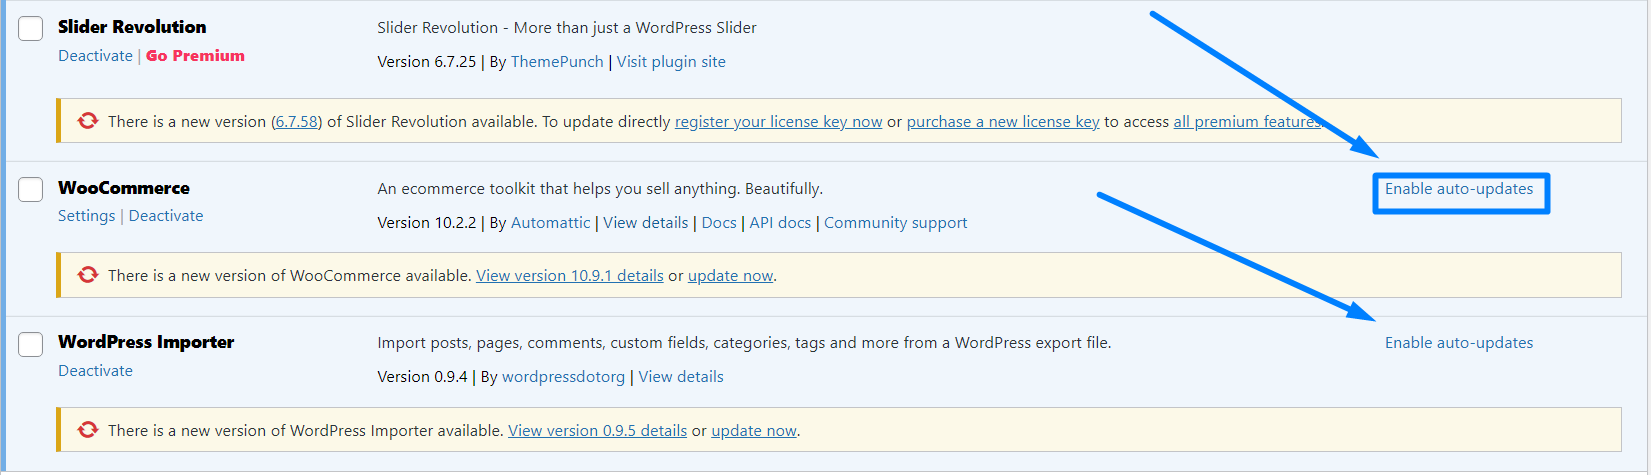
To stop auto-updates for a plugin, click Disable auto-updates.
2. Themes:
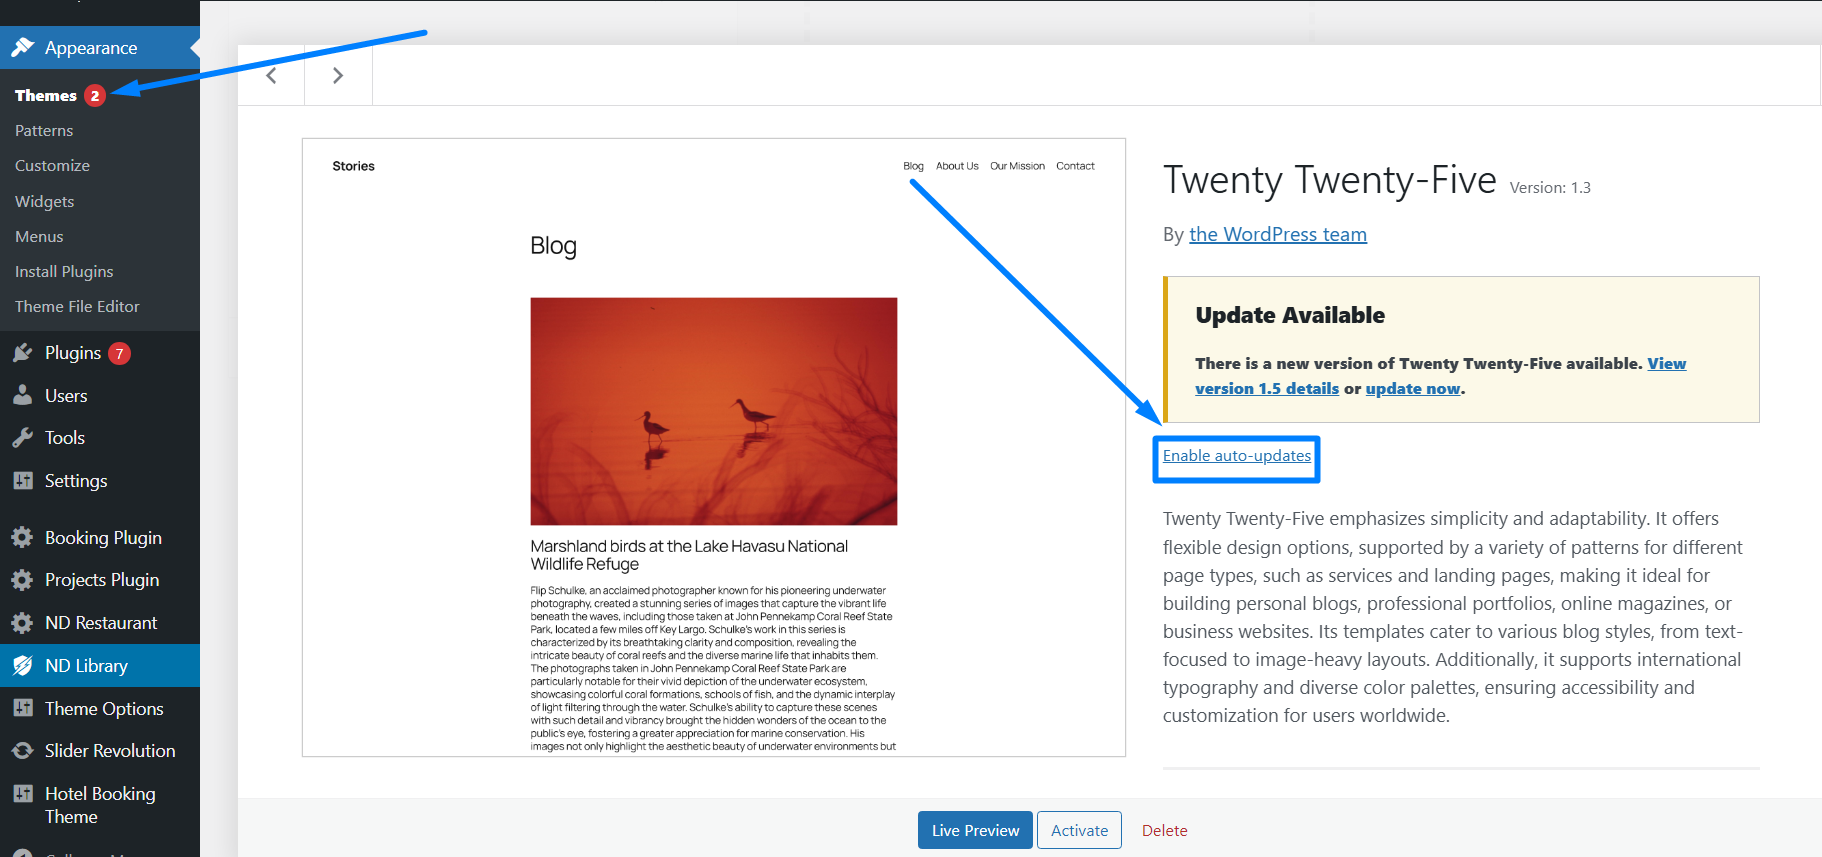
Step 1: Go to Appearance -> Themes.
Step 2: Select the theme and click “Enable Auto Update” button.
3. Core updates:
Step 1: Go to Dashboard -> Updates.
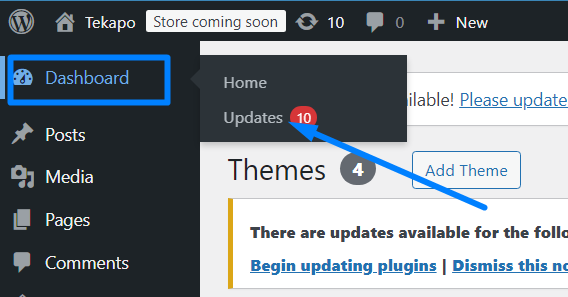
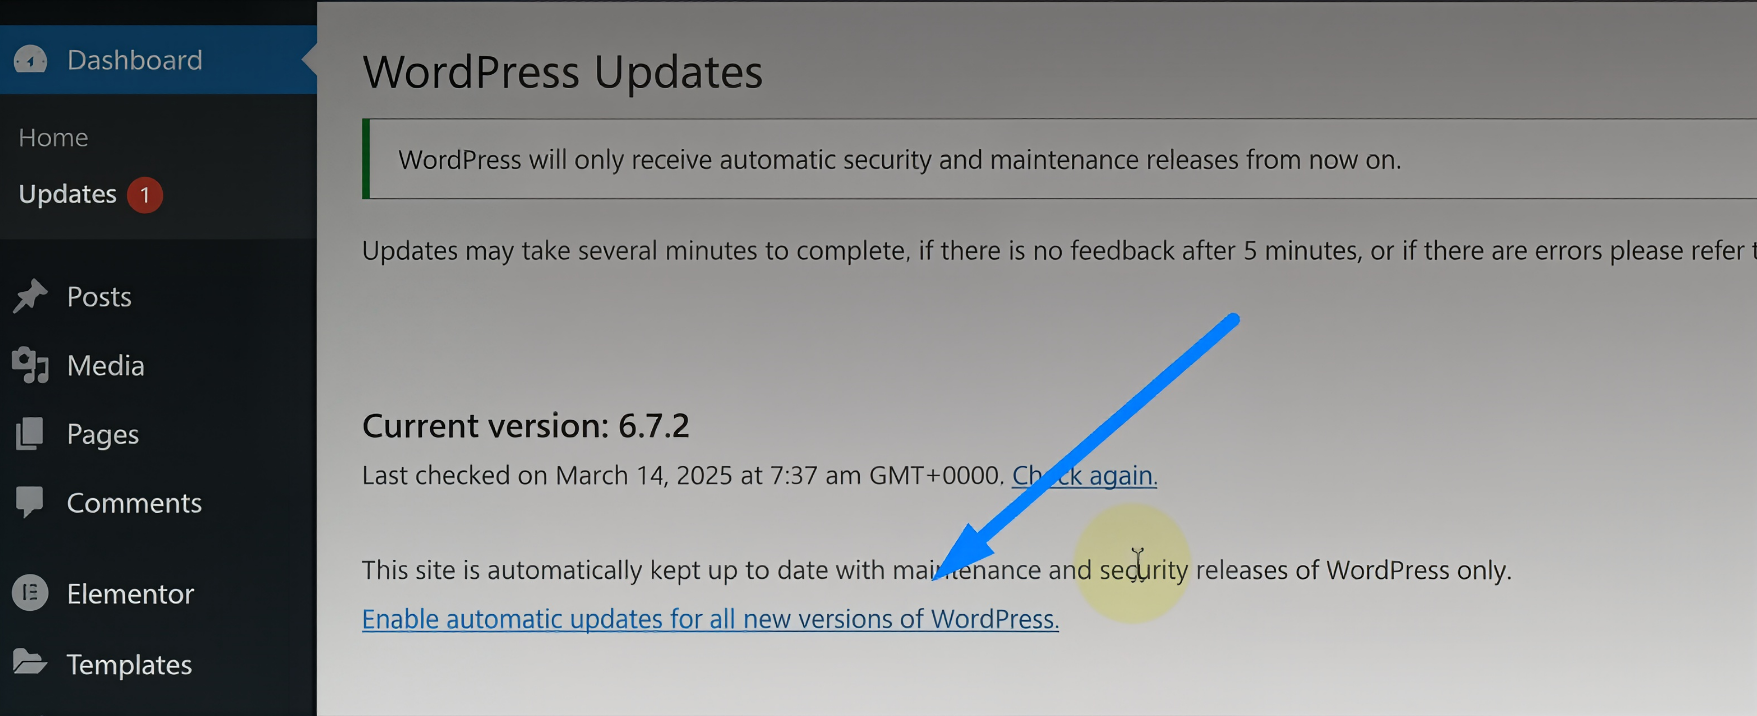
Step 2: Click “Enable Automatic Update” link shown. If it shows “Switch to automatic updates” link to revert from manual updates and then click enable auto update.
Method 2: Using WordPress Softaculous in cPanel
Step 1: Login to cPanel Account.
Step 2: Search and select the “WordPress Manager by Softaculous or Softaculous Apps Installer“.
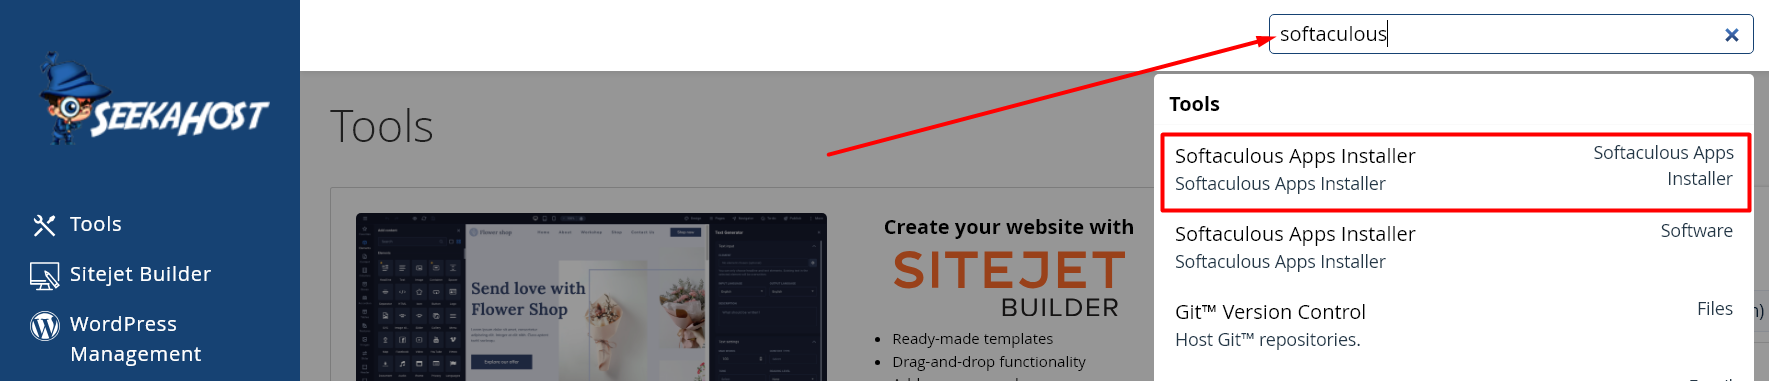
Step 3: Click on the “Manage Your Installation with WordPress Manager” icon.
Step 4: Near the website name, click Down Arrow. Under Auto Upgrade WordPress section, you can see enable automatic updates for core, plugins, themes.
Click Enabled option. For core update, select “Upgrade to latest version available (Major as well as Minor)”
option from the drop down.
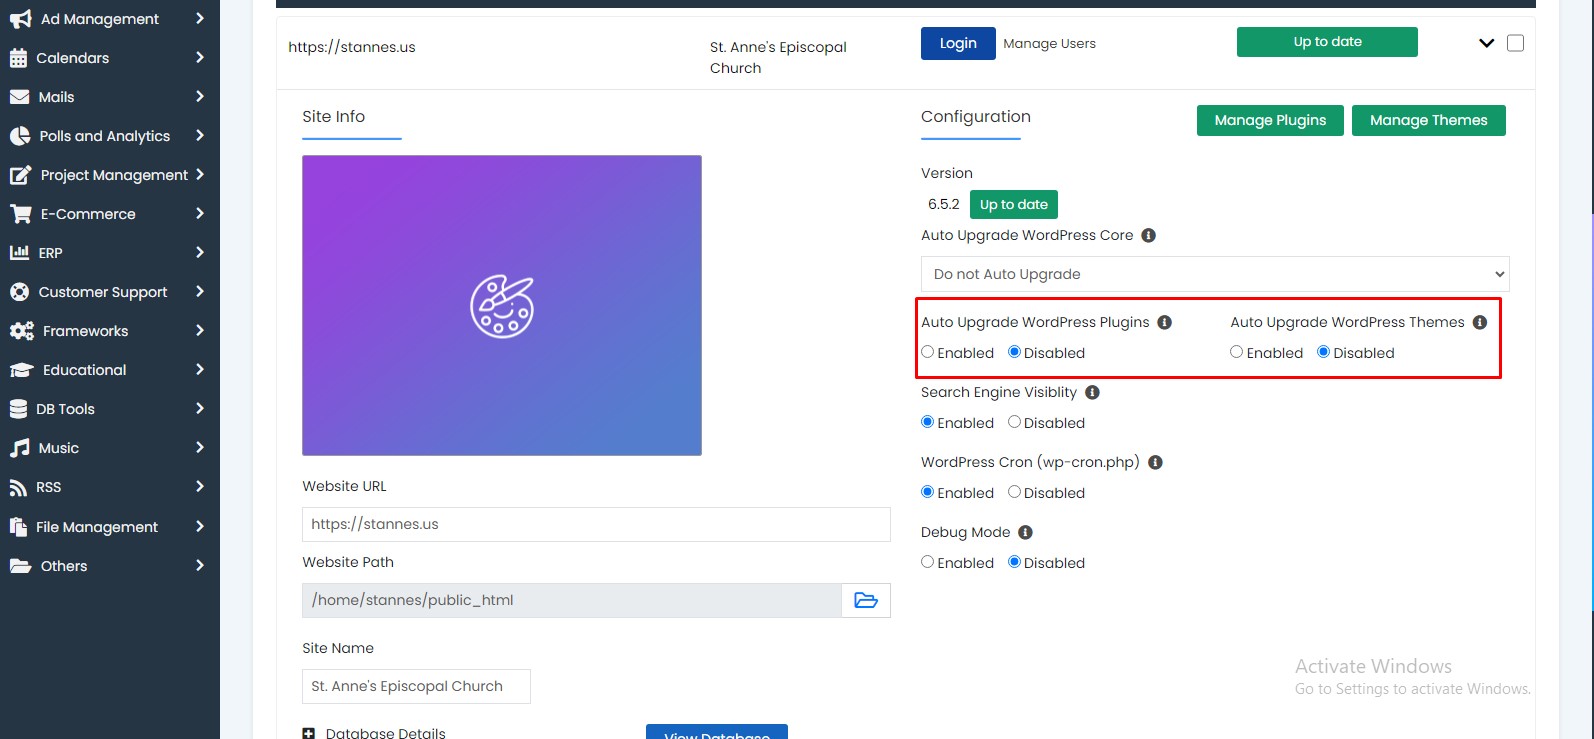
After enabling the auto-upgrade option for WordPress plugins and themes, it will be upgraded automatically to the latest version once the cron job runs which runs every 24 hours once.
Method 3: Using the wp-config.php File
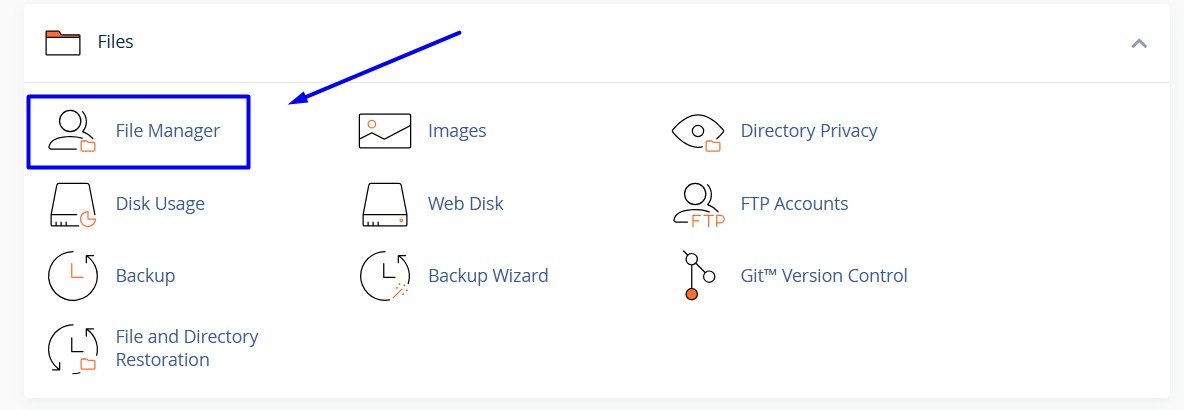
Step 1: Login to cPanel -> File Manager
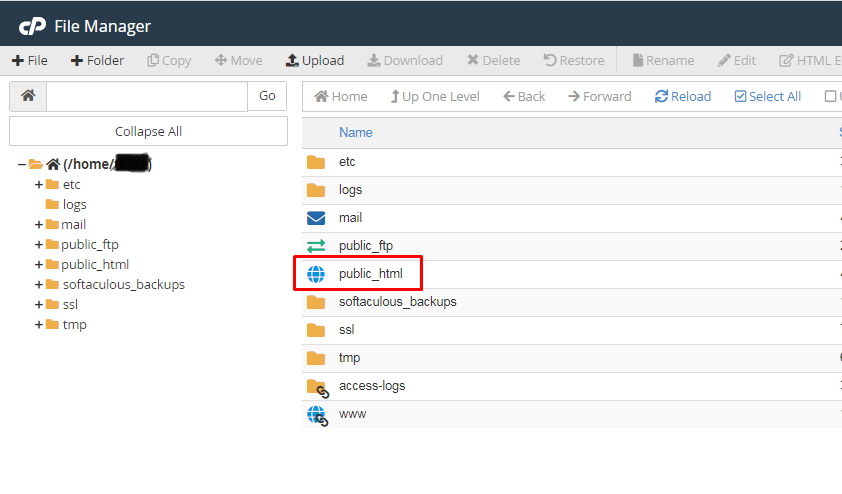
Step 2: Access public_html directory
Step 3: Select the wp-config file and click Edit option on the top.
Step 4: Open the wp-config.php file and add one of the following code snippets above the line:
/* That's all, stop editing! Happy publishing. *//* Disable All Automatic Updates
define(‘AUTOMATIC_UPDATER_DISABLED’, true);
/* Enable Automatic Updates for Everything
define(‘WP_AUTO_UPDATE_CORE’, true);
Step 5: Save the file and test your site.
Hope this helps you successfully set automatic update for core, plugins and themes for your website.