
 SeekaHost.com Client Area
  SeekaHost.app
  SeekaHost.co.uk
  SeekaHost.in
How to Install WordPress in Plesk using WP Toolkit

By Frank Carson
WordPress is a user-friendly platform that allows you to easily create and manage websites, from blogs to fully functional websites. Install WordPress in Plesk is always quick and easy.
With just a few steps, you can have WordPress set up and ready to use. In this tutorial, we will show you how to install WordPress in Plesk using WP Toolkit.
How to Install WordPress Using WP Toolkit
STEP 1: Login in to your Plesk
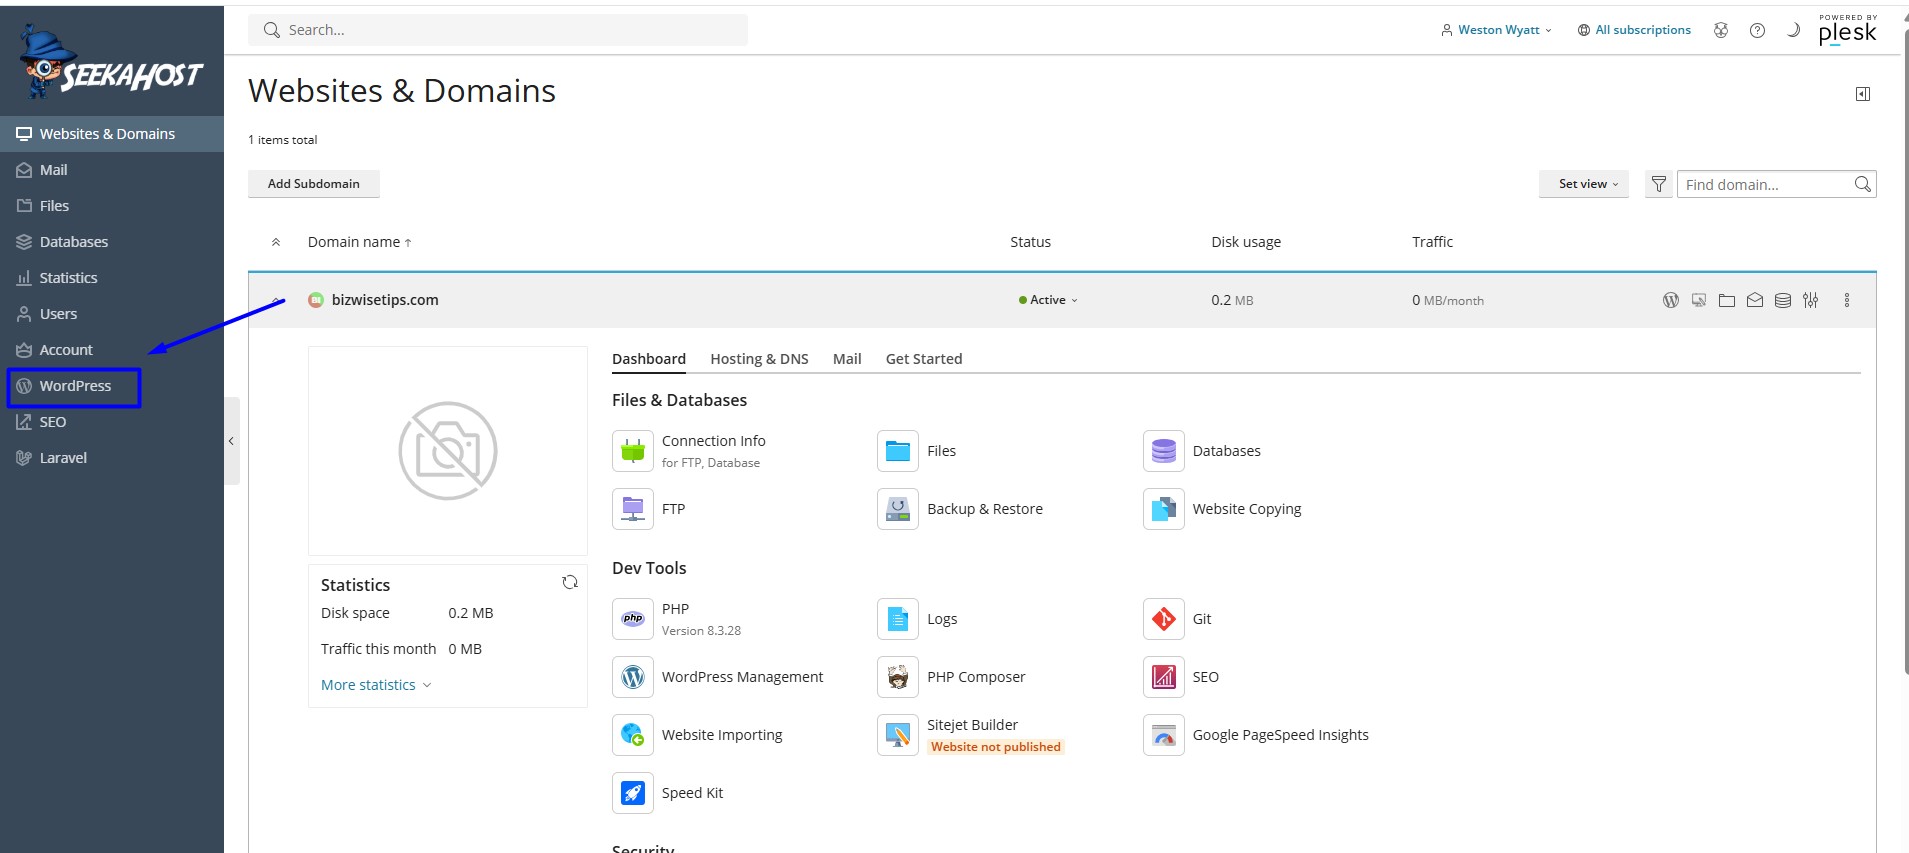
Step 2: From the dashboard, click WordPress to open the WordPress Toolkit.
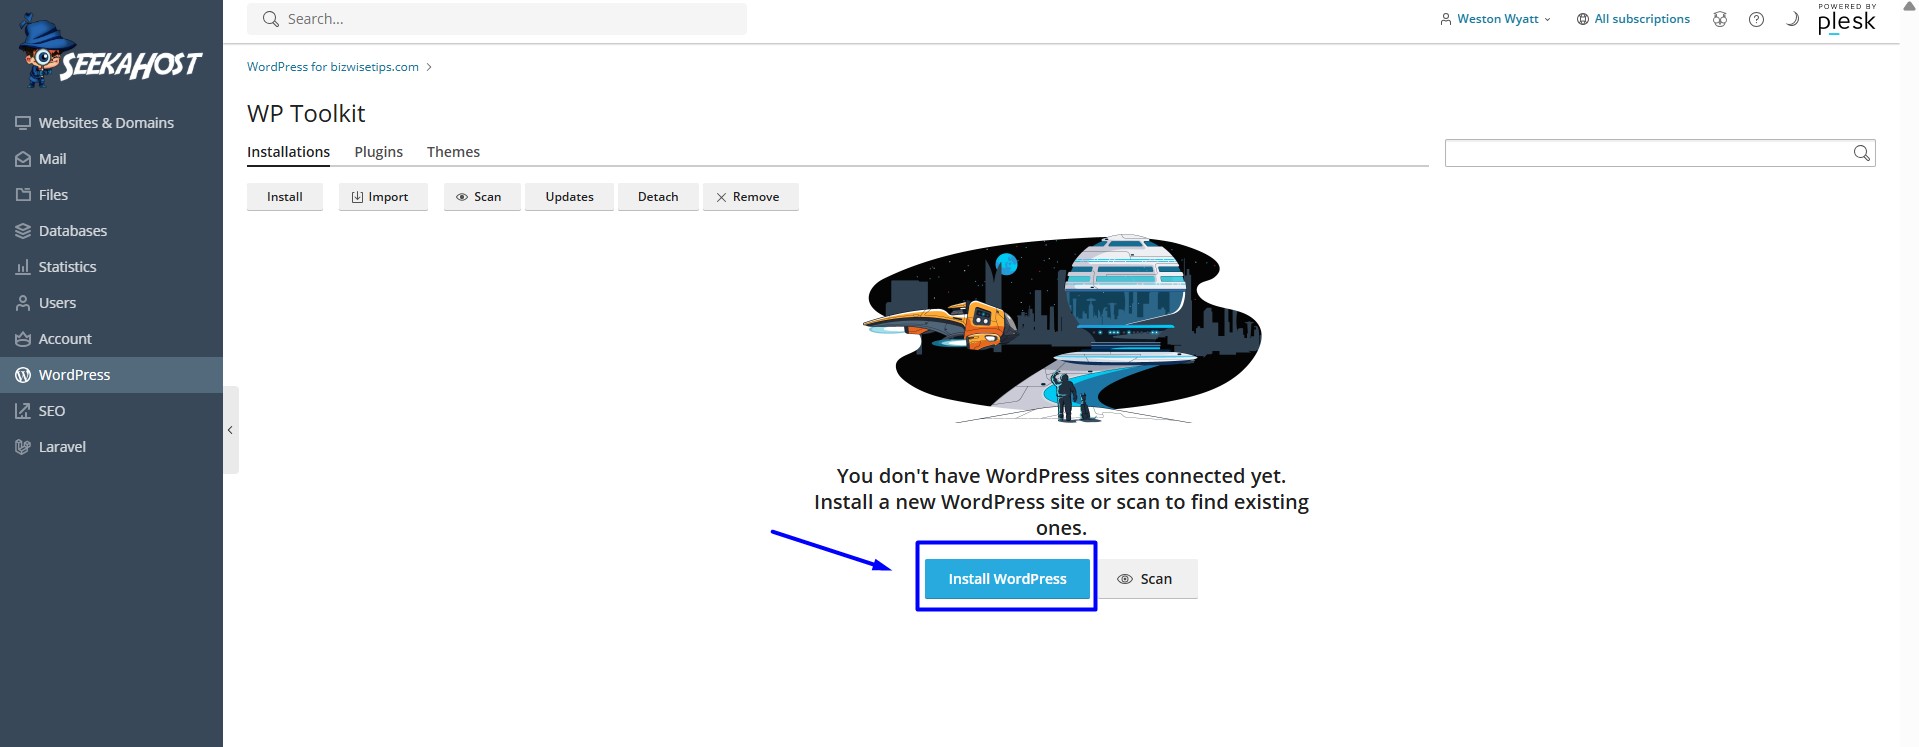
STEP 3: In the Toolkit, click Install WordPress to start the installation.
STEP 4: Choose installation options and fill in the fields:
- Installation Path: Choose where to install WordPress; leave blank for root.
- Website Title: The site’s name shown on the front end.
- Select Plugin/Theme Set: Pick a set of themes/plugins, or leave blank for WordPress defaults.
- Website Language: Choose your site’s language.
- Version: Always use the latest WordPress version.
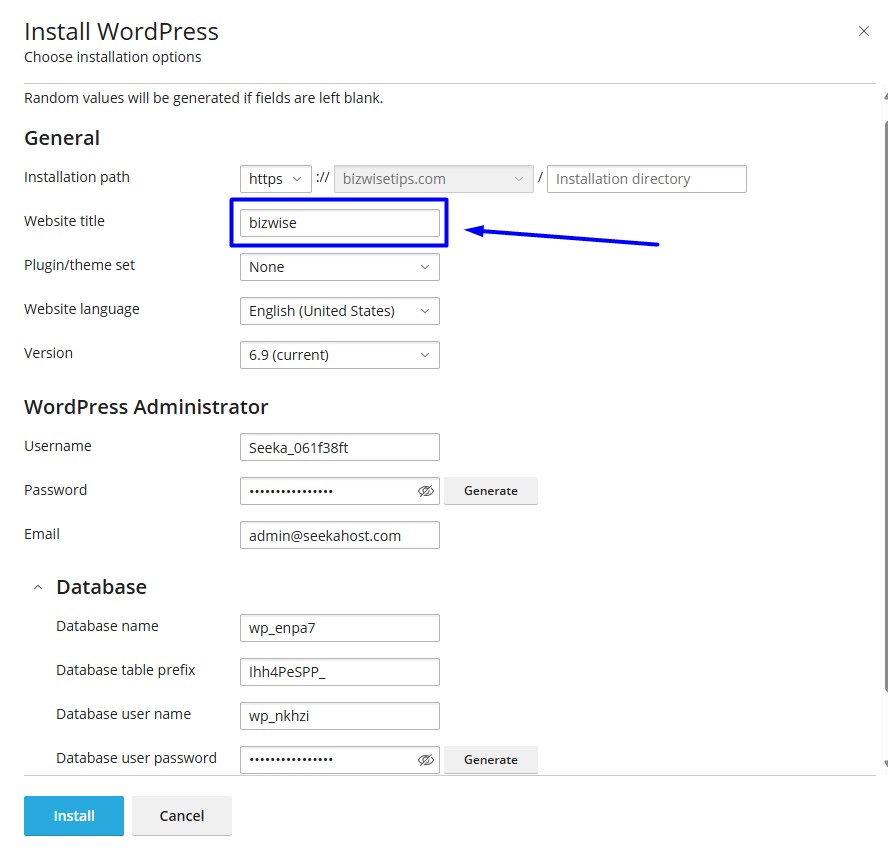
STEP 5: Administrator and Database Setup
WP Toolkit can generate admin details and database credentials automatically. You may use the generated values or enter your own.
Administrator Details:
- Username: Set a unique, secure admin username.
- Password: Use a strong password to protect the site.
- Email Address: Enter a valid admin email for recovery and notifications.
After entering admin details, provide MySQL database information:
Database Setup:
- Name: Create or choose the MySQL database for WordPress.
- Prefix: Specify the table prefix.
- Username: Assign a DB user and set a secure password.
- Password: Enter or generate a strong password for the DB user.
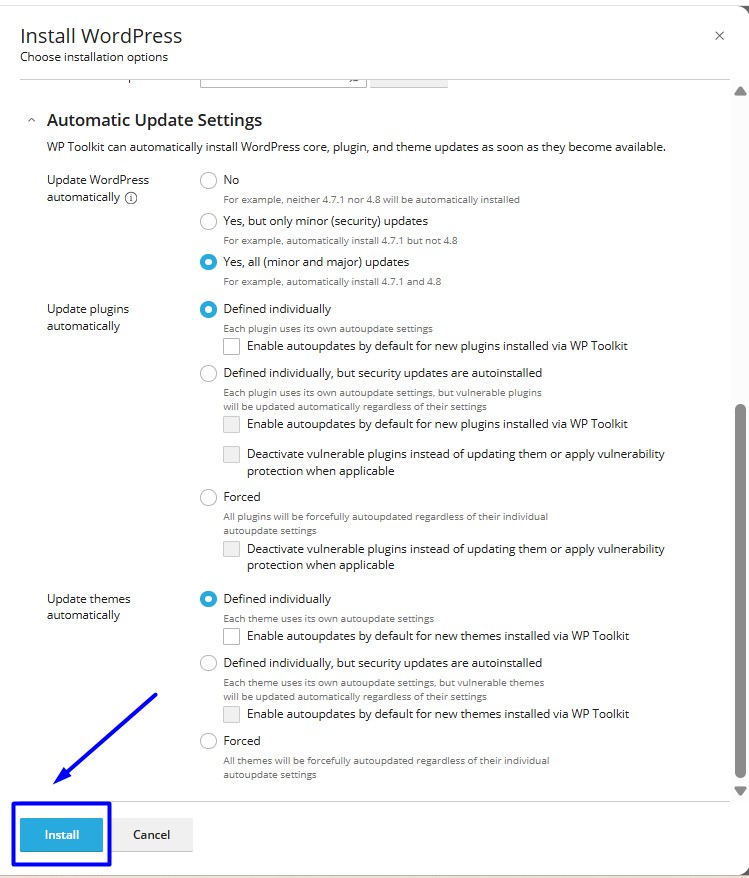
STEP 6: Automatic Update Settings
- Adjust security options, including automatic updates for WordPress core, plugins, and themes.
- Click Install. WP Toolkit will set up WordPress, configure the database, and finalize the installation.
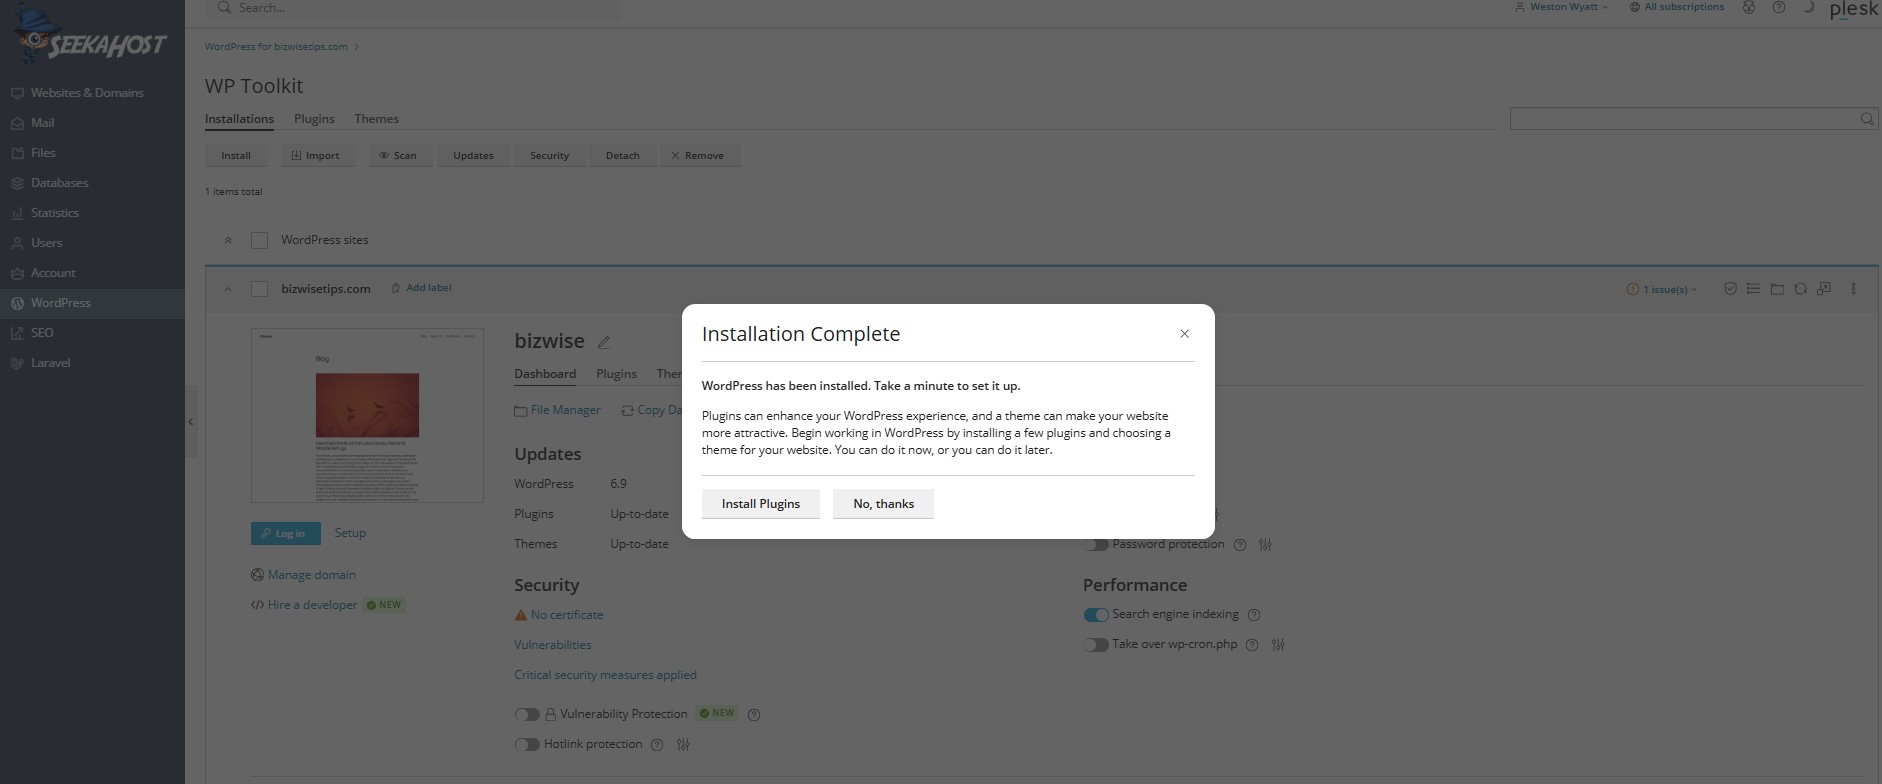
STEP 7: A pop-up notification will confirm that WordPress has been successfully installed.
Subsequently, Install SSL (free or paid) in Plesk so your site loads over HTTPS.
You should now be able to install WordPress in Plesk using WP Toolkit and manage your site easily.