 SeekaHost.com Client Area
  SeekaHost.app
  SeekaHost.co.uk
  SeekaHost.in
How to Update Private NameServer in DynaDot?

By Aslam Saah
Table of Contents
SeekaHost provides private nameservers for each domain in order to avoid footprints and also with unique IP address along with individual cPanel for each domain, when you purchase PBN Hosting Packages.
If the domain is registered elsewhere like DynaDot and not with SeekaHost then we will provide you with the IP address and nameserver details to update in your domain registrar.
FYI, if the domain is registered in SeekaHost along with hosted packages purchased with us, we will set up and send you the details once the NameServer details are propagated over online, you no need to worry about anything in this case.
To Update Private (Child) Nameserver in Dynadot
STEP 1: Sign-In
‘Sign In’ your Dynadot account.
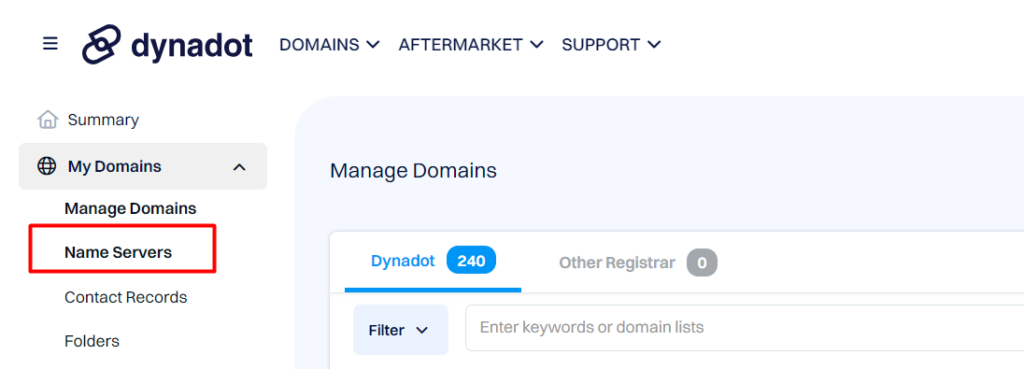
STEP 2: NameServer Section
Select the “Name Servers” option in the left side panel under “My Domains” section.
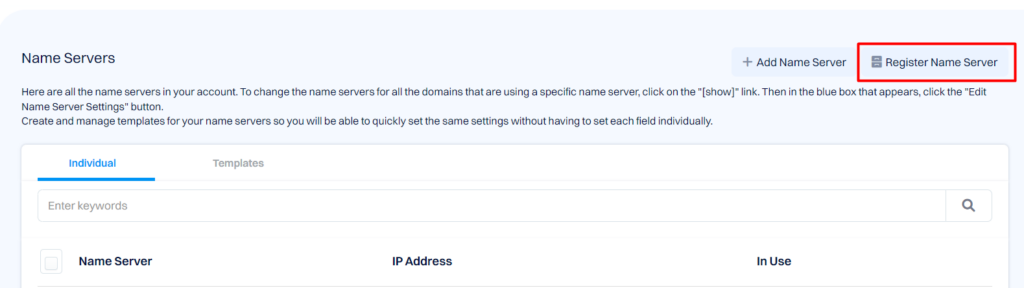
STEP 3: Add/Register NameServer
Click on “Register Name Server”
STEP 4: Register NameServer
Fill your private name server and its Appropriate IP. Do this twice for both your ns1 and ns2. Click on “Register Name Server” at the end of registering each name server.
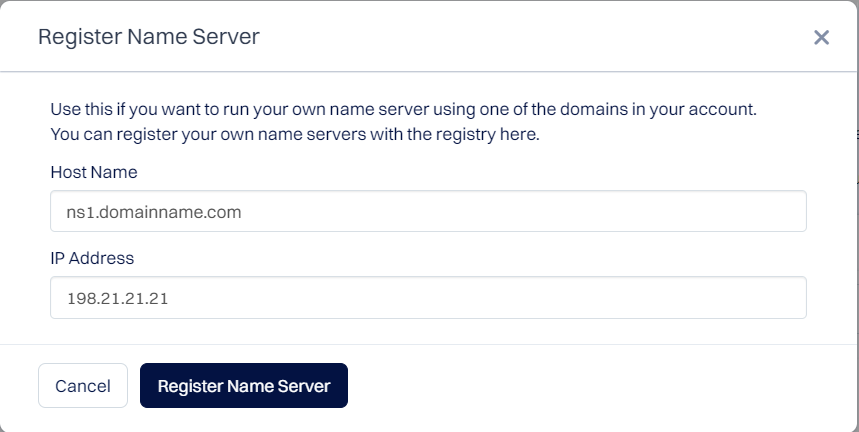
If you have multiple domains, you can do the same with their respective nameserver and ip here. So you can assign them under the domains dns management.
STEP 5: My Domains
Select ‘My Domains’ from the menu bar which is on the left side and click on ‘Manage Domains’ in the dropdown list.

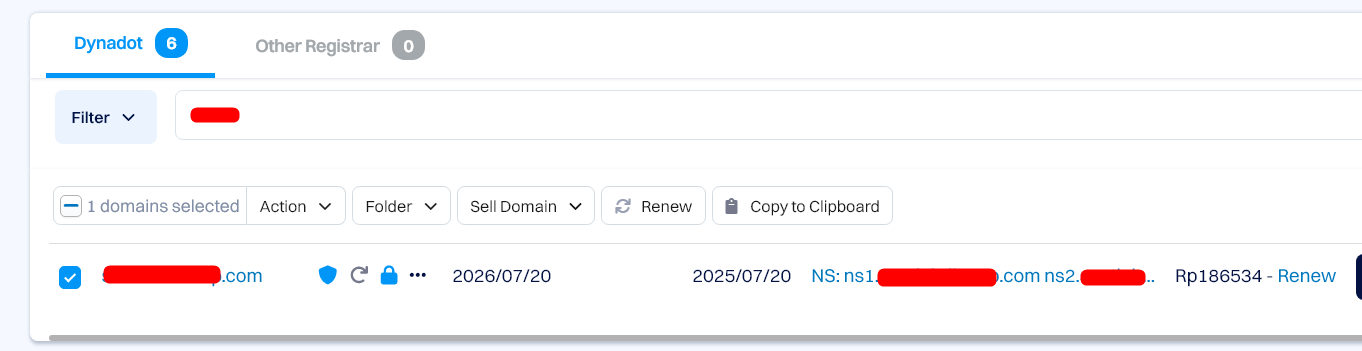
STEP 6: Bulk Action
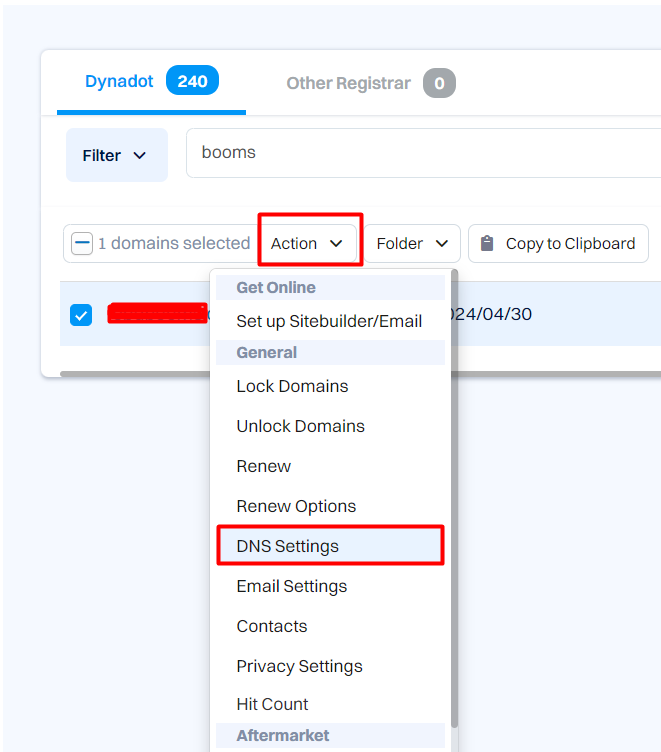
Search the domain name and click the ‘CheckBox’ which is near to your domain names and select ‘Action’. In the drop-down choose ‘DNS Settings’ from the list.
STEP 7: DNS Settings
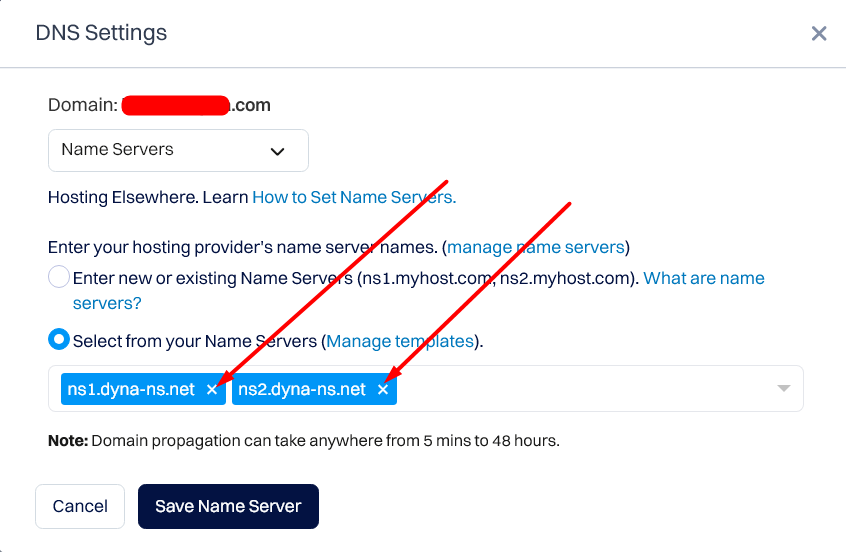
In the ‘DNS Settings’ page, select the ‘Nameserver’ setting from the top drop-down menu.
STEP 8: Remove Existing Nameserver
Here, we are going to choose the option “Select from your Name Servers” since we have already registered our nameserver in step 4. If you see any nameserver already assigned, click ‘X‘ mark to remove it to assign the nameserver you have registered for the domain.
STEP 9: Update Private Nameserver
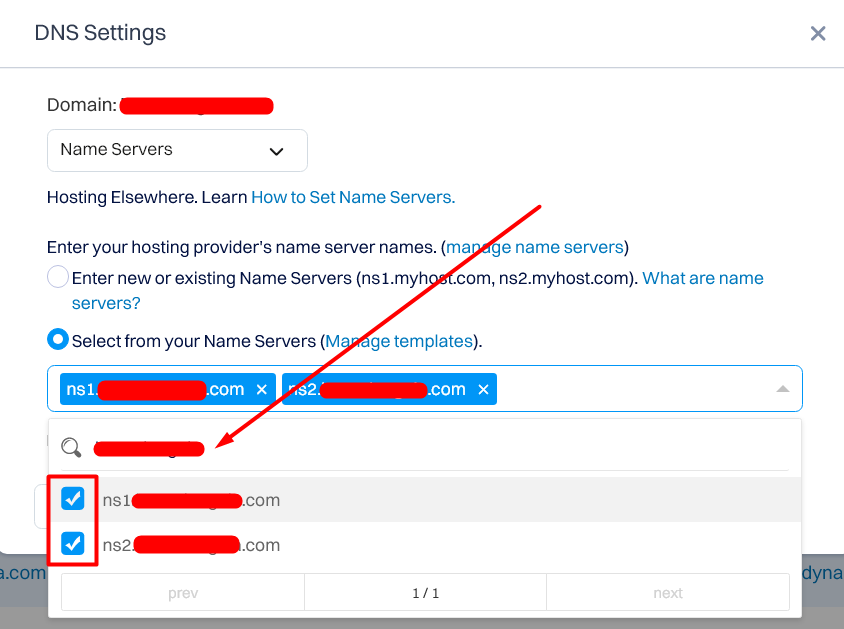
Once removed the old nameserver assigned, now search the nameserver or domain name in search box and click both the checkbox to assign them for the domain. Now click “Save Nameservers” button.
STEP 10: Confirm Changes
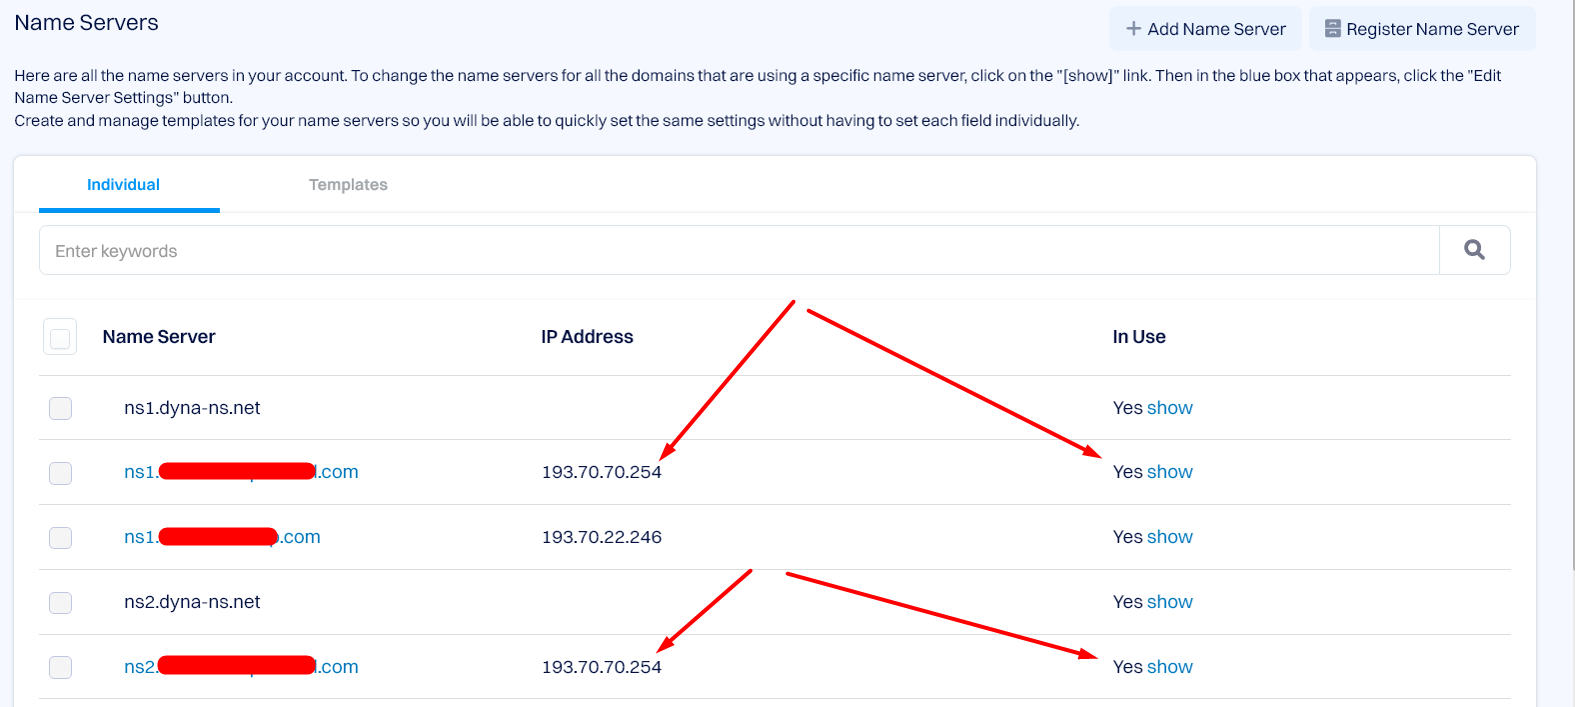
To confirm if you have assigned the nameserver and ip correctly you can check under manage domains option near the domain name and as well in the Name servers option.
Finally, you have created Private NameServers in DynaDot and updated in NameServers. If you would like to know about the Private NameServers and why it’s used on domains hosted under PBN Hosting Package, contact our LiveChat Support or Mail to [email protected] for details.
[Tweet “How to Update Private NameServer in DynaDot”]
Read the 6 DNS Related Terms You Should Know