 SeekaHost.com Client Area
  SeekaHost.app
  SeekaHost.co.uk
  SeekaHost.in
How to Update Private (Child) NameServer in BigRock?

By Aslam Saah
Table of Contents
If you have bought domains from BigRock and hosting at some other place, then the user must be aware and should update the nameserver details in the DNS setting. In SeekaHost, we provide Private NameServer for PBN Hosting Packages to avoid footprints along with unique IP for each domain.
In this article, we have guided you on how to register and update private nameservers in BigRock. If it’s a custom nameserver, you can skip registering the nameserver in the “child nameserver” section and directly update the nameservers.
Register and Update Private(Child) Name Servers in Big Rock:
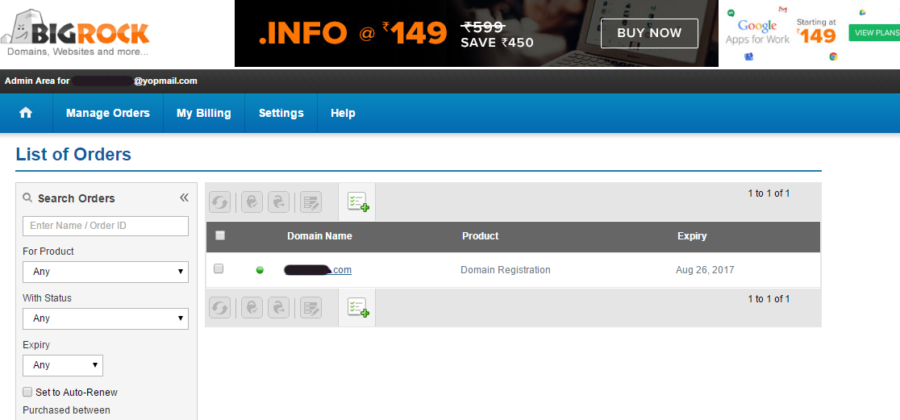
Step 1 – Login to Bigrock
Login to your Bigrock Account and Select the domain for which you would like to update the nameserver details.
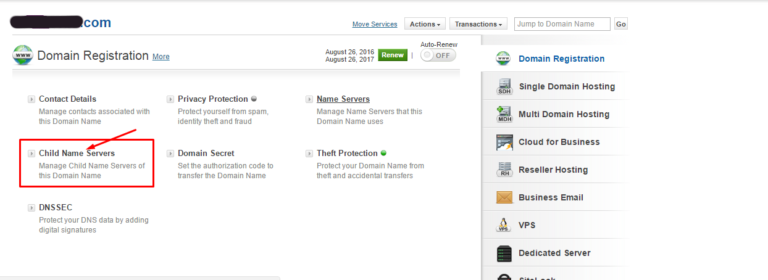
Step 2 – Child Name Servers
Click on the ‘Child Name Servers’ link.
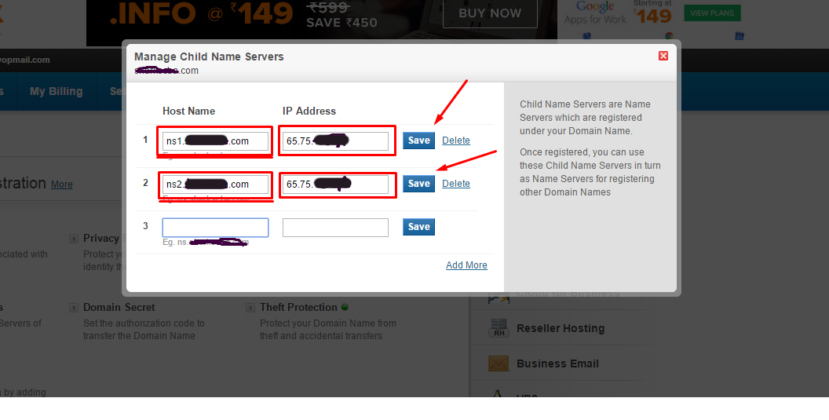
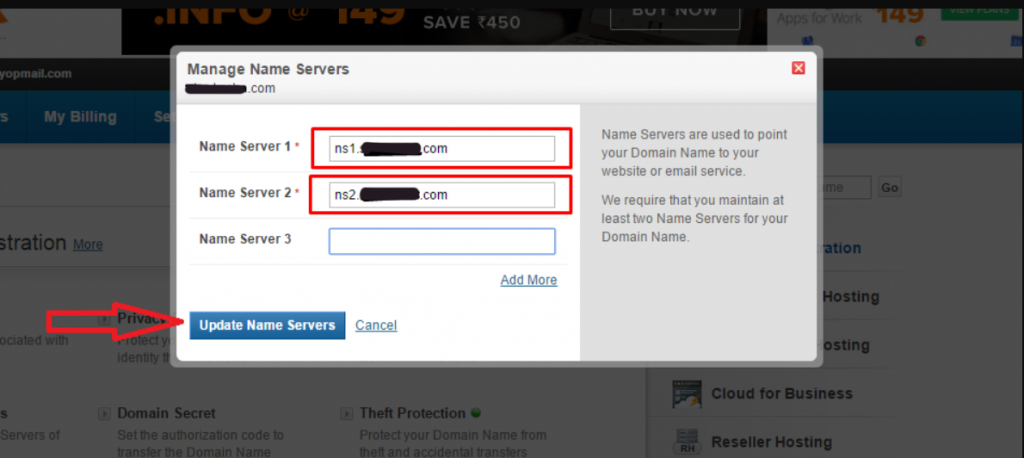
Step 3- Manage Child(Private) Name Servers
Before creating a name server, the user must be registered the child name servers in the cPanel. Child NameServers are otherwise called as Private NameServers. You have to provide Appropriate Host Name (Example: ns1.yourdomain.com) and its appropriate IP address – each for the number of nameservers provided by your hosting providers. Click ‘Save’ button once you have added.
Step 4 – Name Servers
Go back to the main page and select the “Name Servers” option.
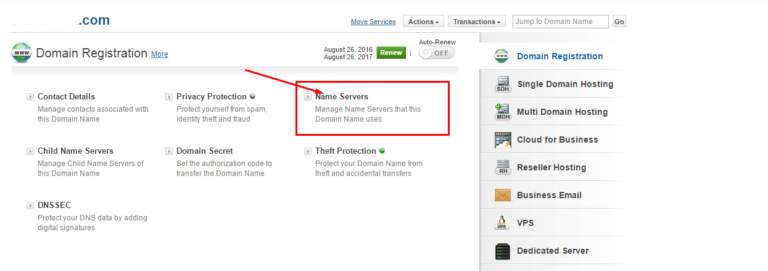
Step 5 – Manage Name Servers
Now, Enter the already registered private nameservers here and update name servers
For the nameservers to get propagated over online, it might take maximum of 48 hours, Though at most of the cases it will get updated in a matter of minutes.