 SeekaHost.com Client Area
  SeekaHost.app
  SeekaHost.co.uk
  SeekaHost.in
How to Set up Custom Email Domain – SeekaHost Email

By Robert Mills
Table of Contents
Keep a professional email for your company domain to simplify communication with clients. When you Setup Custom Email Domain, it will allow you to send emails that clearly identify your brand. Also, it enhance your credibility and trust with clients from the moment they receive your message. Furthermore, it strengthens your marketing strategy and drive increased sales through effective email outreach.
In this article, we will help you create your first email account with SeekaHost email hosting and guide you in managing the email account as well.
Prerequisites to Set Up Custom Email Domain:
Having an email address for custom domain seems a little overwhelming and difficult for beginners. We will share steps to simplify the process and create it easier.
1. First Register a Domain Name with any extension you want and confirm if it is available.
2. Second, Purchase a dedicated Email Hosting with SeekaHost Email.
3. Third, follow the below email records update in respective provider configuration.
For domain with default nameserver, configure the Email Records in domain DNS management,
For domain with hosting nameserver, configure mail records in the cPanel Zone editor,
For domain with Cloudflare nameserver , configure mail records in the Cloudflare DNS zone.
4. Additionally, configure DKIM record separately.
5. Finally now create an Email account for your custom domain and access the webmail easily.
Assuming you already have domain registered and purchased dedicated email hosting with us, please scroll down to follow further steps to setup professional email account.
Create and Manage Custom Email Domain:
1. Set up Custom Email Domain:
Step 1: Login to your SeekaHost client area.
Step 2: Click “Services” -> “Manage” Button on the Email Hosting Package purchased.
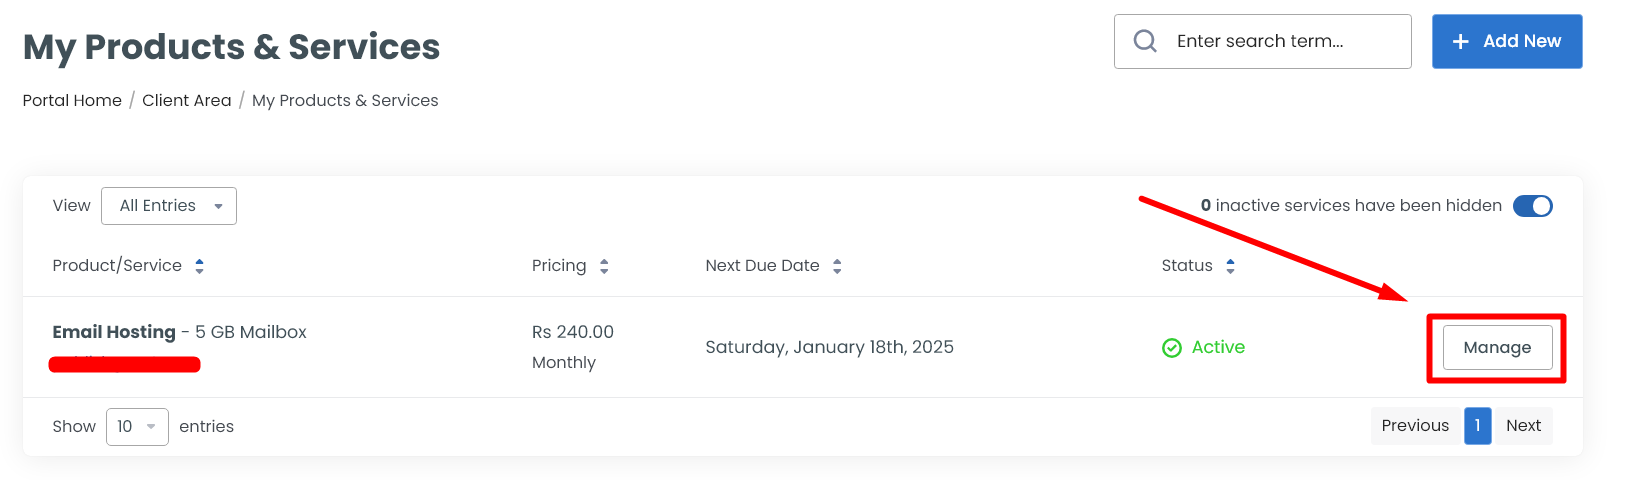
Step 3: At the bottom of your mail package, click ‘Setup Mailbox’.

Step 4: Enter the username and password for the mailbox. You can follow below example format to fill the details,
Mailbox Info:
Password Password must be between 8 to 24 characters
User Info – Fill the user profile information if needed. (Optional)
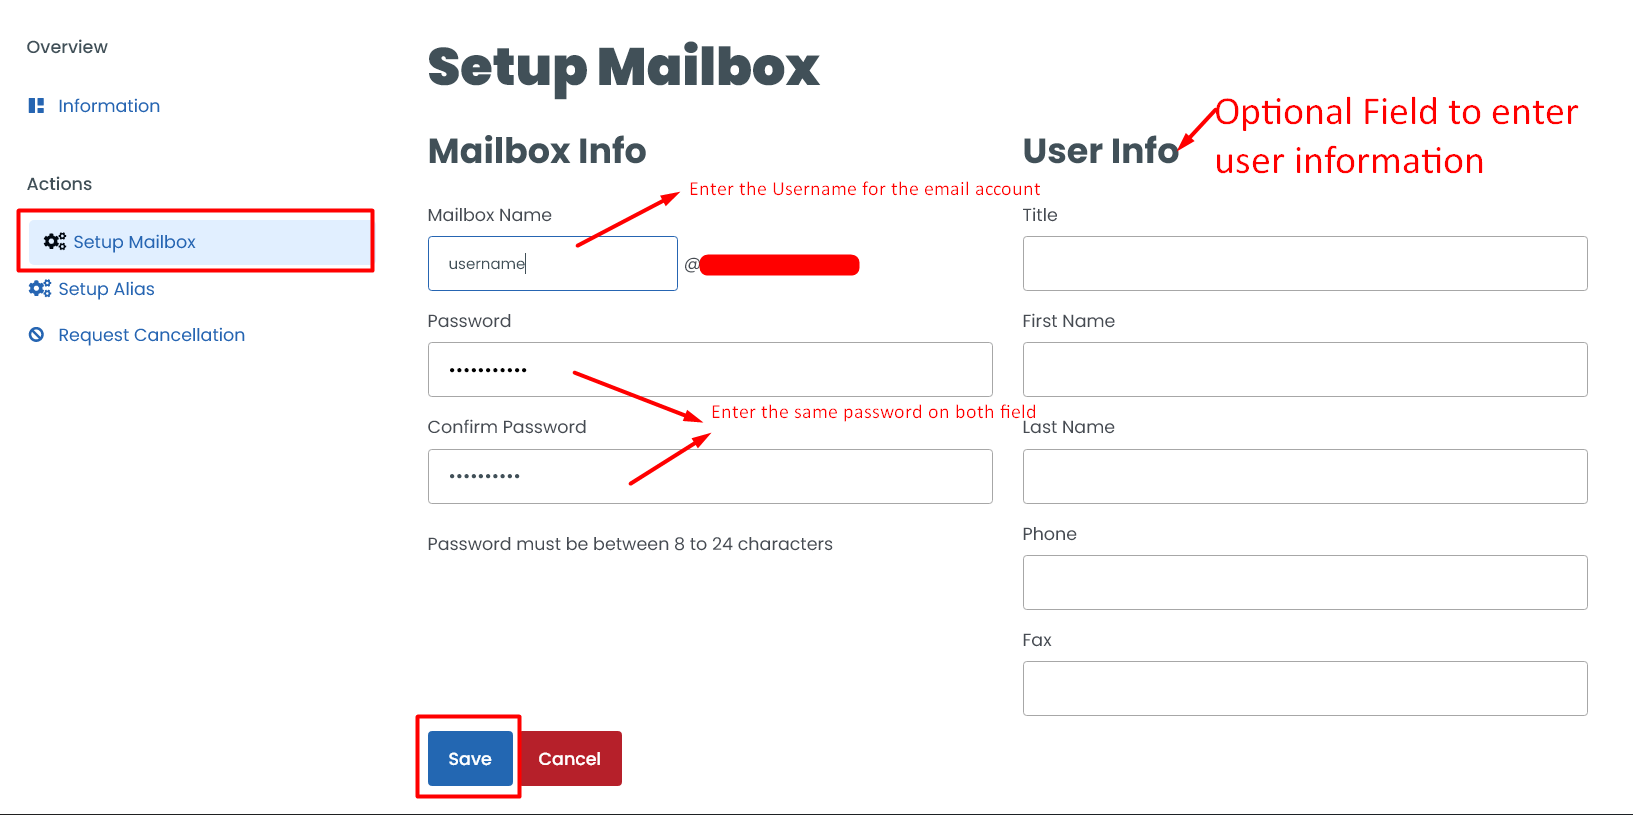
Step 5: Next after filling all the details, click ‘Save’ button to set up business email account.
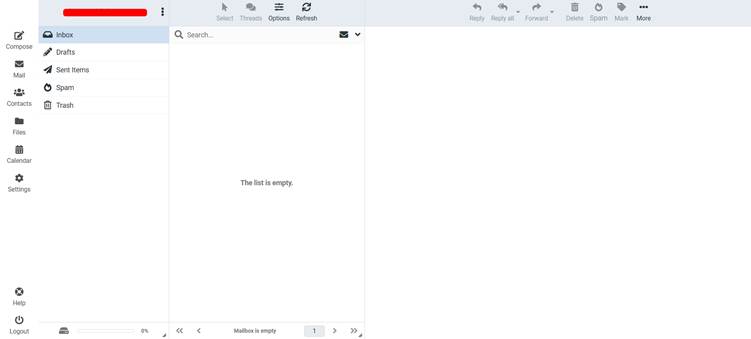
2. Login To Webmail:
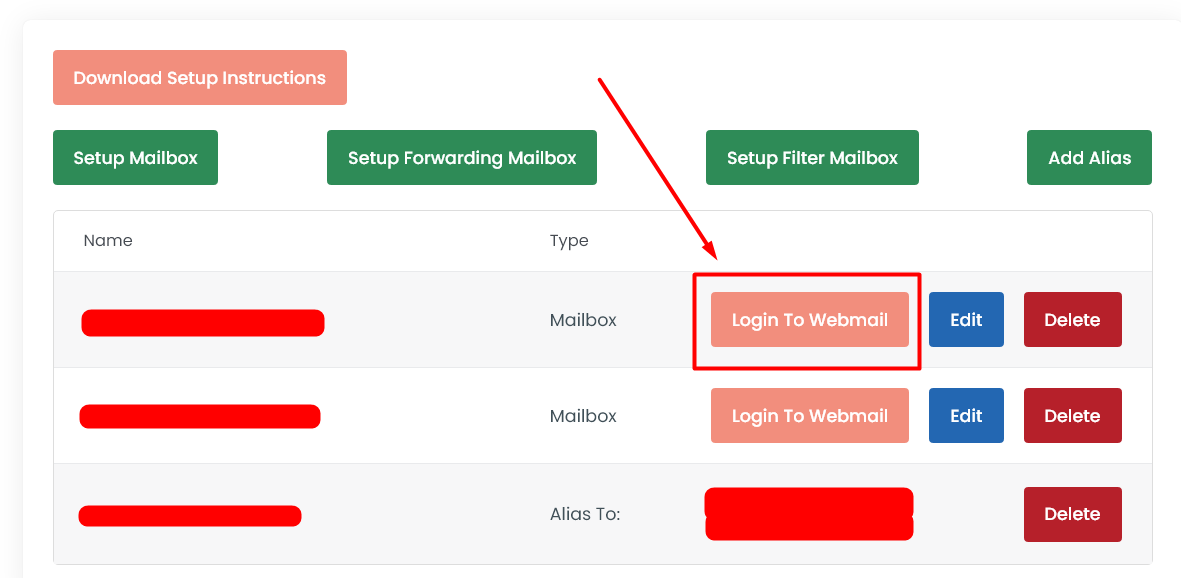
Step 1: Once you have created mail successfully, click the ‘information’ option from the left-side section.
Step 2: Scroll down to the bottom of the page. Click “Login to Webmail” button to take you to login page.
Step 3: Now enter the email address and the password set for the email account to login to webmail interface. Click ‘Login‘ to access the webmail.
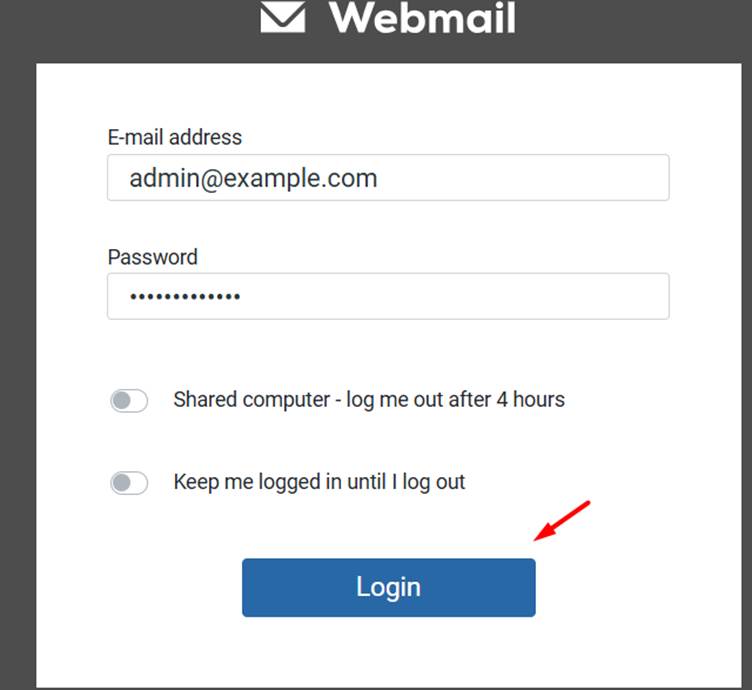
You can toggle on/off for the below option if you wish to keep your login for limited time.
NOTE: If you want to login to another email account, you have to logout from the previously logged in email account from webmail and only then you can able to login to new email account.
Step 4: In this webmail Interface, you can manage, send and receive emails here.
Step 5: To login to webmail without accessing client area, you can access the below secure URL and enter the login credentials like above.
mail.hostedemail.com or mail.emailhome.com
3. Change Mail Account Password:
Step 1: To change the password for the Custom Email Domain created, go to the information option on left side section.
Step 2: Click on the “Edit” button next to the account and enter the new password as how you used to set password while creating the email account.
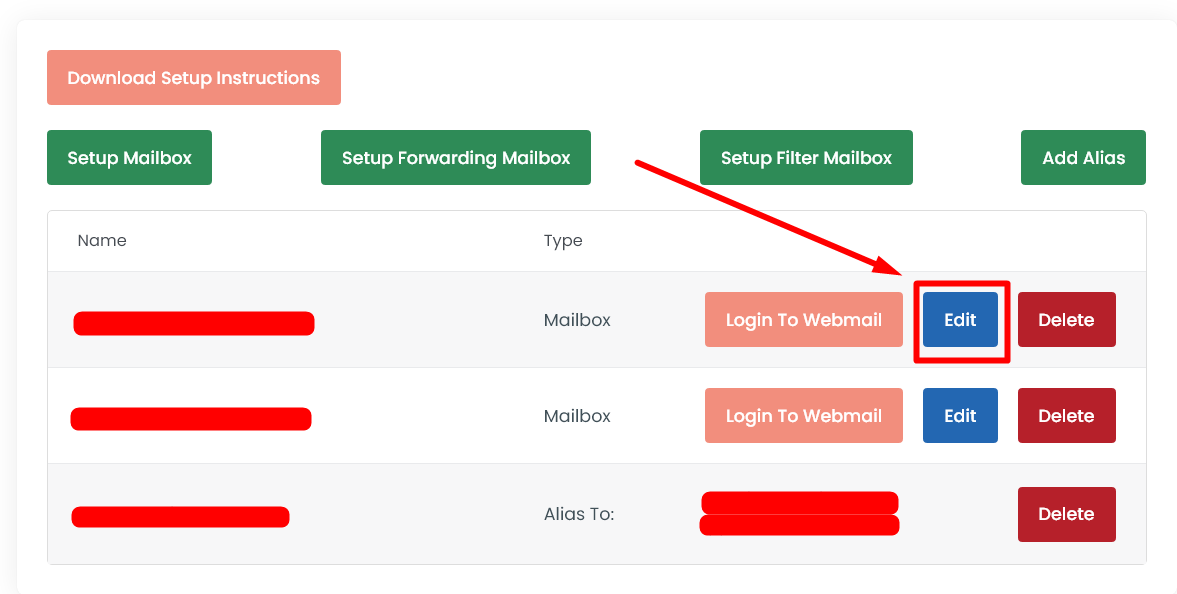
Step 3: Next, click “Save” button to complete the password setup.
4. How to Create a Alias:
Step 1: On left side section, click “Setup Alias”.
Step 2: Enter the alias email username and to mailbox in the Alias section as follow,
Alias: Enter the username for your custom domain which you want to receive in your existing email account.
To MailBox: Select the existing Custom Email Domain created already from the drop down.

Step 3: Once updated, click ‘save‘ button.
5. How to Create a Forwarder:
Step 1: On left side section, click “Setup Forwards”.
Step 2: Enter the from and to address in the forwarder section as follow,
Mailbox Name: Enter the username of the email account created at the start which will be act as “From email address”.
Forward To: Enter the “To email address” where you want to forward all the emails sent to “From email Address”
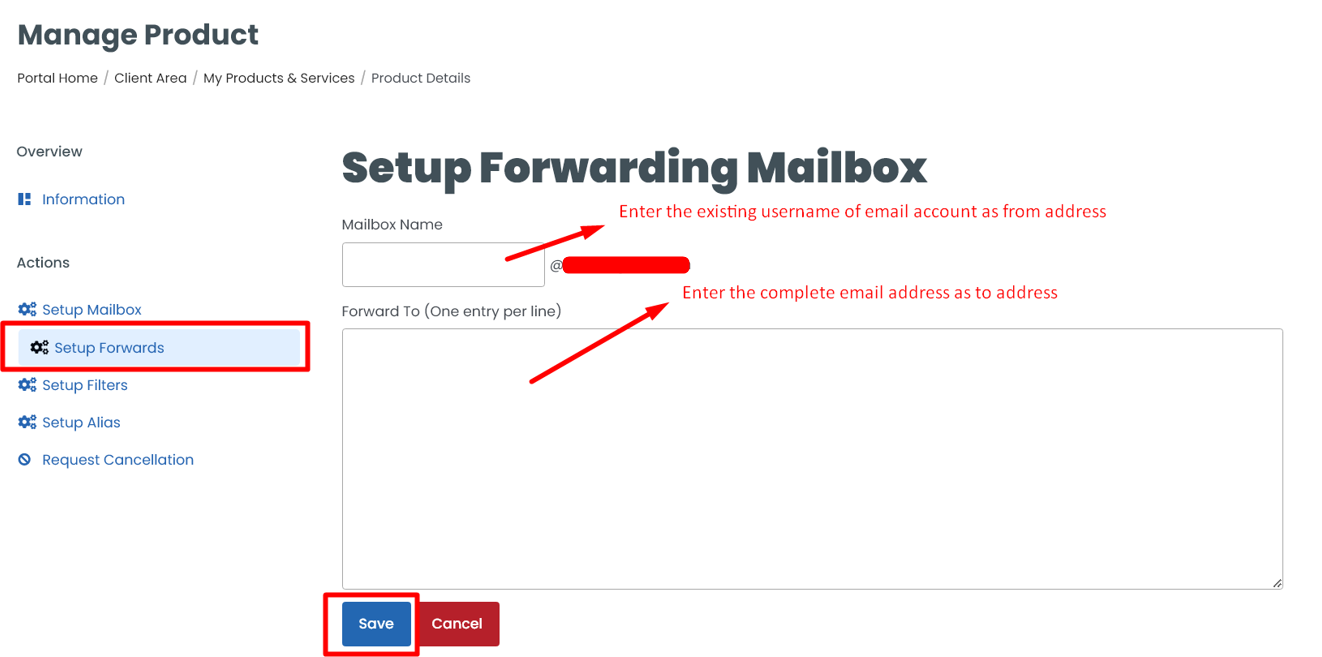
Step 3: Once updated, click ‘save‘ button.
For example, if you have created email – testing@seekahost.com and added the forwarding to email account – checker@google.com, then mails received to testing@seekahost.com will be forwarded to checker@google.com.x`.
6. How to Create a Filter:
Step 1: On left side section, click “Setup Filter”.
Step 2: Enter the required details with the password set for main email account which you create filter and click the save.
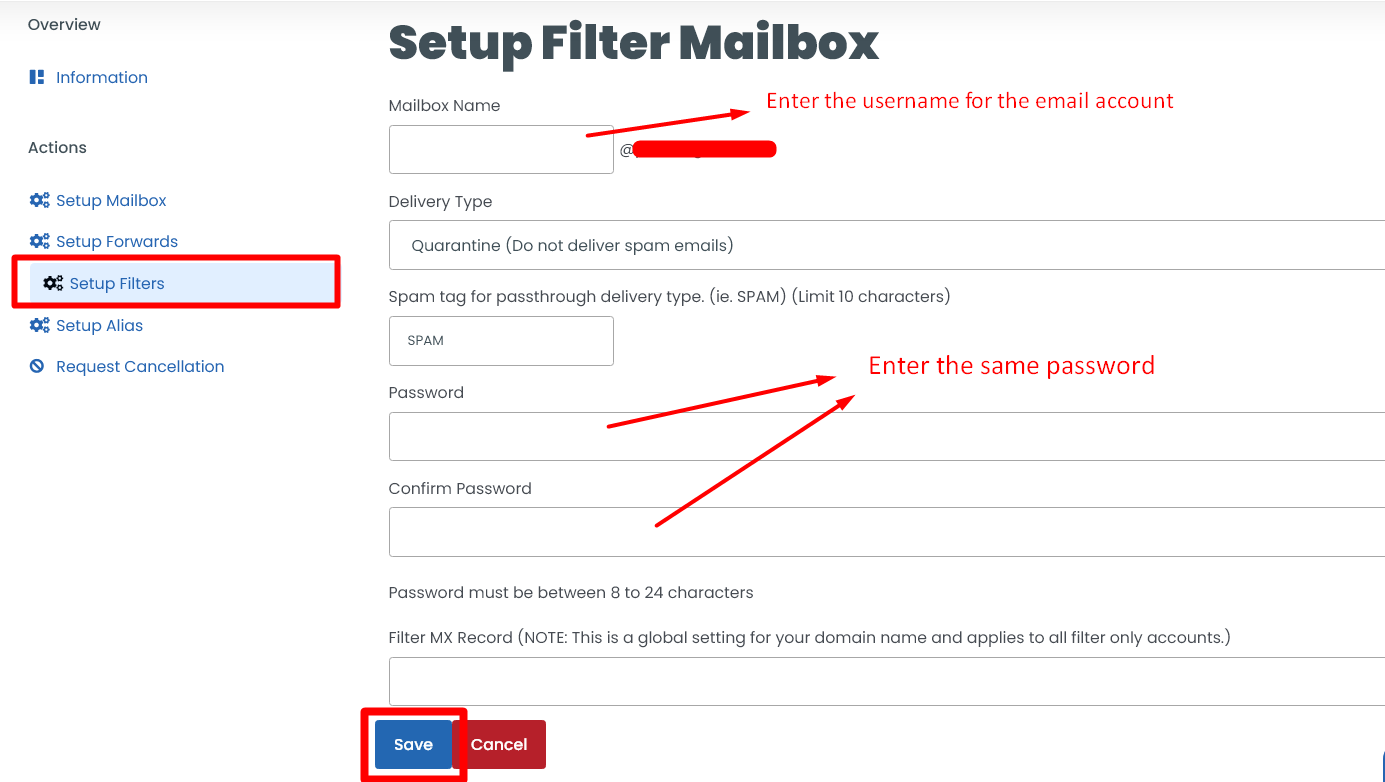
Note: The forwarder and filter addon options will be only available if you have paid for the services additionally. Contact us via a ticket in the client area or start a live chat to request for upgrade your mail package.
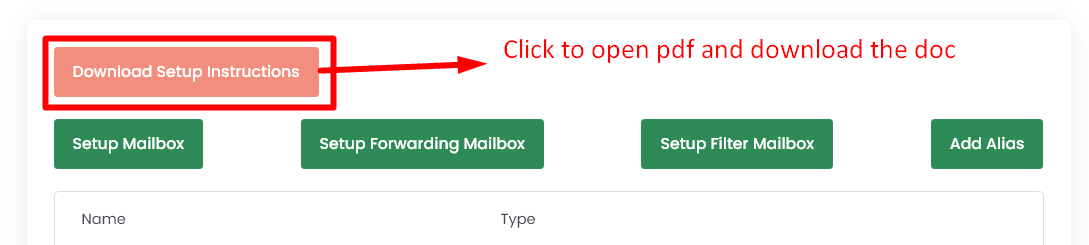
7. How to Download Custom Email Domain Configuration:
On the same product details of your mail account, click the ‘Download the setup Instructions’ option. It will open the document with Custom Email Domain configuration and steps to configure the email in the following email services – MSOutlook, Mac OS, Thunderbird and Outlook.
8. How to Delete Mail Account:
Step 1: On the product details of your mail account, you will see the “Delete” button next to mail your account.
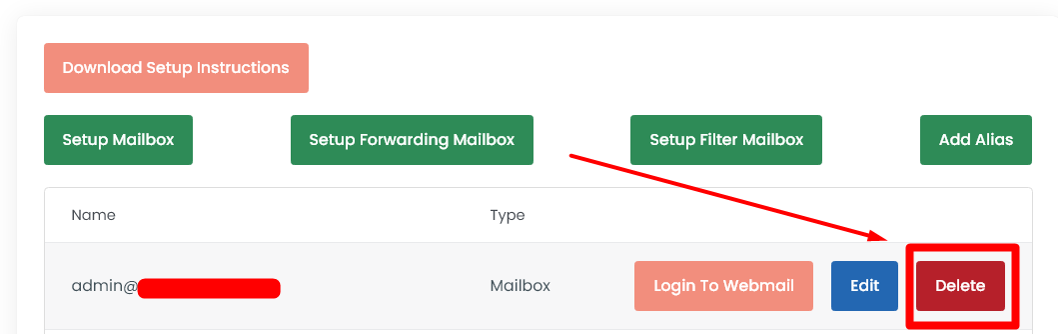
Step 2: Click the ‘Delete’ button to remove the Custom Email Domain created from the hosting plan.
Hope this information helps you to create and manage the email account with SeekaHost Email Hosting Service!
If you are a registered user in SeekaHost and have any queries to be clarified or issues to be sorted, you can raise a ticket through the client area dashboard. For immediate interaction or guidelines, contact our support team available in Live Chat at the right bottom corner of the website.