 SeekaHost.com Client Area
  SeekaHost.app
  SeekaHost.co.uk
  SeekaHost.in
How To Create Custom Error Pages Using cPanel?

By Menaga Devi
Table of Contents
The error pages occur in the website naturally due to some issues in the internal part of the website or also may be due to inappropriate installations of plugins & themes. Other than this, the user can also create error pages manually. If the site is down or you want to make the changes, then this feature must be very useful.
In this article, we have guided you on how to create custom error pages using cPanel.
Create Custom Error Pages Using cPanel:
STEP 1: Login
Login to your cPanel account.
STEP 2: Error Pages
Under the ‘Advanced’ section, tap on the option ‘Error pages’

STEP 3: Selecting Domain
Select a domain under the ‘Select Domain to Manage Error Pages’ section to create custom error pages.

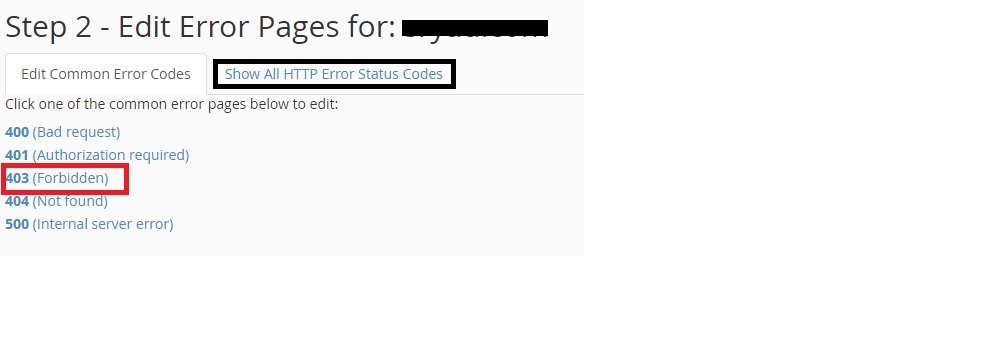
STEP 4: Selecting Error Code
Click on any common error codes under the section ‘Edit Error pages’ to display it when any visitors access your websites.
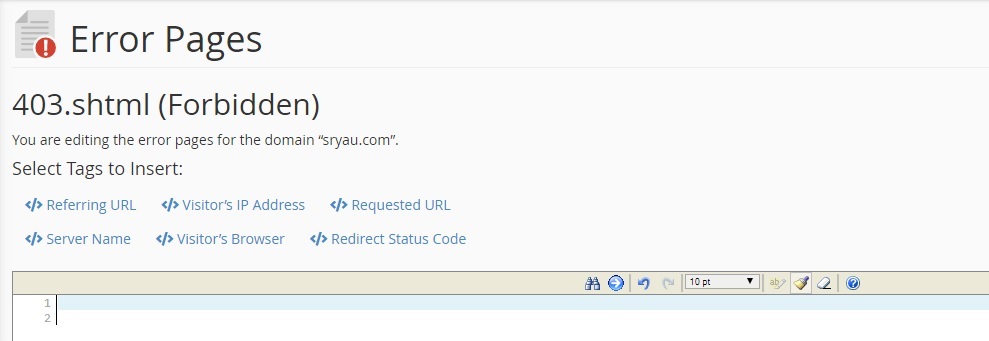
 STEP 5: Editing Error Pages
Click on any common error code. For example, here we have clicked on 403 (Forbidden Error). It brings you to another page to edit and insert the error code at any place in the html code of your website. Other than common error codes, you can also any HTTP error codes under ‘Show All HTTP Error Status Codes’.
STEP 6: Save
After insertion, scroll down and click on ‘Save’. Thus the changes are saved and the visitors will see the error pages when your website is accessed.
[Tweet “How To Create Custom Error Pages Using cPanel?”]
If you are a registered user in SeekaHost and have any queries to be clarified or issues to be sorted, you can raise a ticket through client area dashboard or email to support@seekahost.com. For immediate interaction or guidelines, contact our support team available in LiveChat at the right bottom corner of the website.