 SeekaHost.com Client Area
  SeekaHost.app
  SeekaHost.co.uk
  SeekaHost.in
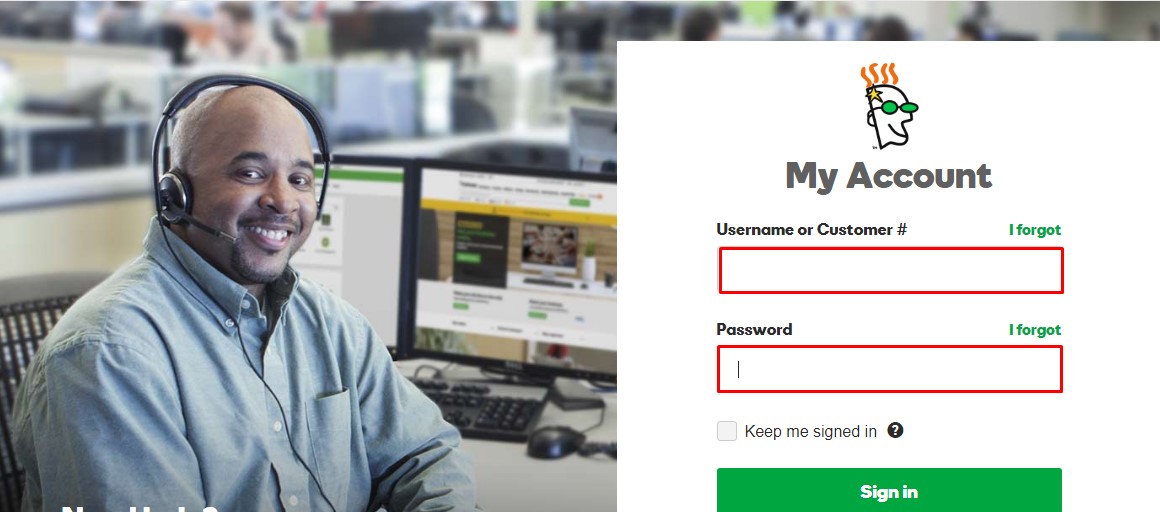
Create and Add Child/ Private Name Servers in Godaddy

If you bought domains from GoDaddy and hosting somewhere else, then you will be requested to set the private nameserver details in your DNS Setting. Getting into the GoDaddy Support chat and to get connected with the agent to ask them about this will take more time than the whole process.
Are you struggling a lot to set the Private/Child Nameserver in GoDaddy? Then you are at the right place. In this article, I have explained to you How to register your Private NameServer and configure it in GoDaddy.
Create and Configure Private Nameserver in GoDaddy
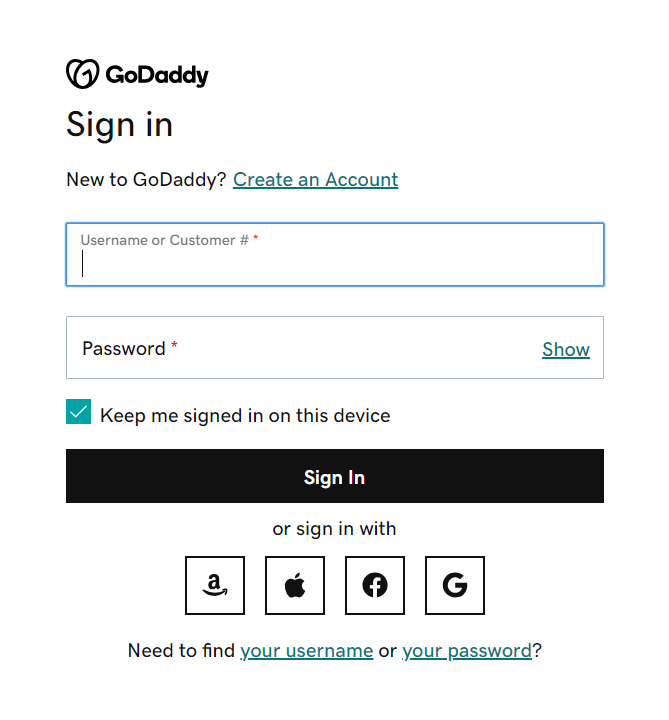
- Log in to your GoDaddy Account with your Account Login Details.
-
My Product or Manage My Product:
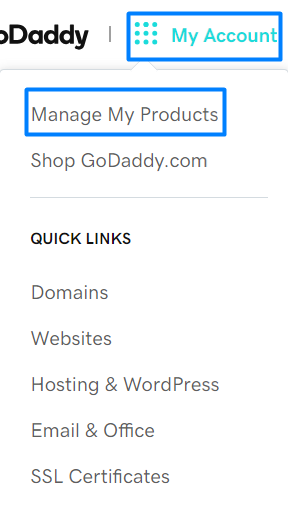
Two ways to check all domains listed purchased. First, click “New” on the top right corner of the page -> My products.
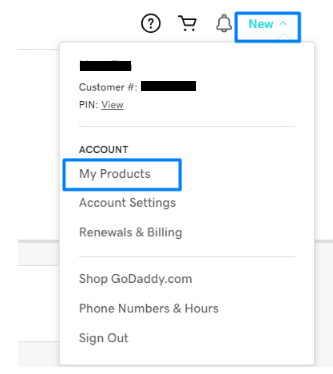
Second, click “My Accounts” -> Manage My Products.
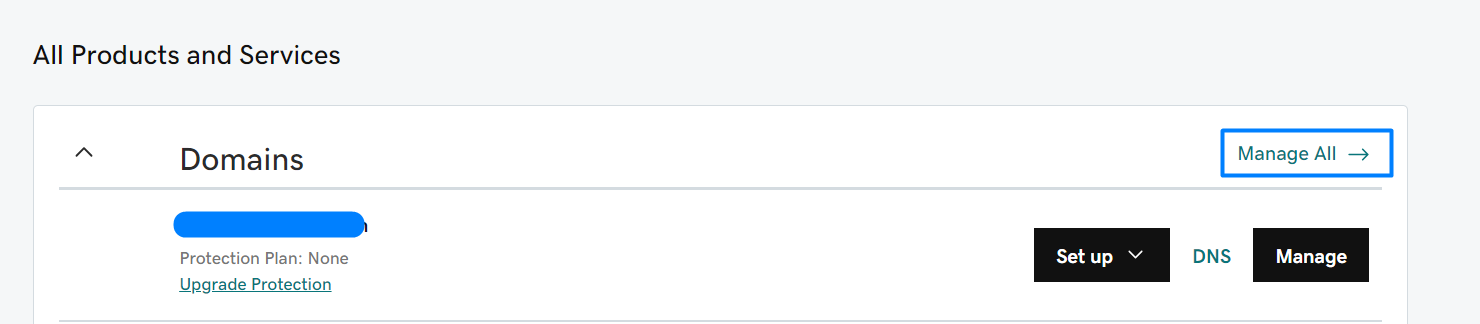
If you want to manage all domains portfolio, click “Manage All” or you can click manage on the domain slot to manage the particular domain separately.
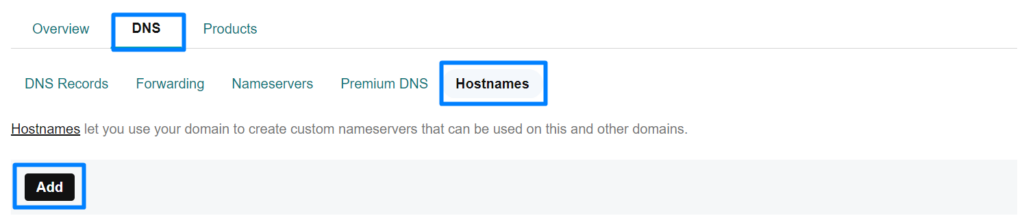
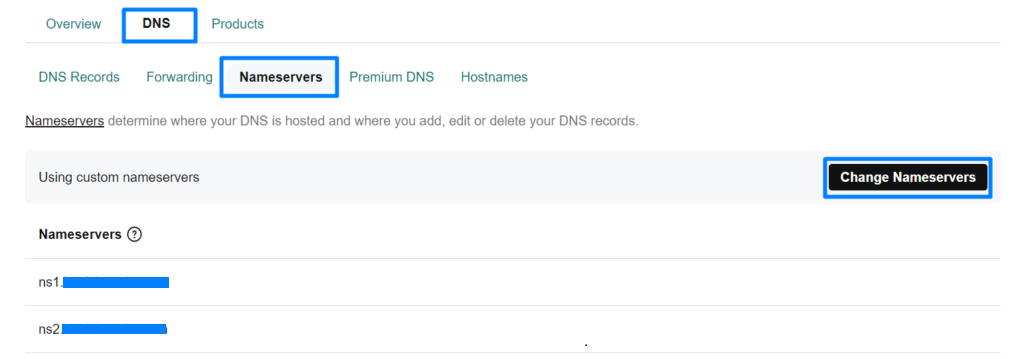
Click the domain name -> DNS -> Hostname -> Click Add.
You can also manage the DNS record under the DNS option for the domain under the domain portfolio.

For another option, go to Manage My products and click DNS option on the domain section.
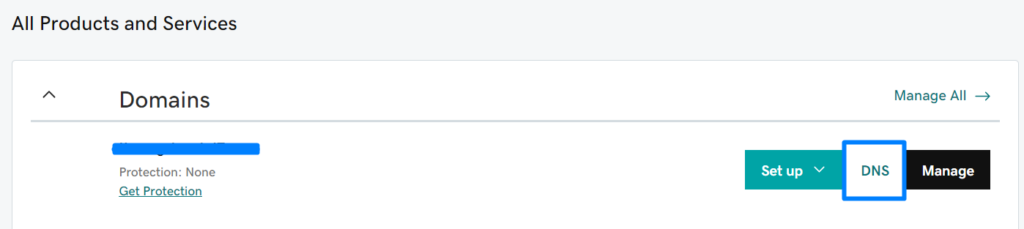
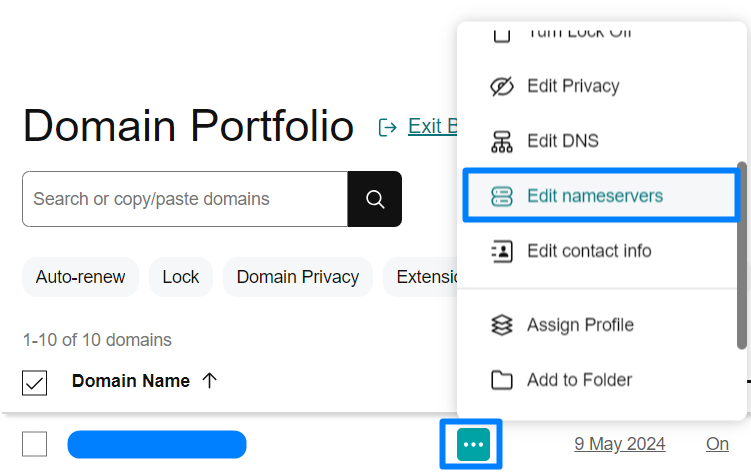
Click the three dot icon under the all domain portfolio and click edit DNS option to directly go to DNS Management option.

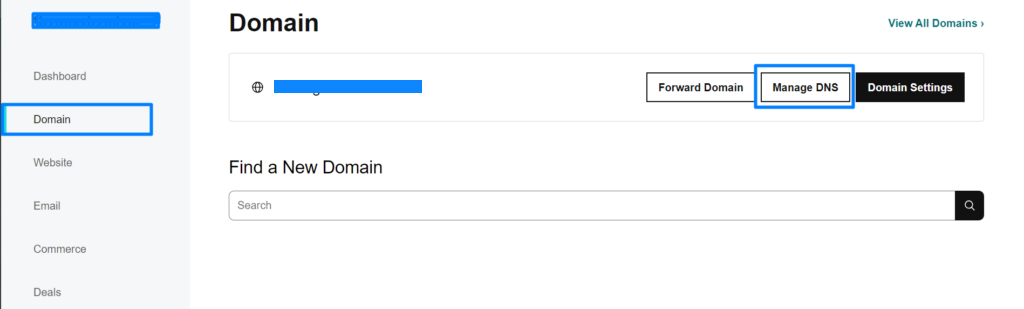
Under Manage My product -> click Manage -> Manage DNS under domain section.
Add ns1 in Host field box and IP in the IP Address field box. Once saved, do the same process the ns2 record also.

- Click Manage All -> Click the domain name -> DNS -> Nameservers -> Change nameservers
You can also manage the nameserver through the all domain portfolio by clicking the three dot icon -> Edit Nameservers option.
Click Use My own Nameservers option to enter the private nameserver details.
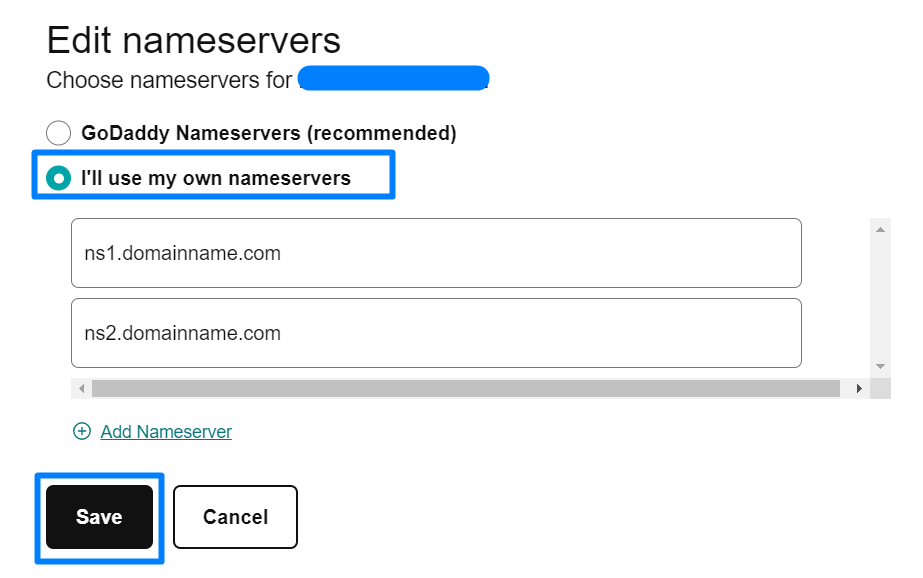
Now Everything set and wait for propagation time to be completed to work on your site.
Important Note: Sometimes the appearance or the options in the GoDaddy website will be different from the attached screenshot. So you can relate the process mentioned above with the GoDaddy Article to configure the Private NameServer.