
 SeekaHost.com Client Area
  SeekaHost.app
  SeekaHost.co.uk
  SeekaHost.in
How to Update Child nameserver in Hostinger

By Frank Carson
Every domain registrar has a different way or interface for updating the Private Nameservers. In this article, you will be guided on how to update private/child nameserver details in Hostinger.
Steps to Setup Private/Child Nameserver:
Step 1: Login
Login into your Hostinger account.
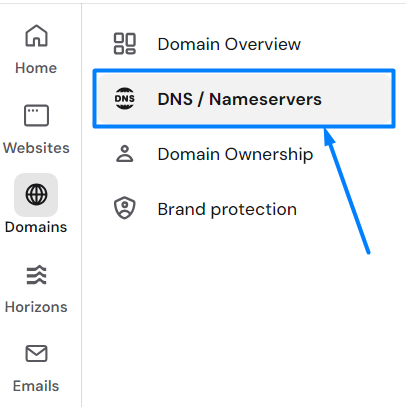
Step 2: Choose the domain and click the nameserver option.
Navigate to the domain tab and choose the domain that you would like to change the nameserver.
Then click DNS/Nameservers.
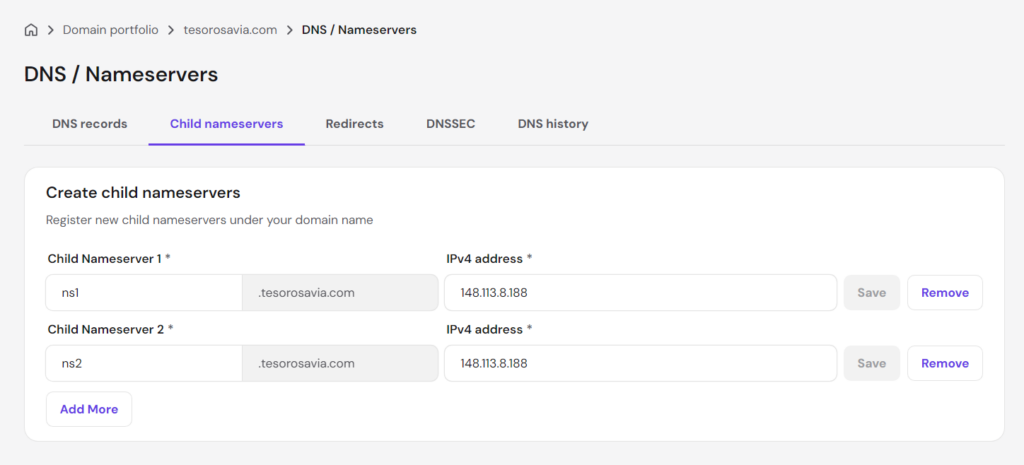
Step 3: Select Child nameserver option.
On right side, you can see different option for the domain dns management. Now click “Child Nameservers” option.
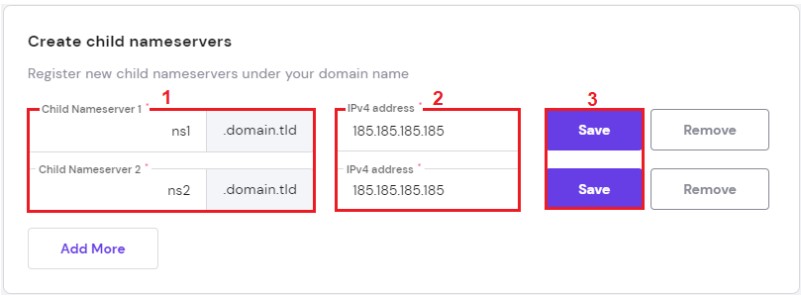
Step 4: Update child nameserver.
Child Nameserver 1 : ns1
IPv4 Address: Enter your website IP
Click save
Child Nameserver 2 : ns2
IPv4 Address: Enter your website IP
Click save
Step 5: Select DNS Records option.
On the same page under DNS/Nameserver option, select “DNS Records” option and then click “Change Name servers” button.
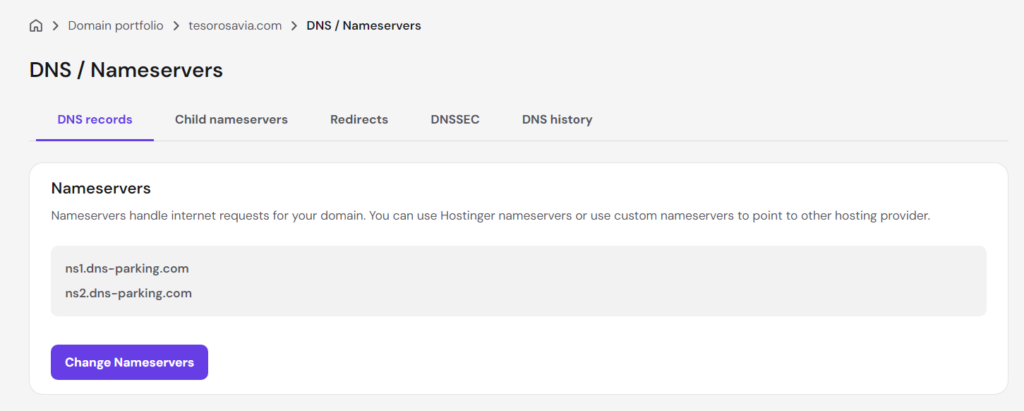
Step 6 : Update custom nameserver option.
Select “Change Nameservers” option and enter the custom nameserver in the field 1 and 2. Click save.
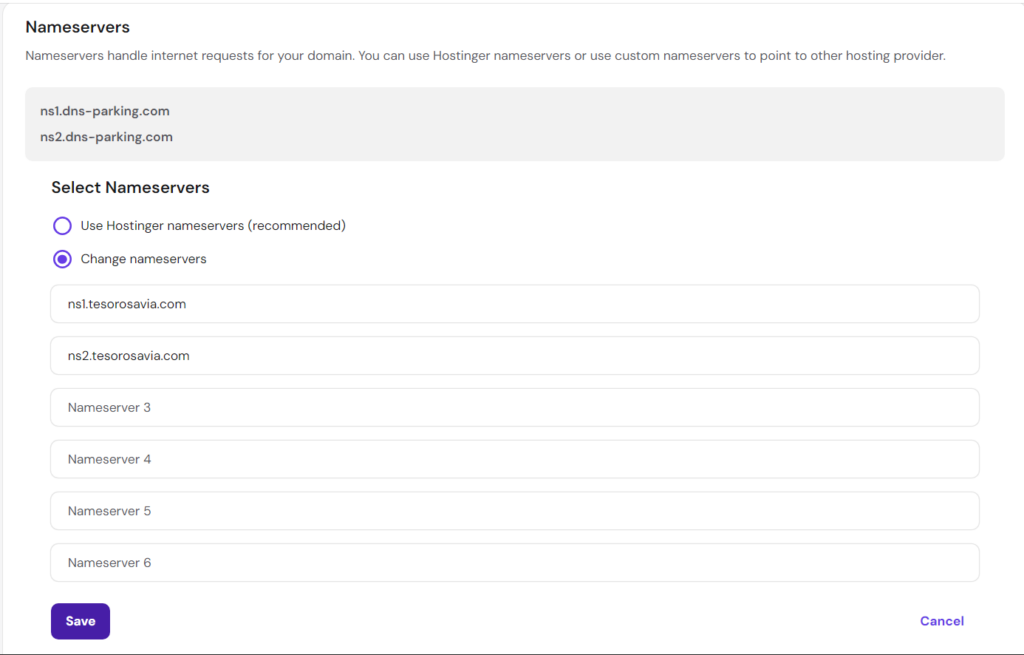
Once saved, the nameserver will start propagating and completed within 24 to 48 hours. If you face any error while updating the nameserver, please reach our to Hostinger support team to fix or identify the cause and revert back to our support team so they can assist you further.