 SeekaHost.com Client Area
  SeekaHost.app
  SeekaHost.co.uk
  SeekaHost.in
How to Add New User to Your SeekaHost Account?

By Swetha
Having an account in SeekaHost & looking to add another user under the same account? This article is for you!
Here, we will guide you to add new users under your client area within a few minutes.
Let us get started with the simple steps that help you to add users and grant permissions to your SeekaHost account.
Step 1: Log in to your SeekaHost client area.
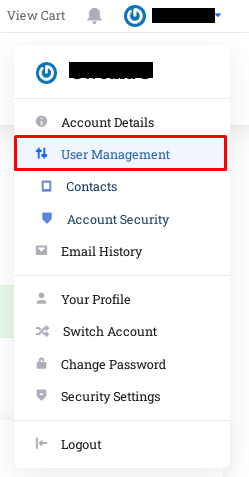
Step 2: At the top right-hand side, you will see your account name, click on that.

Step 3: Under that, there will be an option as ”User Management”. Click that option and you will redirect to the next page.
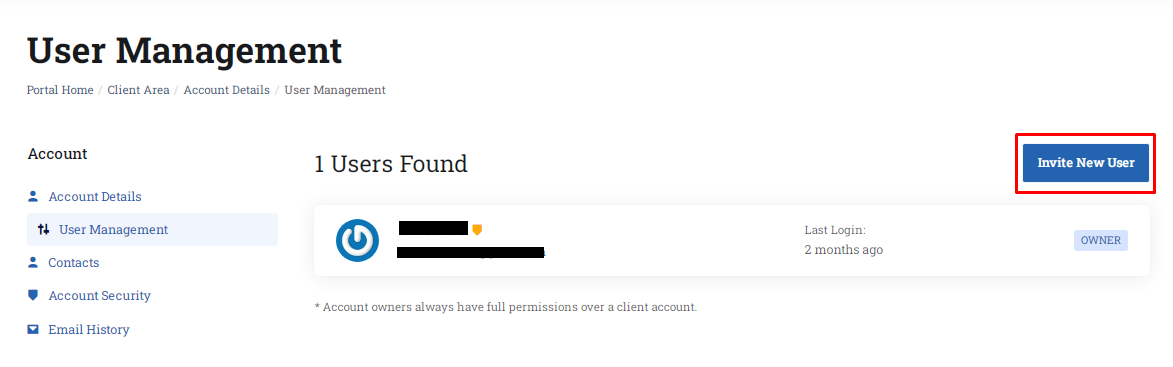
Step 4: Inside the User Management page, click the” Invite User” option which will be available above your current email id.
Step 5: Next, you have to enter the new email id and their permissions. There are two types of options available,
- All permissions
- Choose permissions
If you select all permissions, then you will have all privileges for that new mail id
Or if you select choose permissions, then you will have to choose the permissions from the drop-down list.
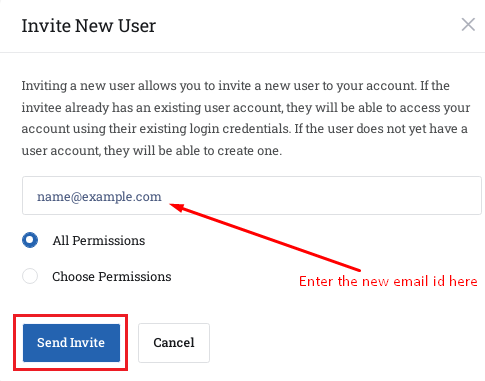
Once you have selected the option, click “Sent Invite”.
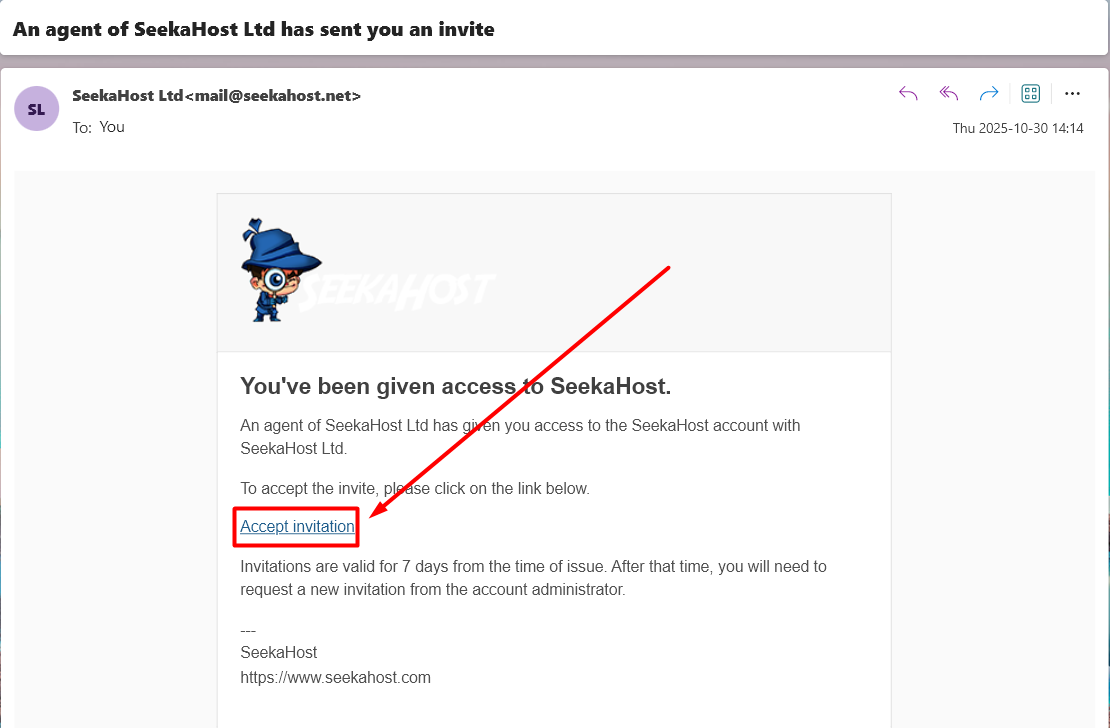
Step 6: Now you should have received the “Invitation link” to the new email id that you mentioned above. Check and click “Accept Invitation” link.
NOTE: If you have already logged into the account with any other login details, please logout from the client area and then click the link.
Step 7: Once you have clicked that link, you will be requested to choose Register or Login button. Click “Register” button.
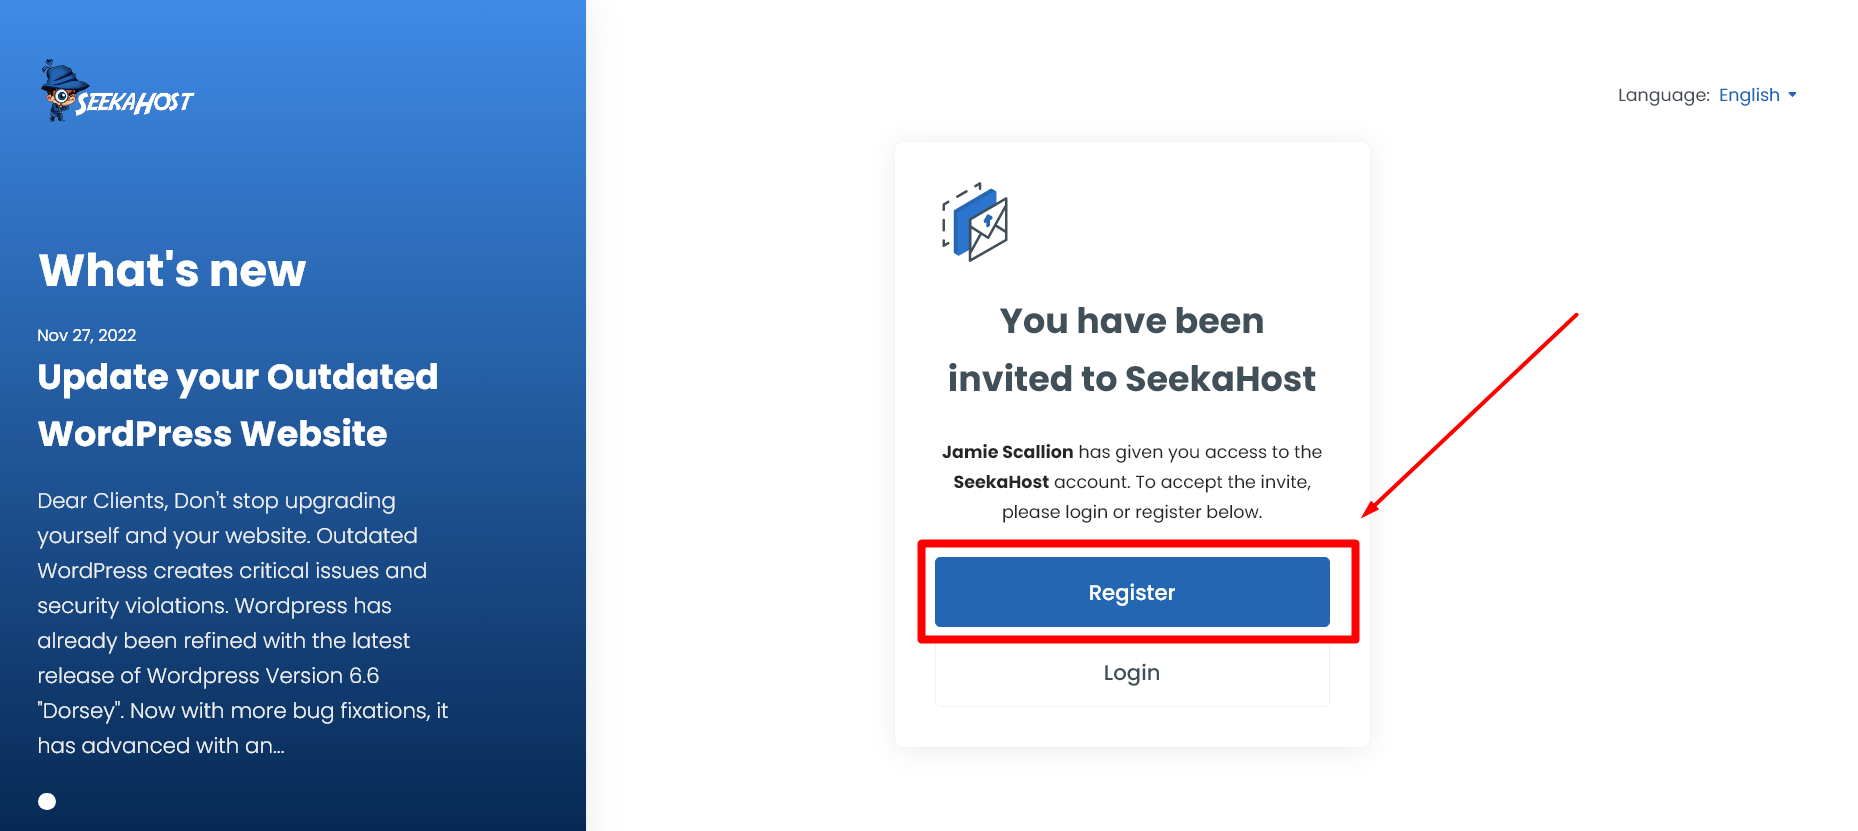
Step 8: Now enter the new user account information along with the password for the user. Once entered, click “Register” button to accept the invitation and add as user for the main account.
Step 9: If you want to change this new user as the owner of your account, you have to contact us through the ticket or chat. We will change your ownership for you.
Additional Helpful Resources:
1. Purchase Domain or Hosting.
4. Enable Two Factor Authentication
5. Add and check Available Funds in Account
7. Account Email Verification at SeekaHost
If you are a registered user in SeekaHost and have any queries to be clarified or issues to be sorted, you can raise a ticket through client area dashboard or email to support@seekahost.com. For immediate interaction or guidelines, contact our support team available in LiveChat at the right bottom corner of the website.