 SeekaHost.com Client Area
  SeekaHost.app
  SeekaHost.co.uk
  SeekaHost.in
Clearing Session Files in cPanel: A Step-by-Step Guide

By Ryan Bradman
Table of Contents
When managing a website hosted on a cPanel account, it is crucial to keep the server clean and optimized. One aspect of maintaining a smooth-running website is managing session files. These files can accumulate over time and consume valuable server resources. In this guide, we will walk you through the process of clearing session files in your cPanel account, ensuring a more efficient and secure website.
NOTE: Before removing confirm with your developer that the clearing session doesn’t affect your website by any chance. You can take a backup if needed.
Step 1: Accessing cPanel
Open your preferred web browser and enter the URL for your cPanel account. Typically, it is “https://yourdomain.com/cPanel” or “https://yourdomain.com:2083”.
Enter your cPanel username and password to log in.
Once logged in, you will be directed to the cPanel dashboard.
Step 2: Navigating to File Manager
In the cPanel dashboard, scroll down or use the search bar to find the “File Manager” option. Click on it.
A new window or tab will open, presenting you with the file manager interface.
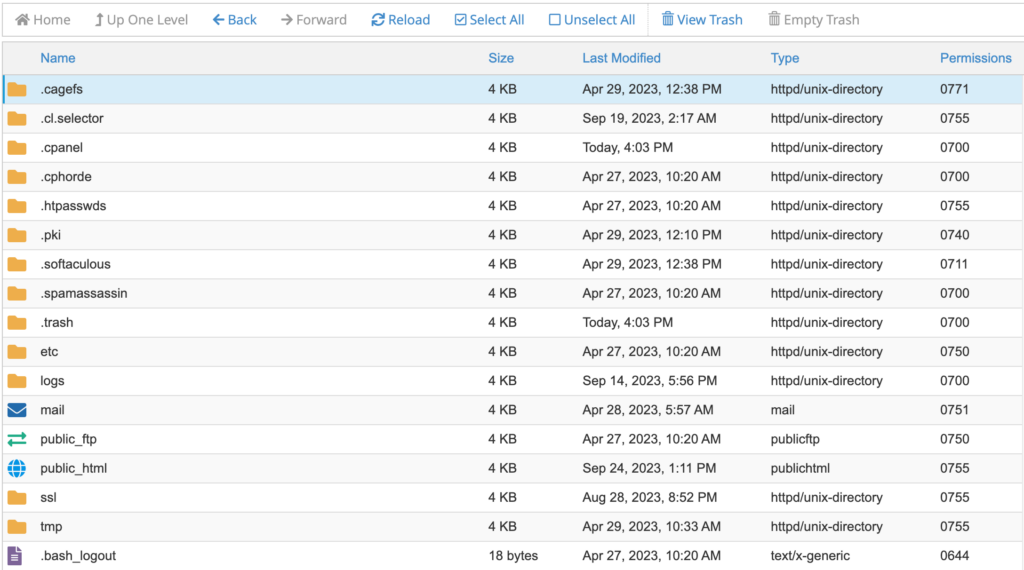
Step 3: Locating Session Files
In the file manager, you will see a list of directories and files on the left-hand side.
Locate the directory named “.cagefs” and click on it to expand its contents.
Within the “.cagefs” directory, find and click on the “var” folder.
Inside the “var” folder, locate the “cpanel” directory and click on it.
Finally, you will find the “php” folder. Click on it to view its contents.
Step 4: Selecting the PHP Version Folder
Within the “php” folder, you will see multiple folders corresponding to different PHP versions (e.g., “ea-php80”, “ea-php81”, or “ea-php74”).
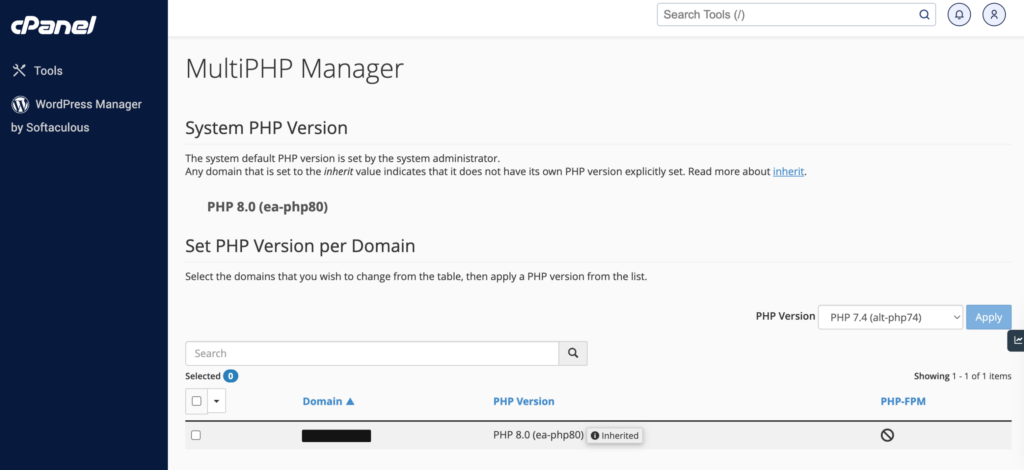
Identify the PHP version folder that matches the one used by your website. If you are unsure, you can check your website’s PHP version through cPanel’s “MultiPHP Manager” or contact your web hosting provider for assistance.
Step 5: Clearing Session Files
Once you have selected the appropriate PHP version folder, you will see various files and folders inside it.
Look for the folder named “sessions” and click on it.
Within the “sessions” folder, you will find a list of session files.
For clearing session files, you can select all the files by clicking the checkbox at the top or manually select individual files if needed.
Once you have selected the session files, locate the toolbar or menu at the top of the file manager interface and click on the “Delete” or “Remove” option.
Confirm the deletion when prompted.
Conclusion:
Regularly clearing session files in your cPanel account is essential for maintaining optimal website performance and server resource management. By following the step-by-step guide provided above, you can easily navigate to the session files directory and remove unnecessary files, ensuring a cleaner and more efficient hosting environment. Remember to exercise caution while deleting files and always double-check that you are deleting session files and not critical system files.