
 SeekaHost.com Client Area
  SeekaHost.app
  SeekaHost.co.uk
  SeekaHost.in
How to Create a Landing Page on WordPress Website?

By Robert Mills
Table of Contents
The landing page is a page specifically created to increase your business sales. It will convert your website’s visitors to leads. The landing page has the clear goal to increase the website conversations and convert your website visitor into your business customer. So it should be simple and attractive to the visitors.
The visitor will directly land on this page when they click on the Search engine result page. Landing pages are purpose-built pages that are used for paid marketing, email, and social media campaigns. Create a Landing Page is much different from the website’s home page.
What is the Difference between Home Page and a Landing Page?
When the users land on your website, they will see the home page. That doesn’t mean the home page is the landing page. The home page is just the front page of your whole website.
The home page is the type of page where the user explores the other pages, signup, services, and your products.
But Create a Landing Page will have all the information about your website or brand. It will lead the visitors to perform the specific action and that could be buying a product, joining in the email list, and more.
You can create more landing pages based on your paid advertising campaigns. In WordPress, lots of plugins are available for landing page creation. Now, we will see how to create the landing page on your website using the Elementor plugin.
Steps to Create a Landing Page on WordPress Website:
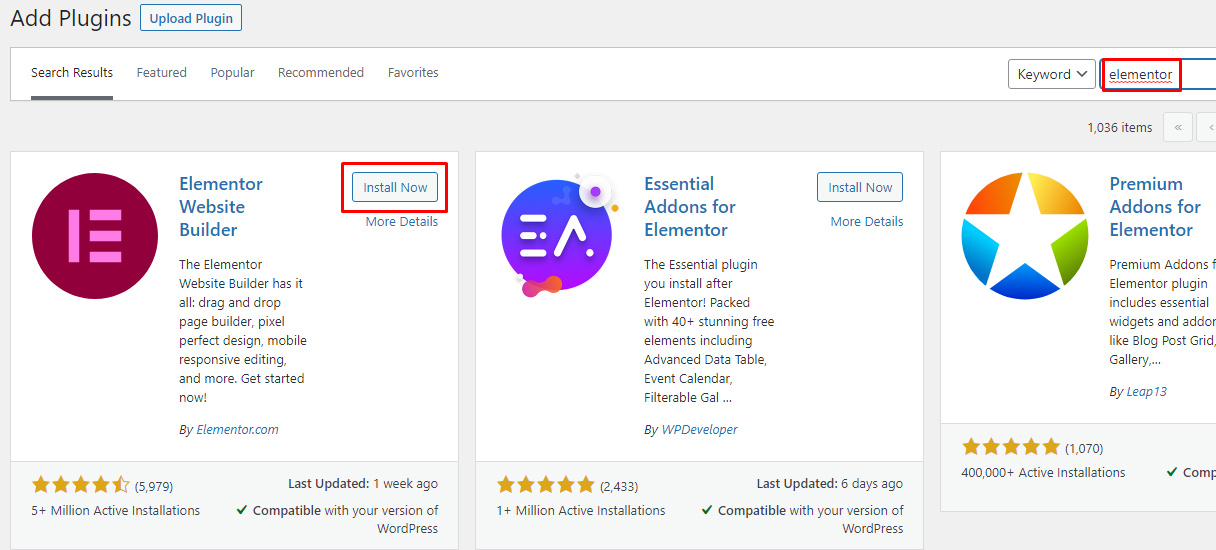
Step 1: Login to WordPress of the website and click “Add plugins” option on left side.
Step 2: Search the Plugin “Elementor” and click Install Now button. Then, Click Activate.
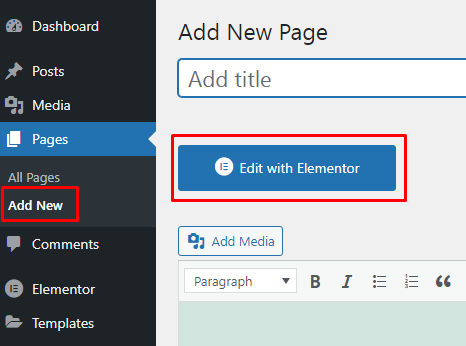
Step 3: After installing the plugin, Click on Pages -> Add new. Click the “Edit with Elementor” button to start the process with the Elementor.
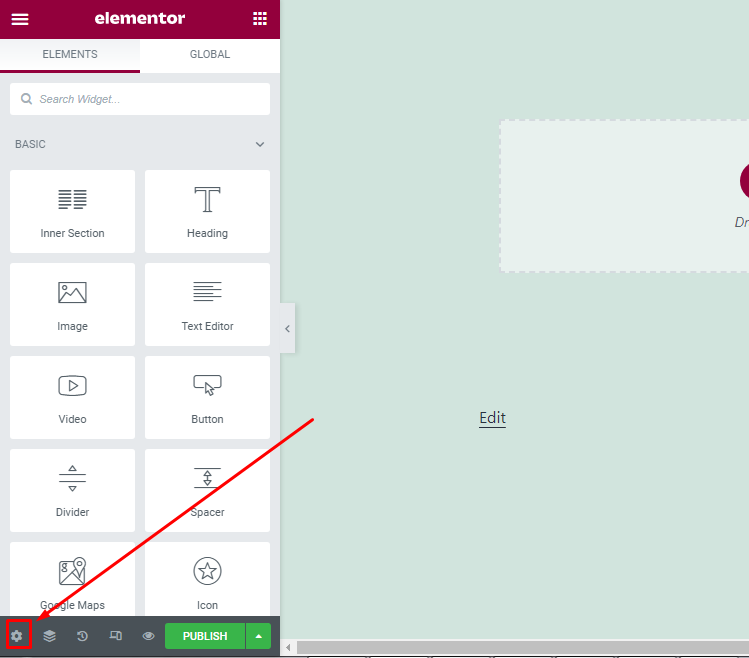
Step 4: Now Select your template which will be redirected to the Elementor interface. Inside the Elementor interface, click the “Settings” button.
Step 5: Now select the Page layout as “Elementor canvas”.
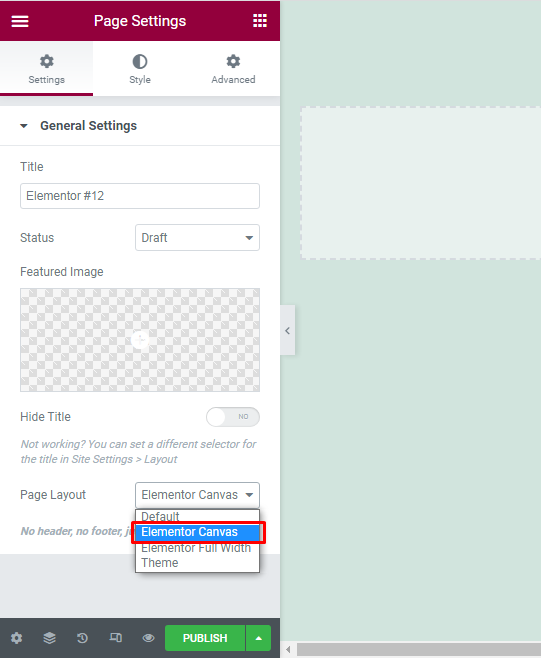
By selecting this option will give you the blank page and will remove all the extra elements, links, and navigation menus.
Step 6: Next, click the Folder icon to add elements to your website.
A pop window will open, there you can see the menus options like blocks, pages, my templates.
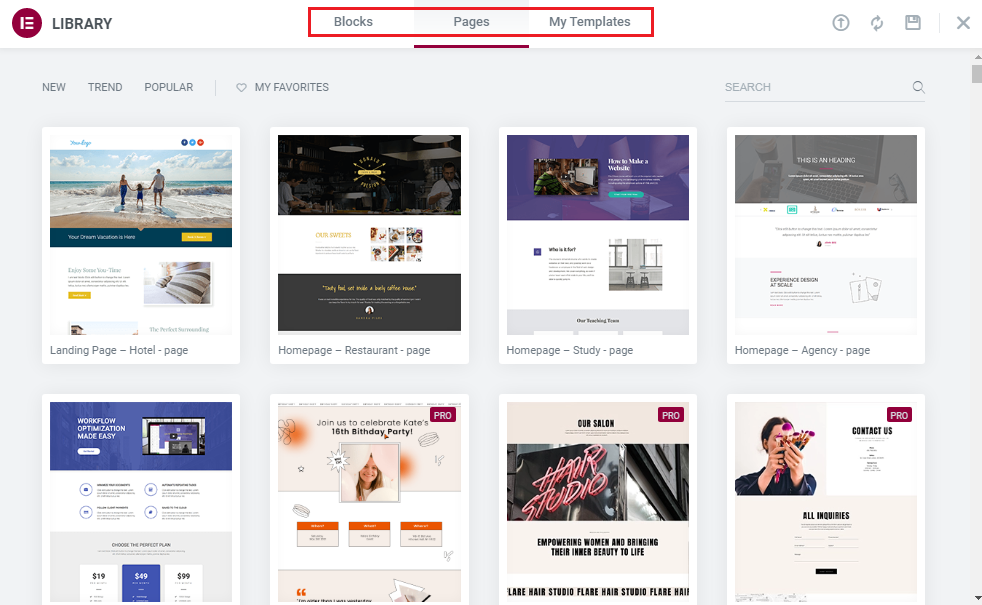
You can Create a Landing Page in two ways, either you can manually create every single block by dragging it or you can choose the pre-built template from here based on your website need.
Elementor has both free and paid templates, you can navigate to the search bar to find the template.
Step 7: Create a Landing Page manually
If you are a beginner, then we recommend you choose the pre-built template for your website, or else you can manually Create a Landing Page like below.
The first thing you have to select is the structure of the website by clicking the plus symbol(+). In Elementor you will get different options to select columns. The maximum you can select is up to six columns.
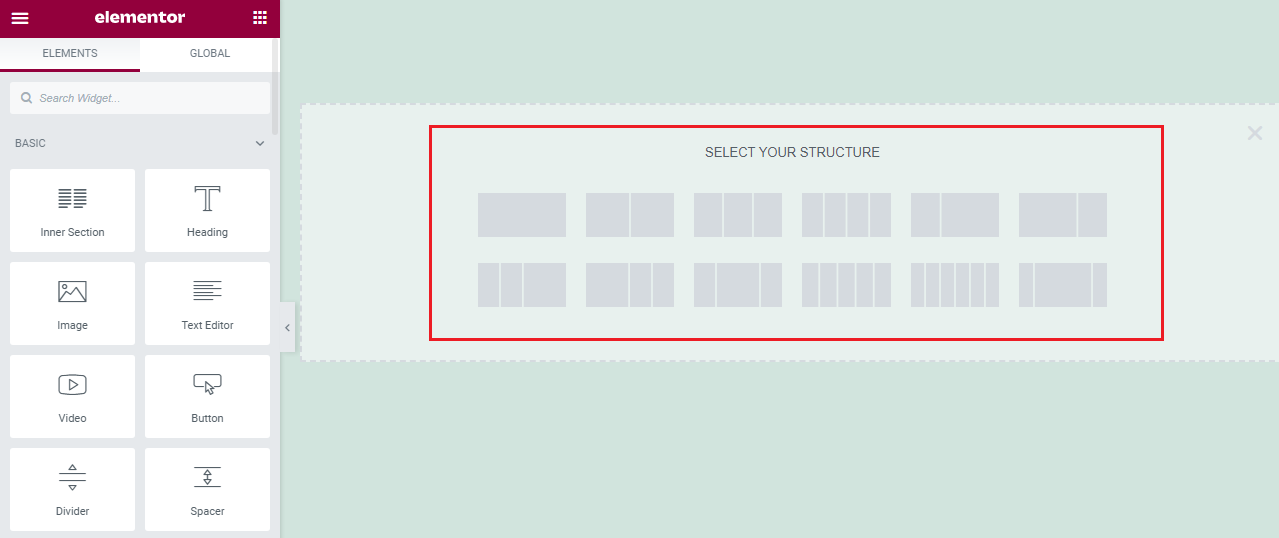
Step 8: Once you have selected the structure, next you can add the style and new elements to your landing page.
Elementor allows you to add many more elements for yourself. You can choose the different elements from the left side of the page under the elements section.
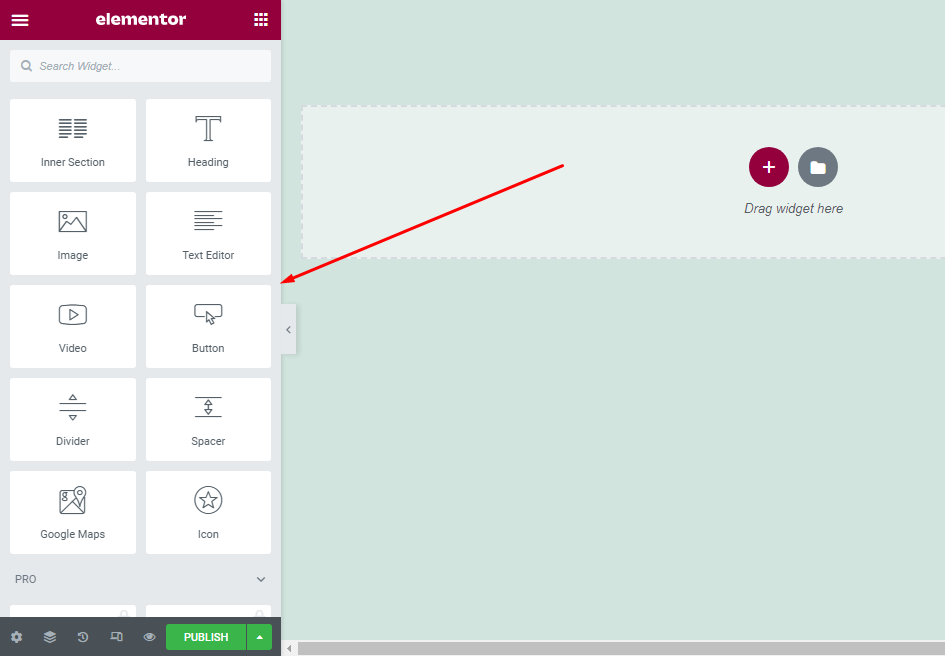
You can add background images, video, text elements, and much more. Create all the elements required for your landing page as per the website requirement. You can also add the how-to add the subscription form on your landing page using the MailChimp plugin.
If you want to enhance your WordPress Website, you can install best Elementor Addons for more customization of website.
That’s all, you have created your landing page and are ready to publish the page now. Landing pages are important to grow your business. So create landing pages that attract and increase sales on your business.