 SeekaHost.com Client Area
  SeekaHost.app
  SeekaHost.co.uk
  SeekaHost.in
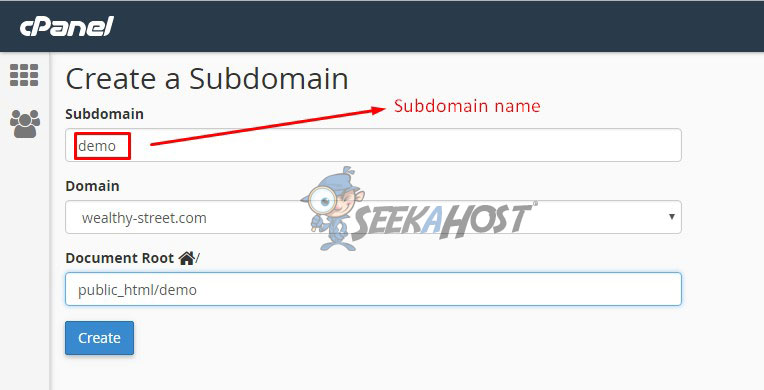
Step By Step Guide to Create a Subdomain in cPanel

Table of Contents
You can create a webpage individually for your contact, blog and article as separate website under your main website in cPanel. Just create a subdomain for your main website and upload the content.
Let’s guide you how to create a subdomain in cPanel in this article.
What is a Subdomain?
A subdomain is a domain name that is followed by the main domain. For Example: Seekahost.com is a domain and blog.seekahost.com is a subdomain.
How to Create a Subdomain in cPanel?
In cPanel it is very simple and easy steps to create the subdomain. Just follow the below steps to create a subdomain in your account.
- Login to your cPanel with your Account Details.
- After login, you will see an interface like below. Sometimes it may vary just because of different themes.
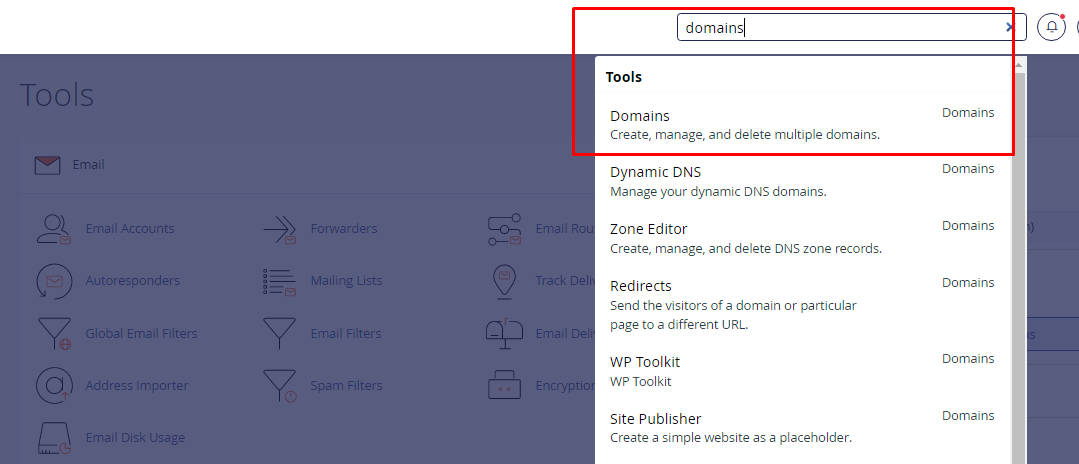
- In search, type “domains“, then you will get the results as shown below.
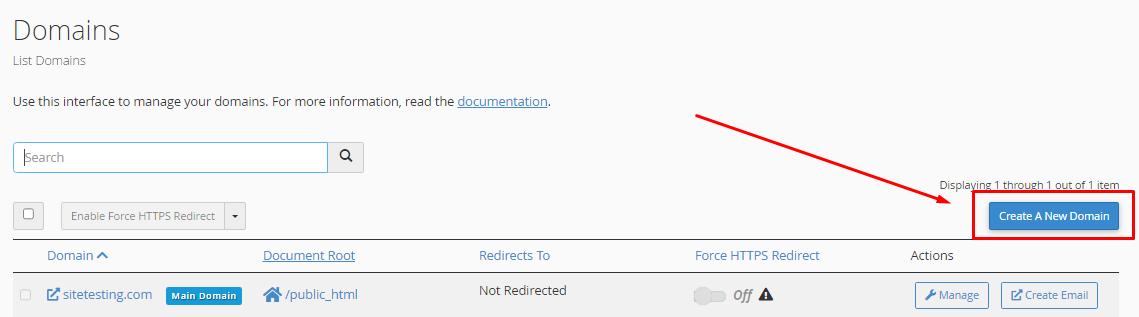
- Click on the Domains.
- Then you will be redirected to another page, where you can see the option to create a new domain.
- Just click the “Create a New Domain” and you will see an option as the below image. There enter your subdomain name in the provided box and just make a click inside the document root text box. For example: I have used the domain wealthystreet.com and created the subdomain “demo”.
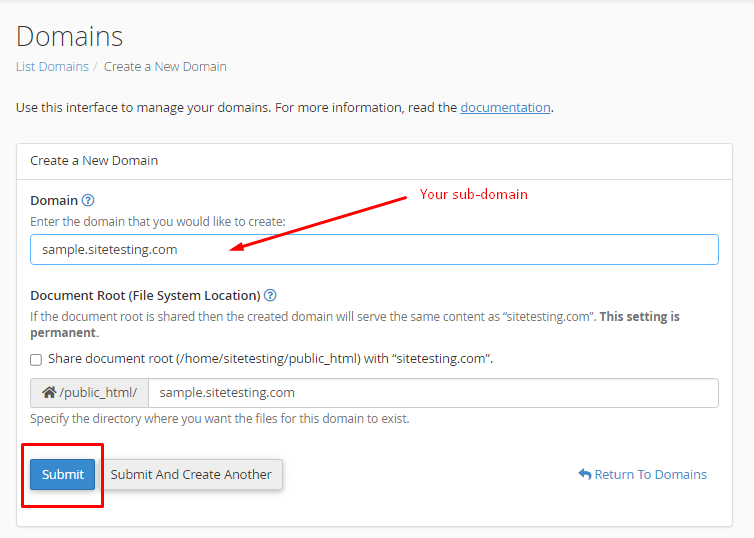
- Click on Submit. Then your Subdomain is created.
- To use the Subdomain, you must install CMS like WordPress.
Just follow the below steps to install WordPress and Use the subdomain.
- Go to cPanel, and search for Softaculous.
- Click on the Softaculous under software.
- In Softaculous, go to WordPress installation. For more refer step by step guide to make use of a click installer.
- Choose your subdomain and provide the needed details to install WordPress.
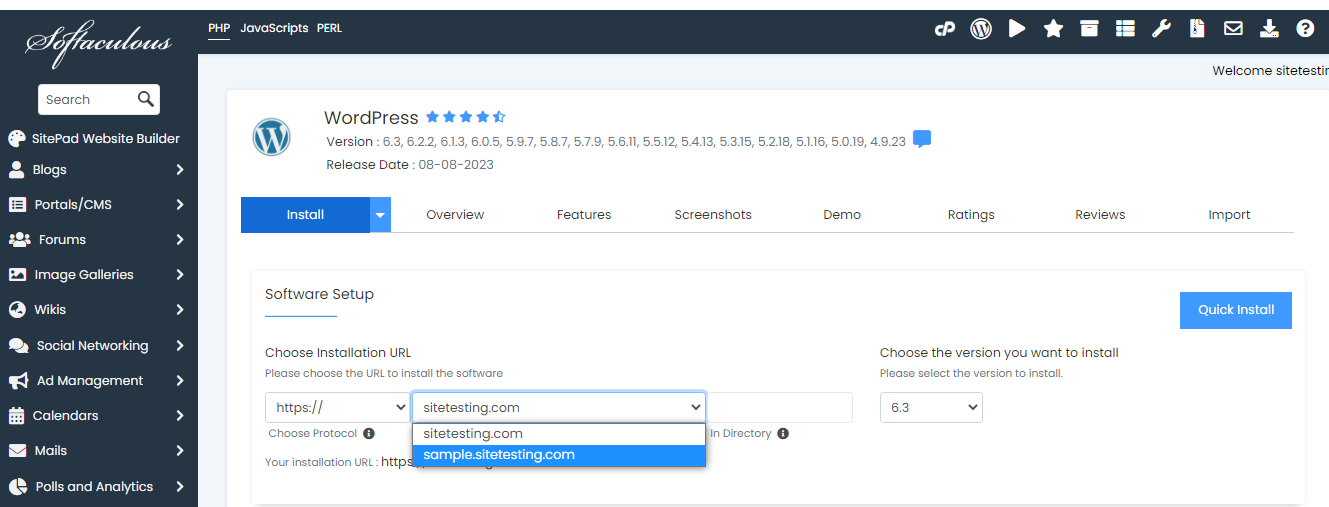
- Click on Submit. Once after the installation, your subdomain is ready to design and use.
- To check, go to cPanel and click on File Manager as shown below.
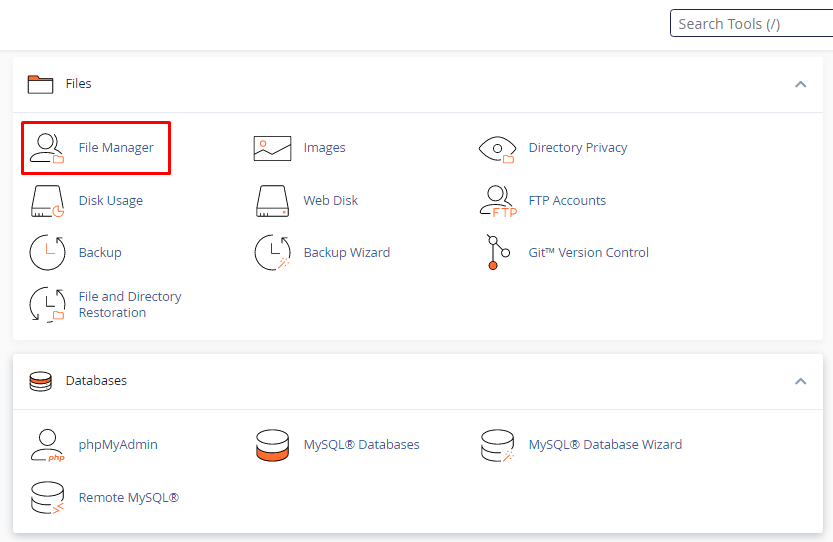
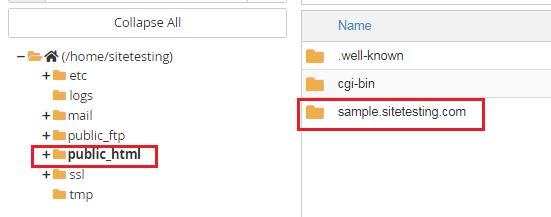
- In Filemanager, Click on public_html.
- Here you will see a folder in the name of your subdomain as shown in the below image.
- Finally, you have created a subdomain and it is ready to use it.
For more, Visit -> seekahost.com/blog