SeekaHost.com Client Area
  SeekaHost.app
  SeekaHost.co.uk
  SeekaHost.in
How to Create and Manage Email Account in cPanel?

By Swetha
Creating and managing an email account in cPanel is a straightforward process that allows you to set up personalized email addresses associated with your domain. With cPanel’s user-friendly interface, you can efficiently manage your email accounts, passwords, and other settings. In this article, we will walk you through the steps to create and manage email account in cPanel.
-
Create an Email Account
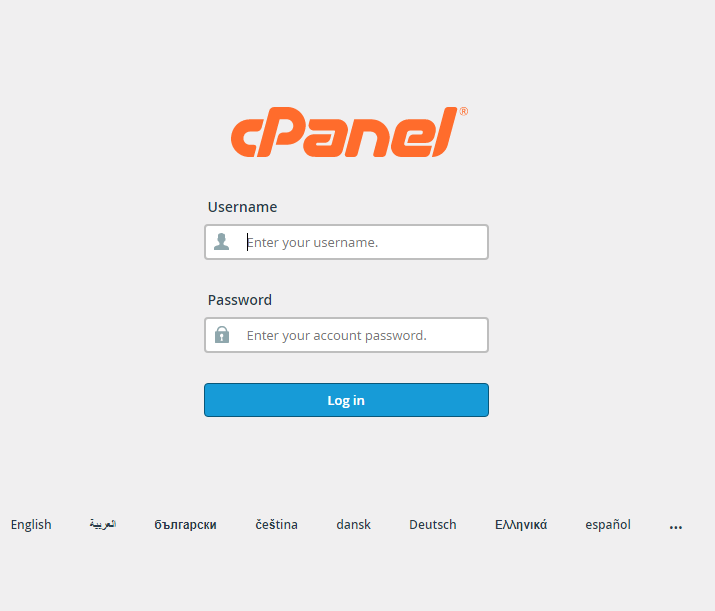
Step 1: Log in to your cPanel account with the URL “yourdomain.com/cpanel”
(Note: Replace the “yourdomain.com” with the actual domain)
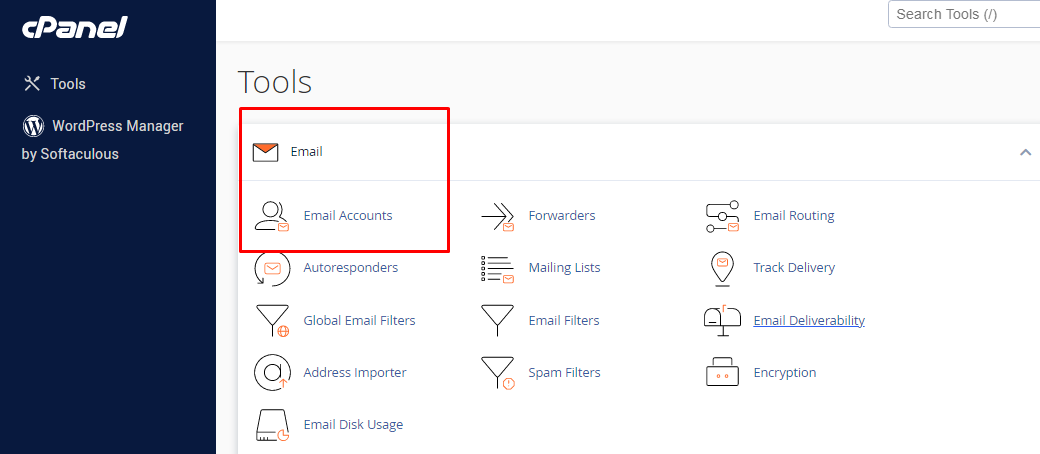
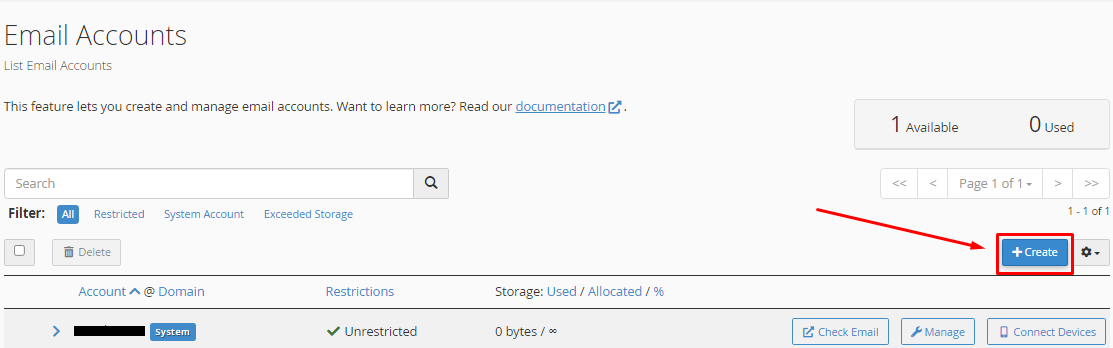
Step 2: Once logged in, navigate to the “Mail” section in cPanel.
Click on “Email Accounts.” This is where you’ll create and manage email accounts.
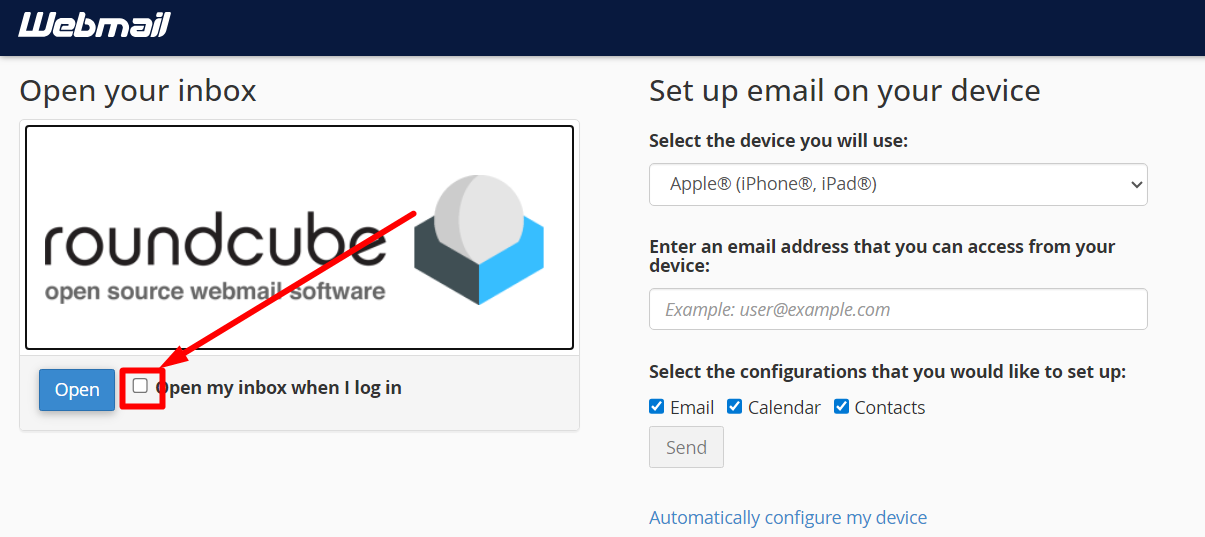
Step 3: Login to Webmail
Click “Check Email” to login to WordPress for the email account.
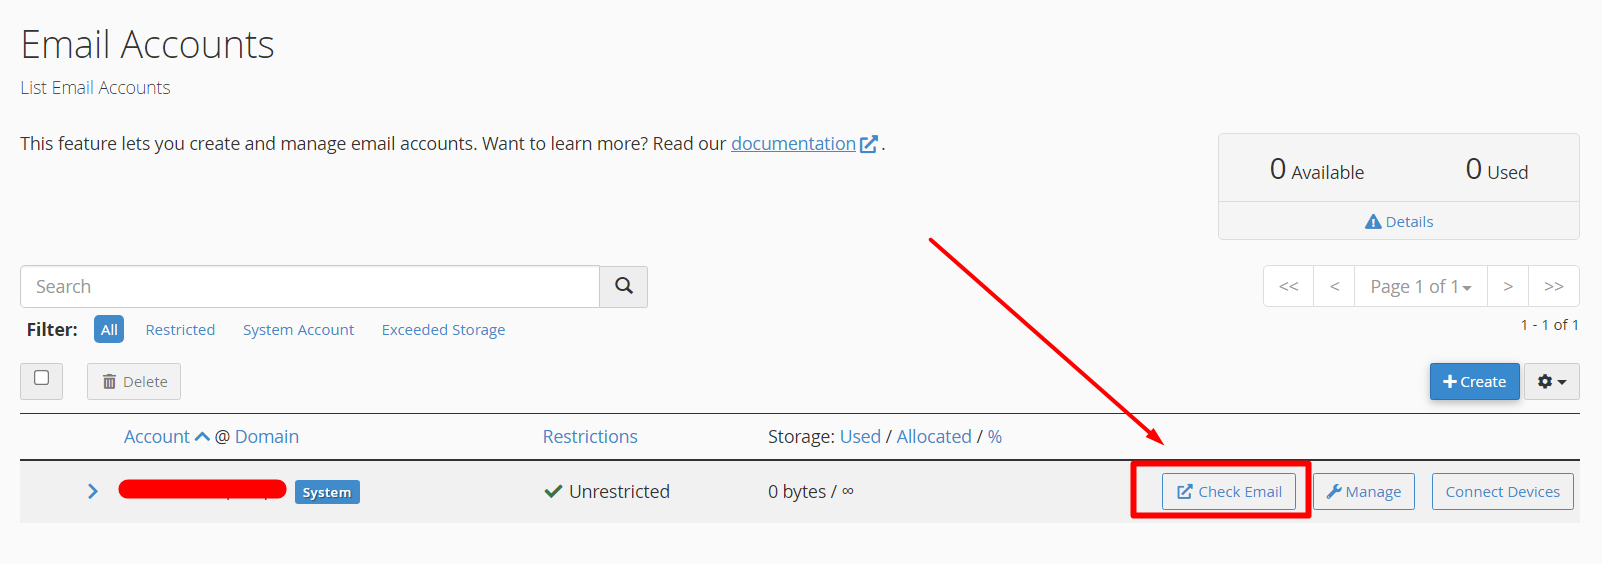
Then, click the checkbox near the open button and then click “Open” button to login webmail successfully.
Step 4: Add a new email account
If you would like to create email account, follow step 2 and On the right-hand side, you will see the option “create”, click on that.
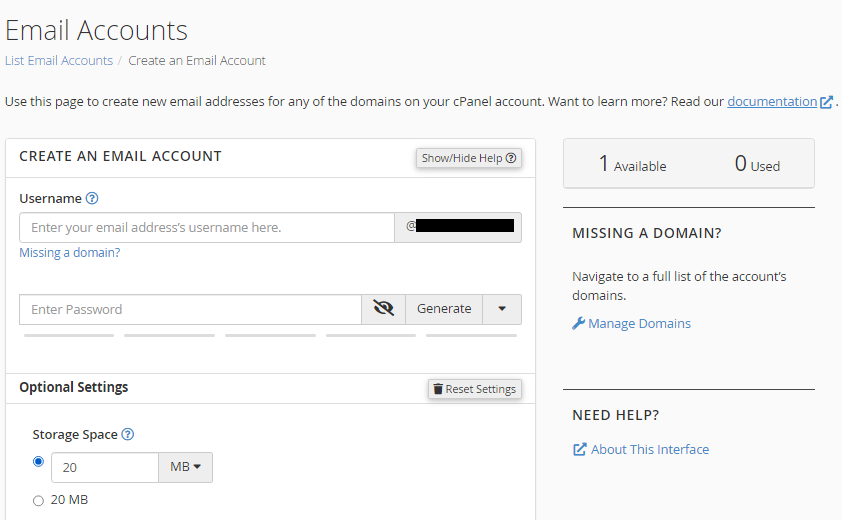
Step 5: A new window will open. There fill in the account details.
Choose the domain you want to associate with the email address from the drop-down menu and mention the username if you have multiple domains under this cPanel.
Or if is a single account, you can just enter the user name following your domain name.
Set a secure password for the email account. Aim for a strong combination of letters, numbers, and special characters to enhance security.
Next, click on optional settings – There adjust the mailbox quota if needed. This sets the maximum amount of storage space for the email account. You can enter the new quota limit or choose the default limit of 20MB.
Step 6: After filling in all the details, click on “Create” to finish the creation.

-
Managing Email Accounts
Now you have created a new email account and you can manage your email through the various option provided by the cPanel.
-
Access the mail account
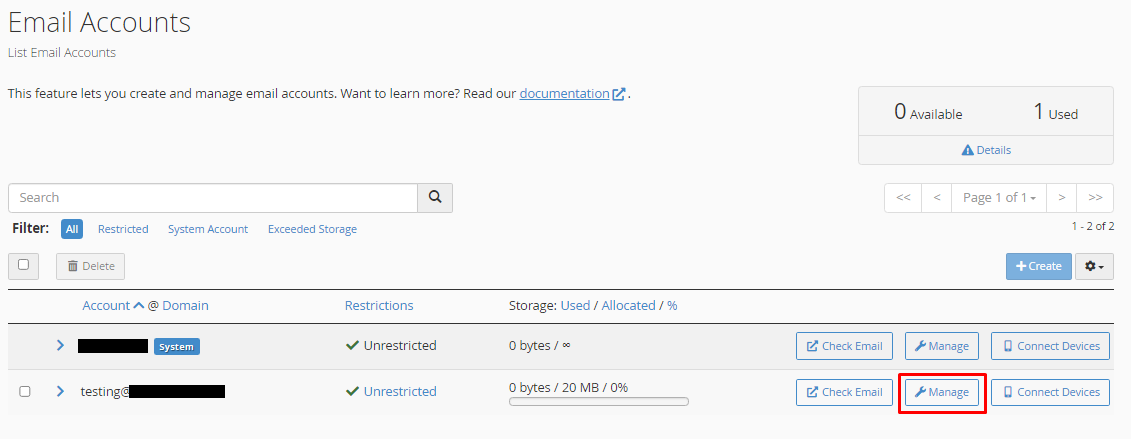
To access your email account, go back to the “Email Accounts” section in cPanel and there you will see your newly created account.
Click on “Check Email” next to the account you want to check.
It will redirect you to the Webmail inbox page.
You can also access cPanel webmail directly in the browser using one of the following links:
- https://yourdomain.com:2096
- https://yourdomain.com/webmail
- http://webmail.yourdomain.com
-
Changing Passwords
If you need to update the password for an email account, return to the “Email Accounts” section in cPanel.
Locate the account for which you want to change the password.
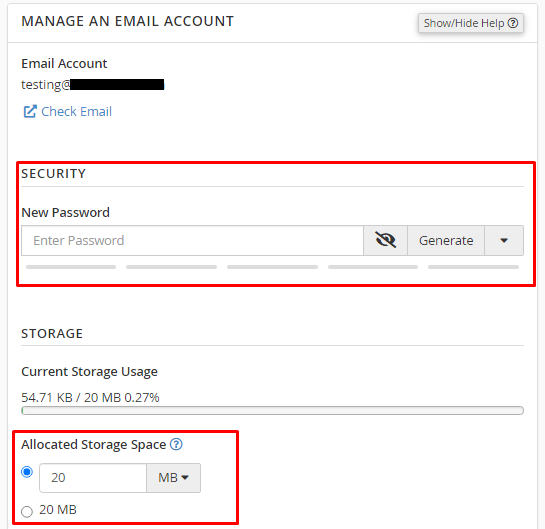
Click on the “Manage” button next to the account and then you will have the option to change your password under the “Security” field.
Enter the new password or click on the “generate” option to get the random password and confirm it.
If you want to set storage space for the email account, you can update the value within the default limit under “Allocated Storage Space” by entering the MB size you want.
-
Setting Mailbox Quotas
Click on the “Manage” button and then navigate to the “STORAGE” field. Enter the new quota limit or choose the default limit of 20MB.
Click “Update Email Settings” to save your above changes.

Find Email/IMAP/SMTP Settings:
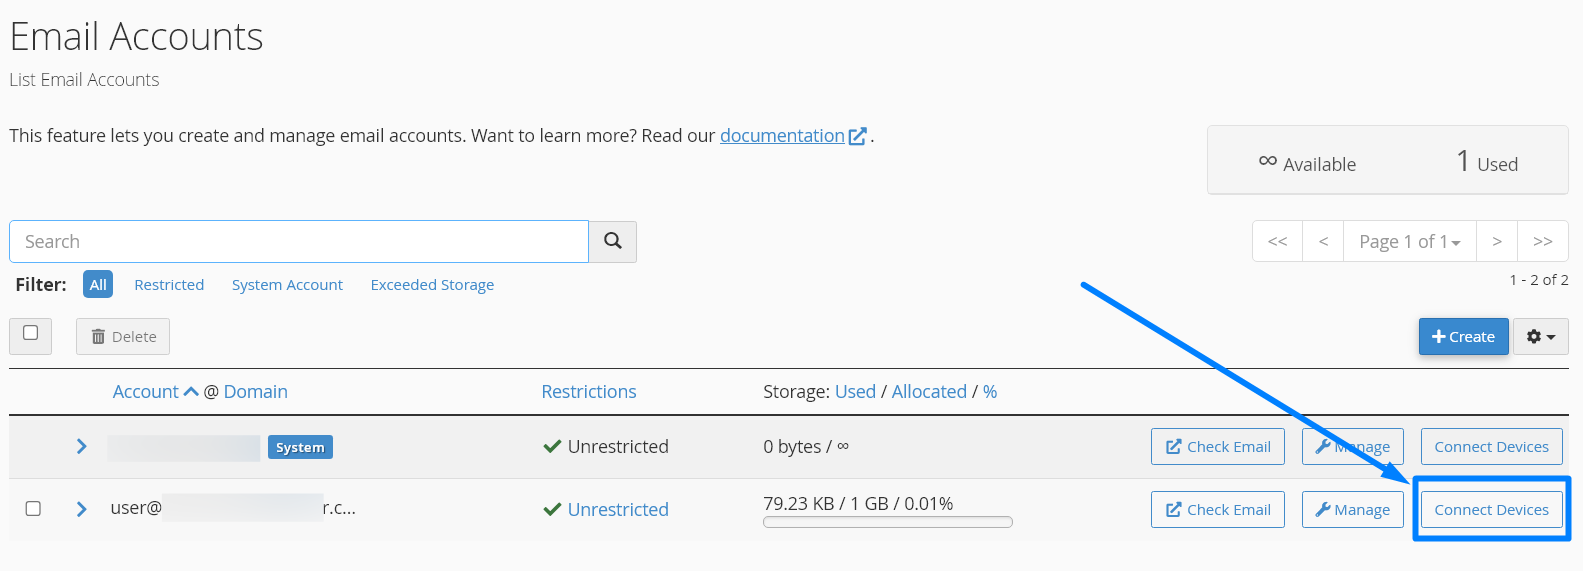
Step 1: Following from step 2 above, in the email account page, click “Connected Device” button.
Step 2: Under “Mail Client Manual Settings” section, you can find the email settings for secure connection if you have already installed ssl for the website. If not, you click “non ssl/tls setting” below and find their details with port number.
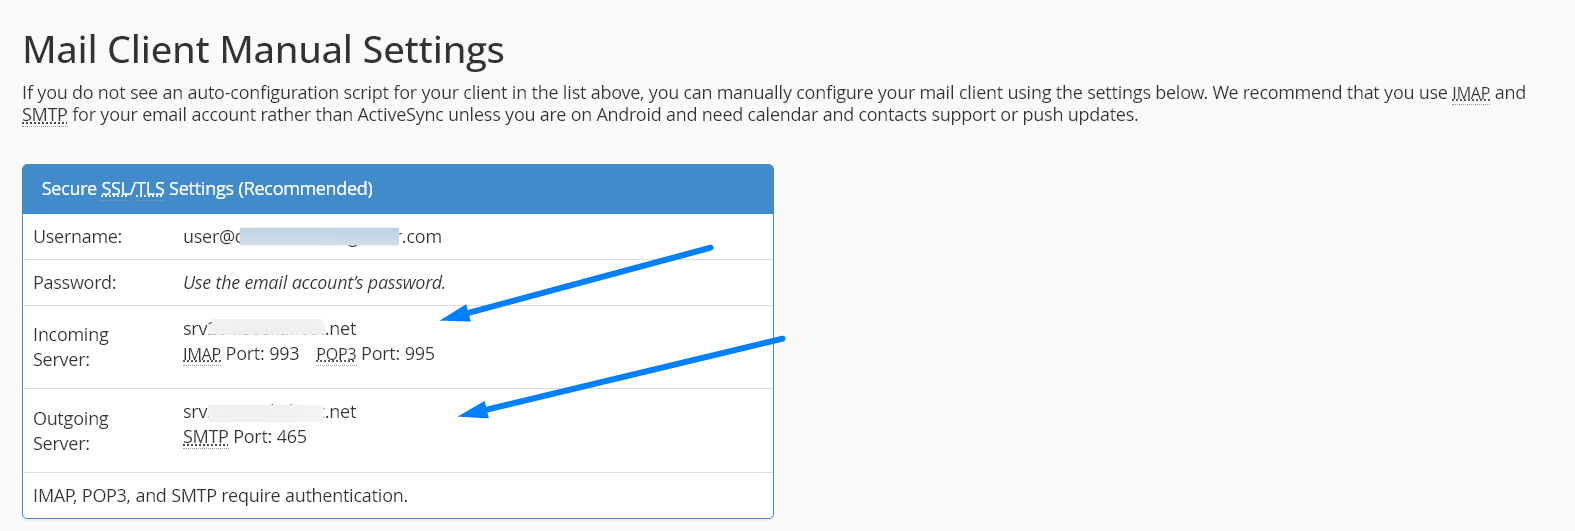
You can use this settings to configure in any third party service like gmail, outlook, etc to send and receive emails for the webmail from their services.
-
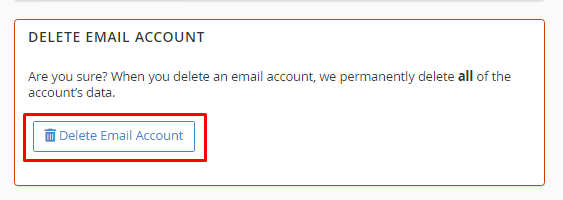
Deleting Email Accounts
If you want to remove an email account, go to the “Email Accounts” section in cPanel.
Find the account you wish to delete and click on the “Manage” button.
Scroll to the bottom of the page and click on the “Delete Email Account” button to confirm the deletion.