 SeekaHost.com Client Area
  SeekaHost.app
  SeekaHost.co.uk
  SeekaHost.in
How to Create Staging Using Softaculous in cPanel – WordPress Website

By Aslam Saah
The core purpose of staging a website is for website development. A website will be staged (literally a copy of original version) to develop a new website by testing and solving the issue in the staging version and make it live to avoid false practice/bugs on original version. Website Staging environment will avoid such chaos and trouble to the developers. Here, we are about to share the steps for “How to Create Staging Environment Using Softaculous in CPanel” for a WordPress Website.
For A Precautionary Measure, kindly take complete backup of your website using a plugin or backup wizard option in cPanel of your convenient.
The method, I’m about to process has different way of keeping the backup alive. You will get to know when you’re following the steps below.
Though, I would highly recommend you to keep a separate full backup of your website before starting staging process.
Steps to Create Staging Environment Using Softaculous in cPanel For WordPress Website:
Here, i have dummy website in the name of asdf.co.uk. In your case, it will be the domain you would like to create staging environment.
1. Login to your cPanel and create a sub-domains through your cPanel.
– Here, I have named it as sub.staging.com.
– Initially, I will create a staging environment for staging-real and will not use it anymore. This will be my backup file. I will do all the changes only on staging.asdf.co.uk.

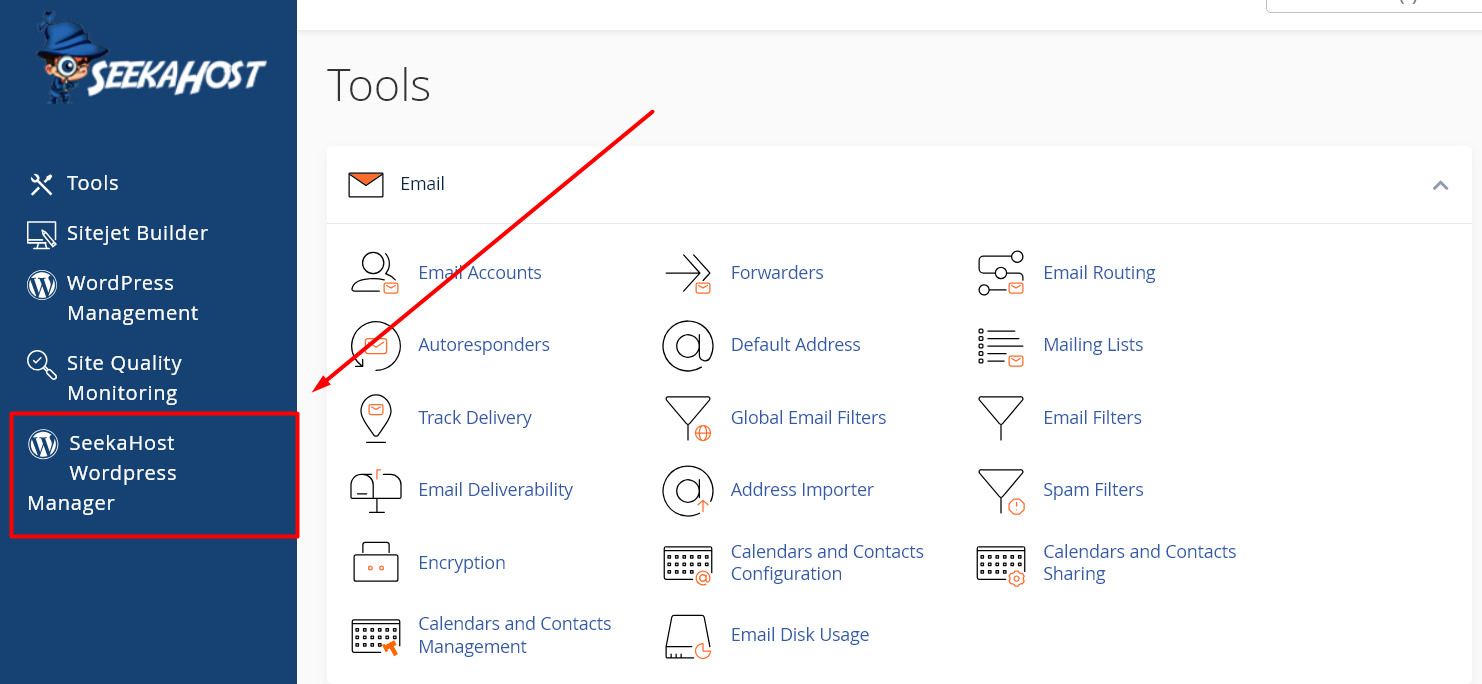
2. Click “SeekaHost WordPress Manager” on left side section.
3. Next, you will see all WordPress installations here. Click Down Arrow at last near the website name.
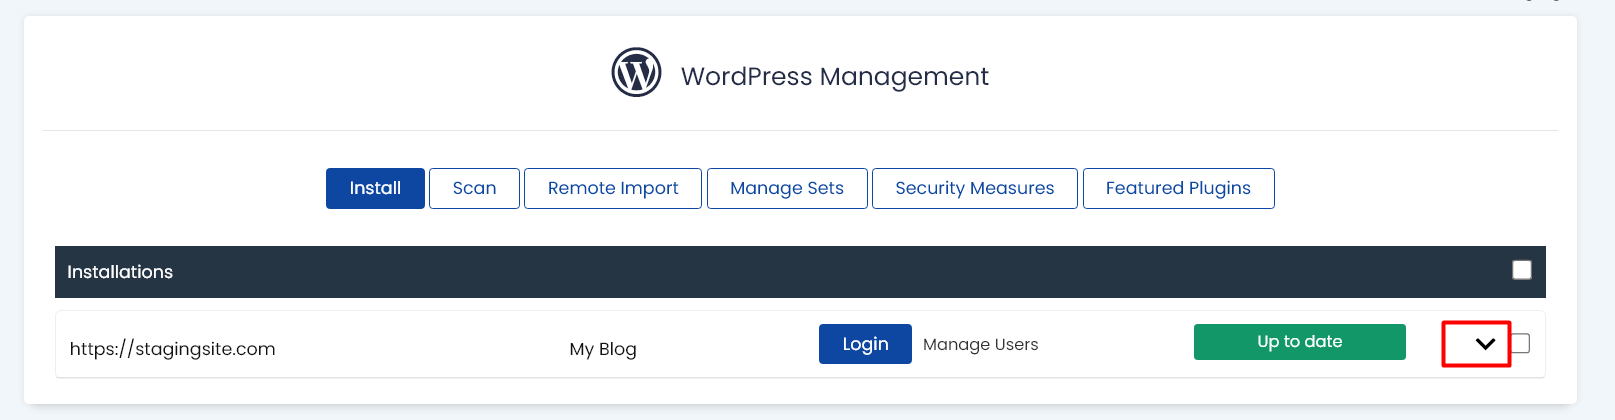
If not have any, install a new WordPress for your website.
4. Click on the “Staging” Option for the domain you would like to create staging environment,

5. Choose the subdomain from the dropdown.
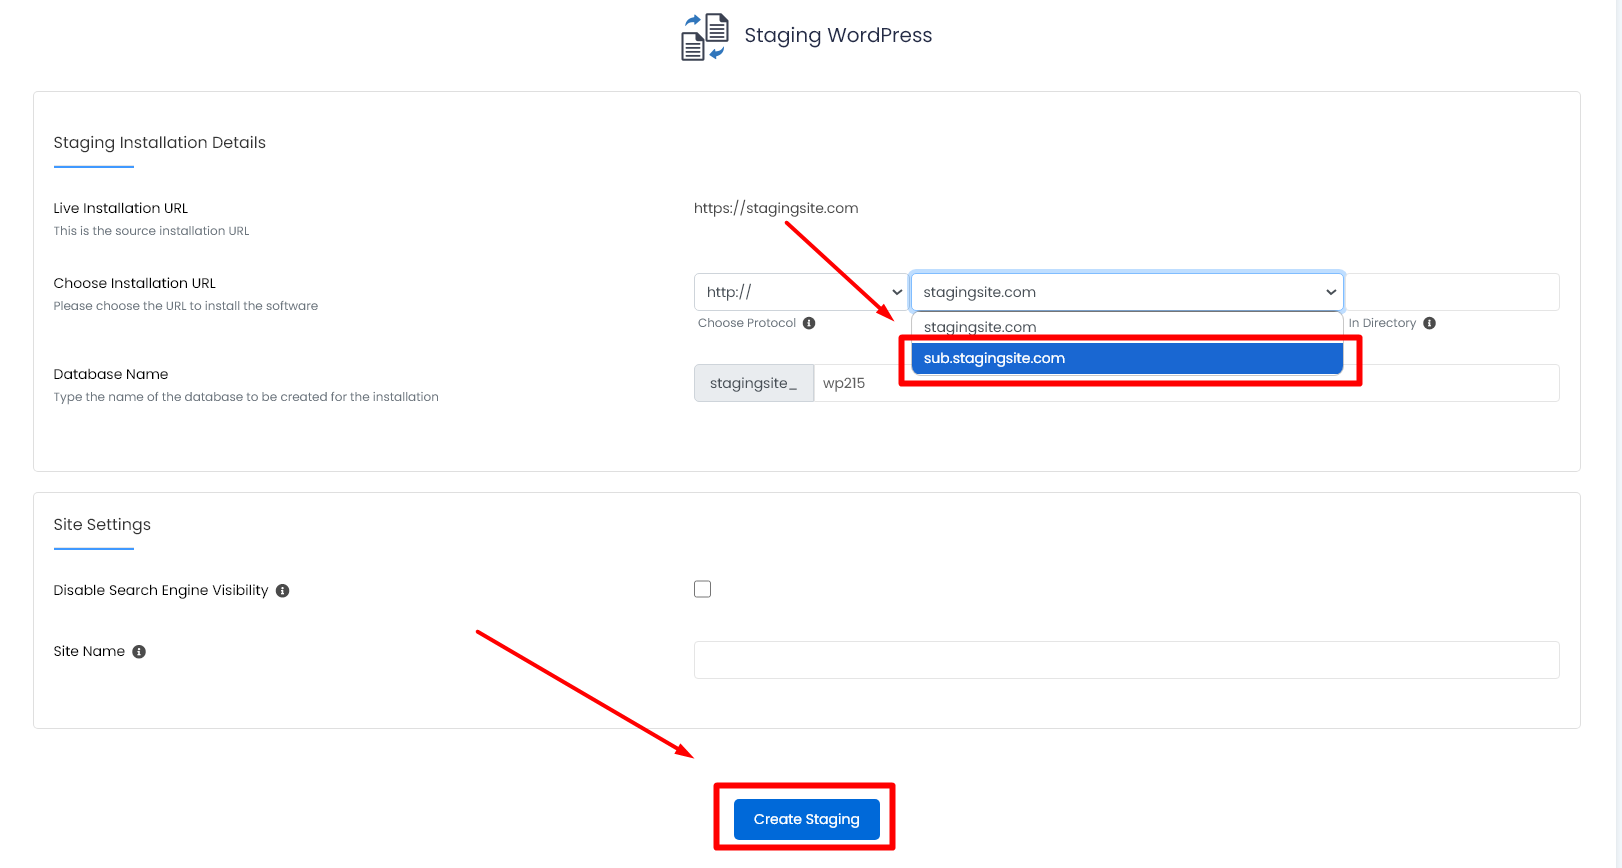
– In Choose Protocol keep it similar to your original website.
– Keep the “In directory” area empty.
– Click on create staging to process.
– As i have already said, sub.staging.com is my backup of the original verison, I won’t do anything on this sub-domain after this step.
6. After staging, you will see a screen with
“Congratulations, the staging was created successfully”.
Click on “WordPress Manager” icon on top and go back to Scripts Installations Section, you will see staging created.

7. Click again the ‘down arrow’ icon near the staging site name ‘sub.staging.com’ and click ‘push to live’ button. It will take you to the final page to make the site live on main website.

8. Once you click again ‘push to live’ button, the https://stagingsite.com.
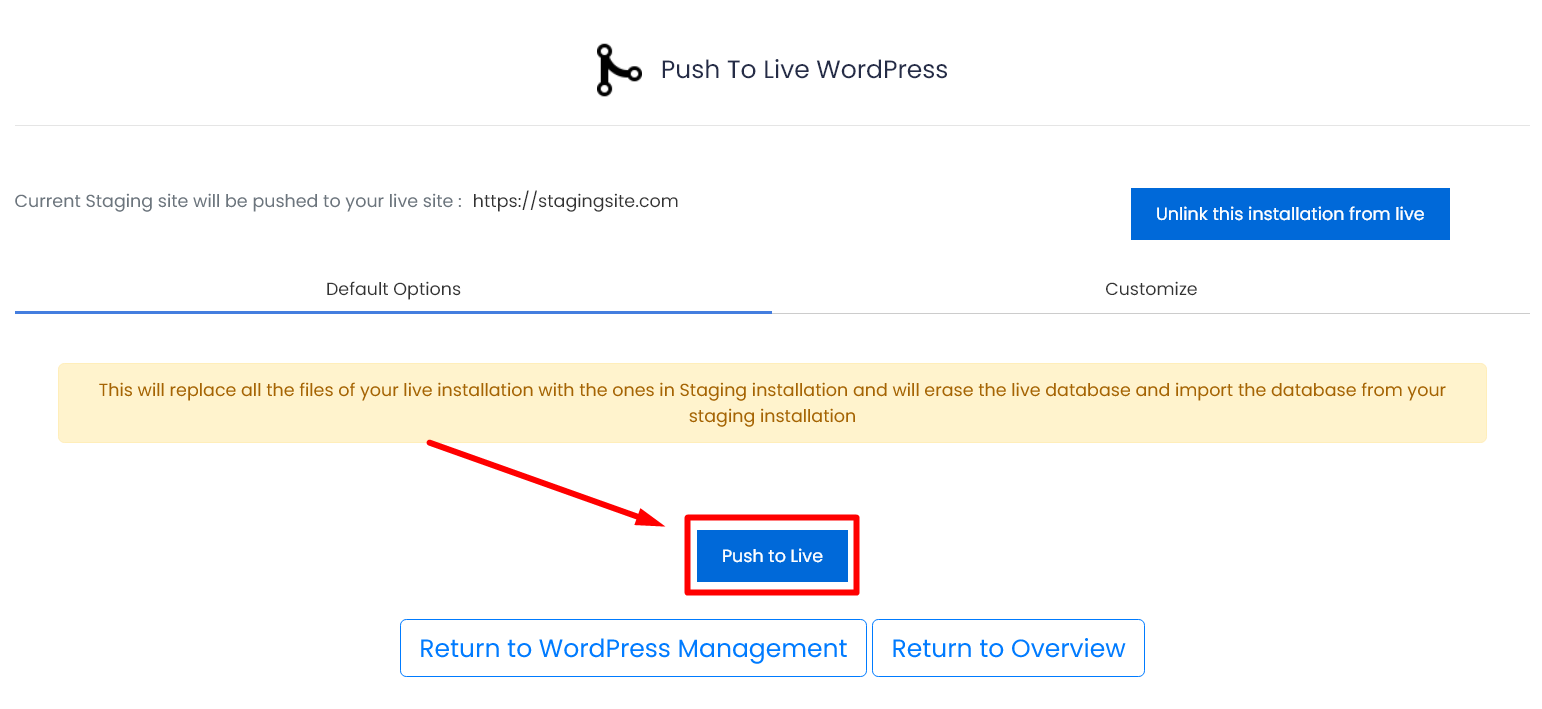
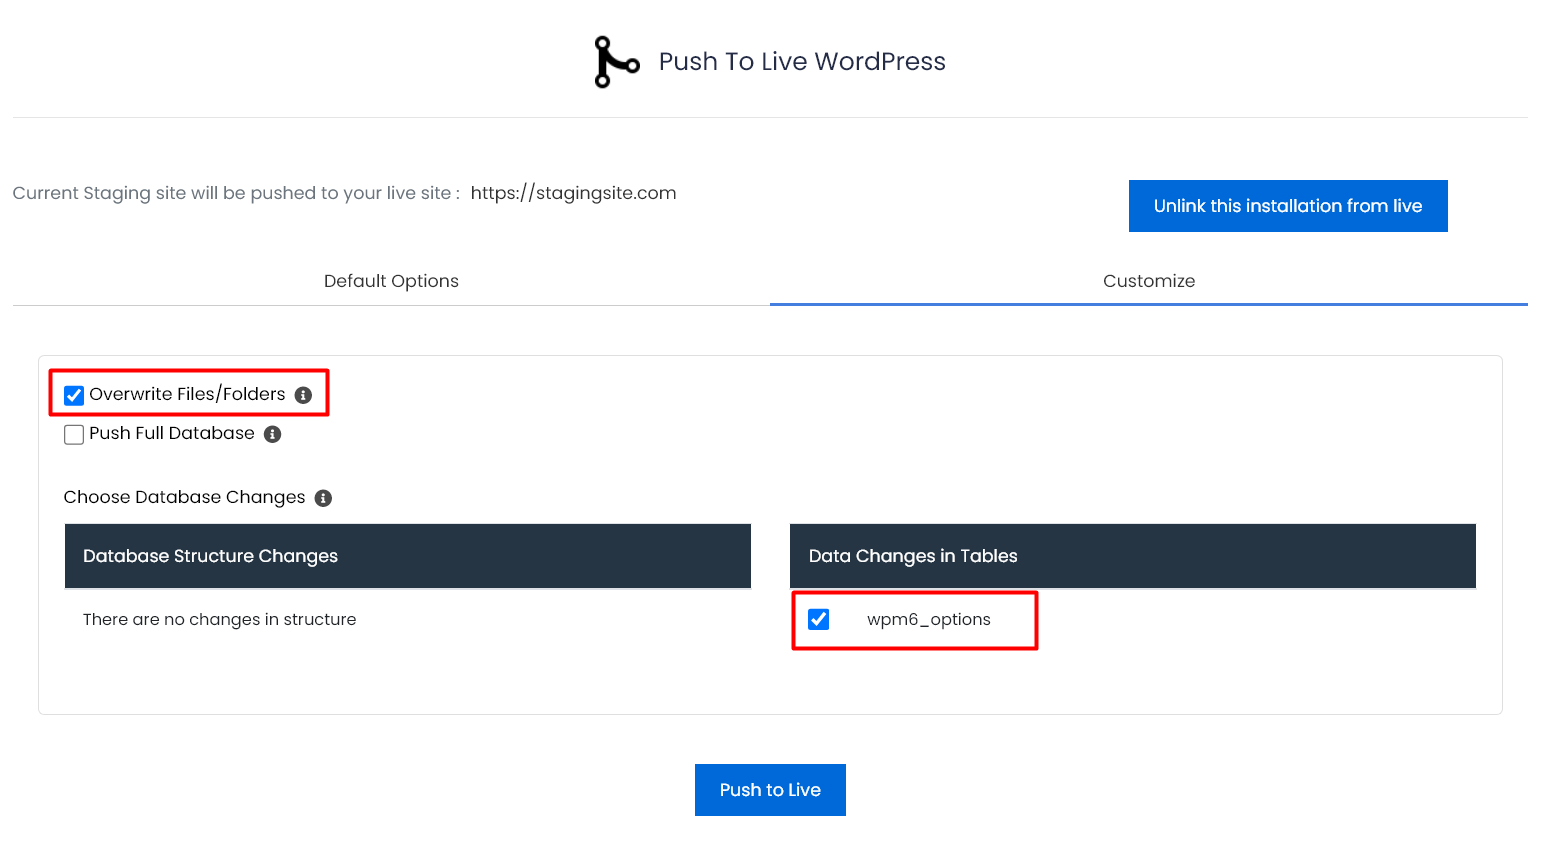
You can push to live with database or only files to replace on original site using the customize option.
If in case you have separate backup, you can revert back using that backup to your old version. Anyway, having a separate full backup of your website before processing everything for staging will be a safer move.
REMEMBER:
- WordPress Login Credentials will be same as your original version for all staging sub-domains.
- If you don’t want the staging sites to be indexed, make sure you have enabled “discourage search engines from indexing this site” in Settings -> Reading option in your WordPress dashboard.