 SeekaHost.com Client Area
  SeekaHost.app
  SeekaHost.co.uk
  SeekaHost.in
How to Update Private Nameservers in SeekaHost

By Robert Mills
Each domain registrar offers a distinct method or user interface to modify or update Private Nameservers. This informative guide will provide you with step-by-step instructions on how to edit or Update private nameservers in SeekaHost.
If you haven’t registered any domain, Register a new domain or purchase High-quality Expired Domain with.
1.Update Private Nameserver
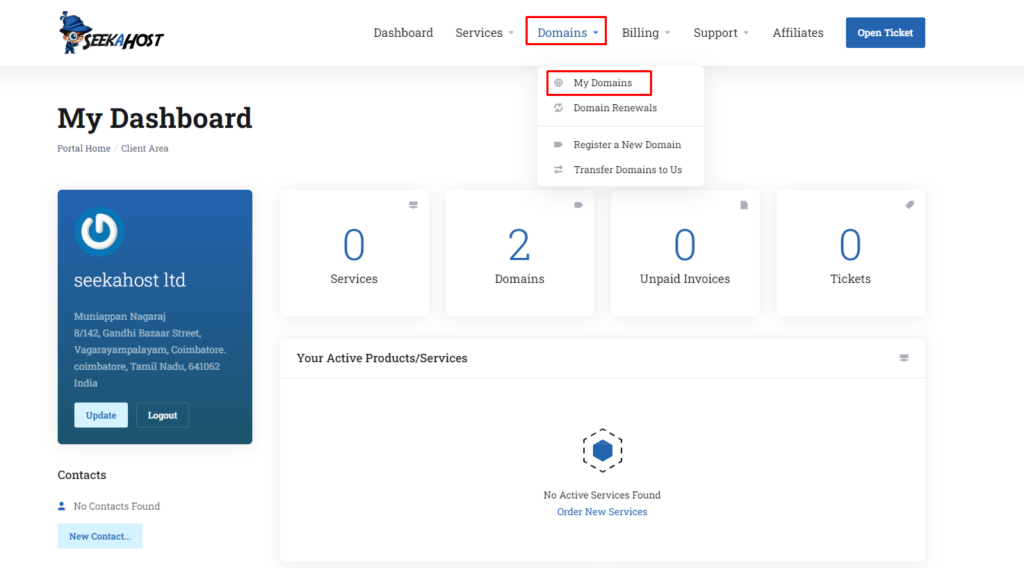
STEP 1: Login
Login to your SeekaHost account.
STEP 2: Domains
Click on ‘Domains’ and select the ‘My Domains’ option present in the list.
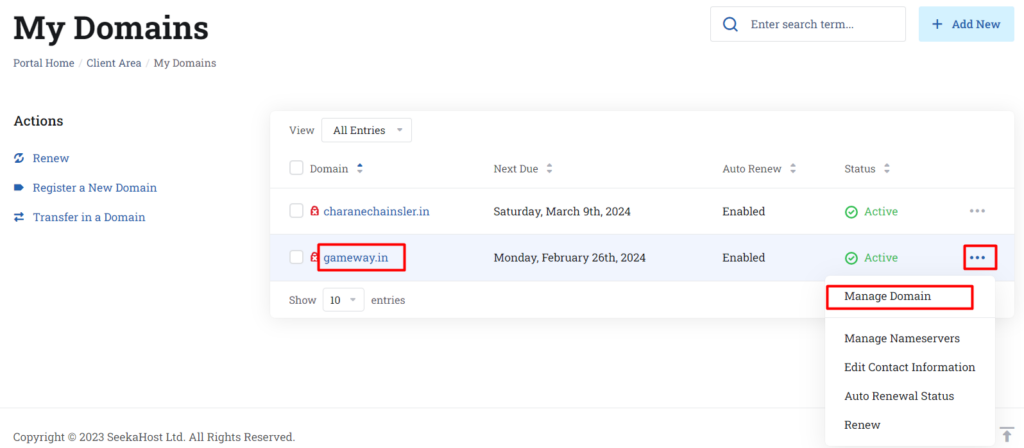
STEP 3: Choosing the domain
Now, select the specific domain for which you would like to update the private nameserver.
Here I chose my domain gameway.in to demonstrate how to update the nameserver details.
Just click the three dots and select ‘Manage Domain’.
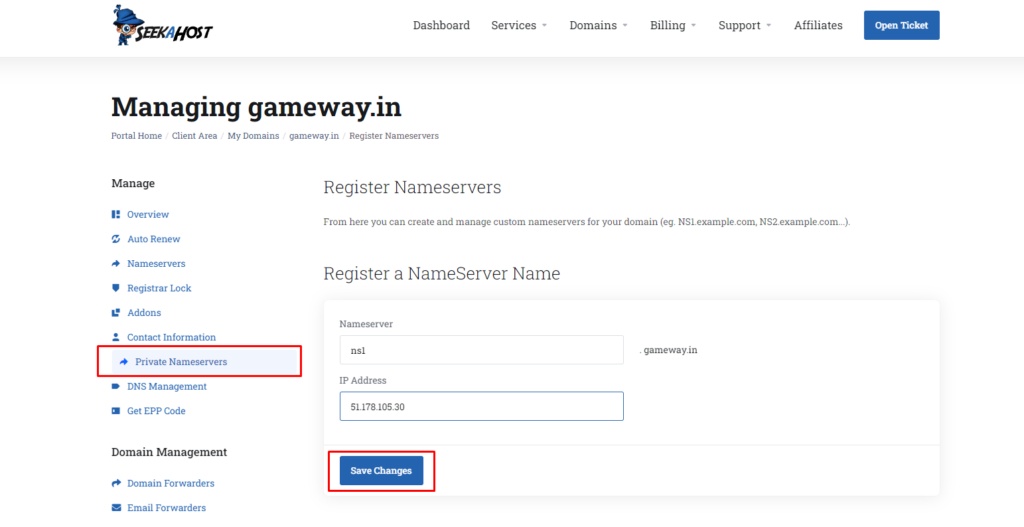
STEP 4: Update Private Nameservers
Select the Private Name Server option which is present on the left side.
Enter ns1 in the Nameserver box, IP in the IP address and click ‘Save Changes’. Similarly, repeat the same for ns 2. You can also modify, or delete the nameserver if in case you updated it with the wrong nameserver details.
STEP 5 : Updating Nameservers
Then, click on the Nameservers option and click ‘Use Custom Name Servers’ and enter the list of name servers in the given boxes and click on ‘Change Name Servers’.
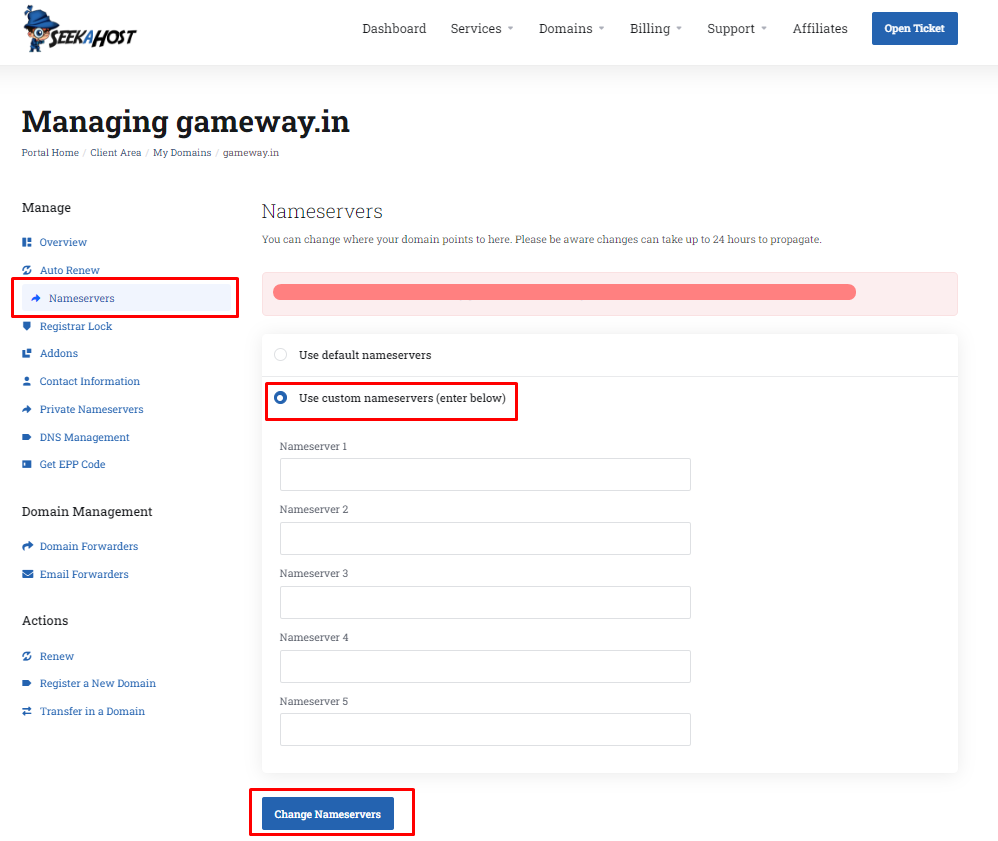
That’s all you have updated the private nameserver successfully!
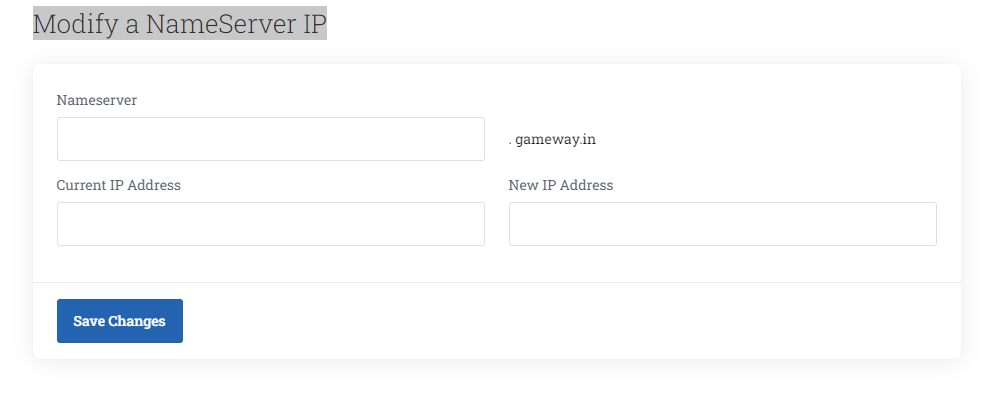
2. Modify Private Nameservers
To edit an already updated IP address for your nameservers, click modify the Nameserver IP Address and mention the name server, then the Current IP Address and New IP Address.
Click the on the save changes.
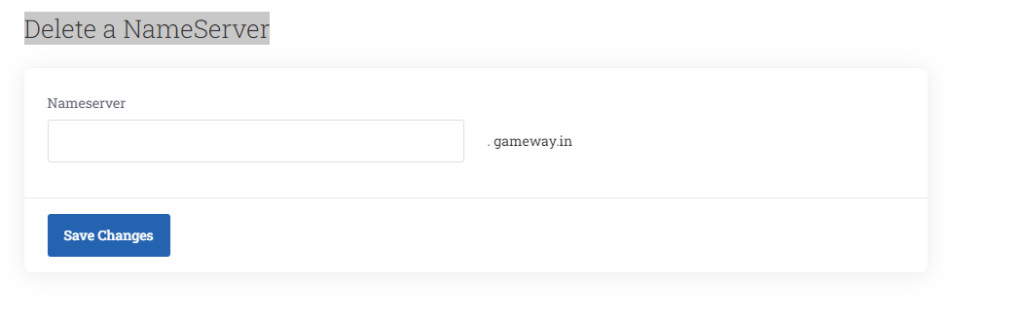
3. Delete a Private Nameservers
Enter ‘ns1’ in Nameservers and click the “Save Changes” to delete the ‘ns1’ name server for the domain.
Repeat the same process for the ‘ns2’ name server. Now, both your nameservers along with the IP record will be deleted. You can now update the new IP address for the domain in case you don’t know your old IP address to modify it.
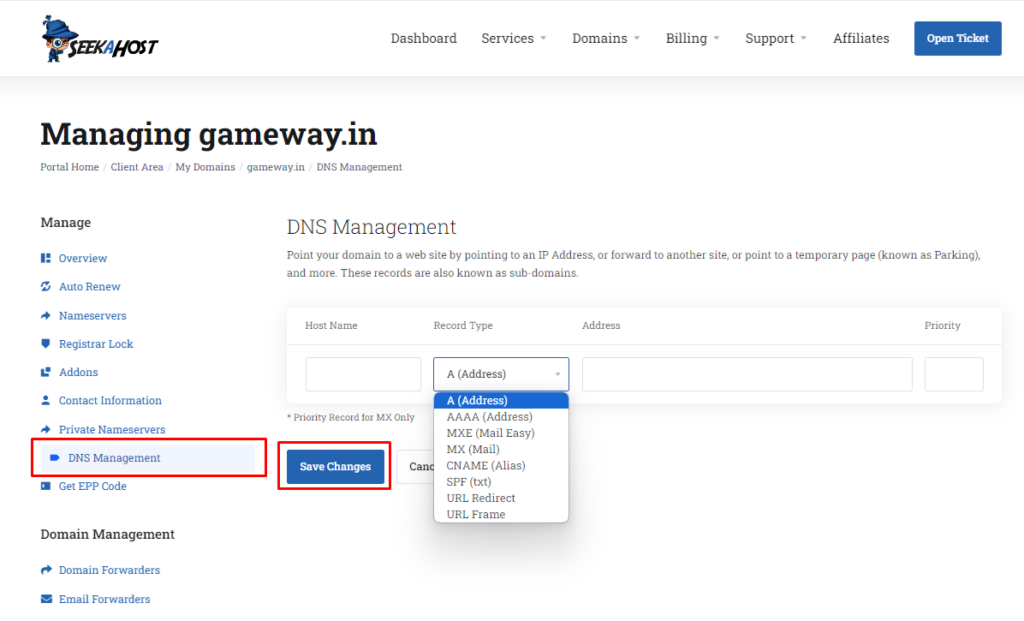
4. Update DNS Records in domain
If you want to update the DNS records for your domain, Click the nameserver option then Set the Nameserver to default nameservers of the domain as below,
ns1.systemdns.com
ns2.systemdns.com
ns3.systemdns.com
Remember, changes in the DNS Management will only propagate after completing this step.
Then click the DNS Management option.
Here choose the respective record type and update the received Hostname, Address and a priority value if any. If the hostname is the domain name, leave it empty which will automatically take the domain name.
Update all the record type and its value one by one and click on ‘Save Changes’.
You can check the propagation completion in the DNS Checker -> whatsmydns.net
Note: The DNS propagation is the time frame it takes for DNS changes to be updated across the Internet, DNS propagation takes 24-48 hours