 SeekaHost.com Client Area
  SeekaHost.app
  SeekaHost.co.uk
  SeekaHost.in
How To Update Private Name Servers In Porkbun?

By Aslam Saah
Table of Contents
If you have purchased domains from Porkbun, then you have to update the name servers in the domain registrar (Porkbun). In this article, we have guided you the steps to update the name servers in Porkbun.
STEP 1: Login
Firstly, log in to your Porkbun account.
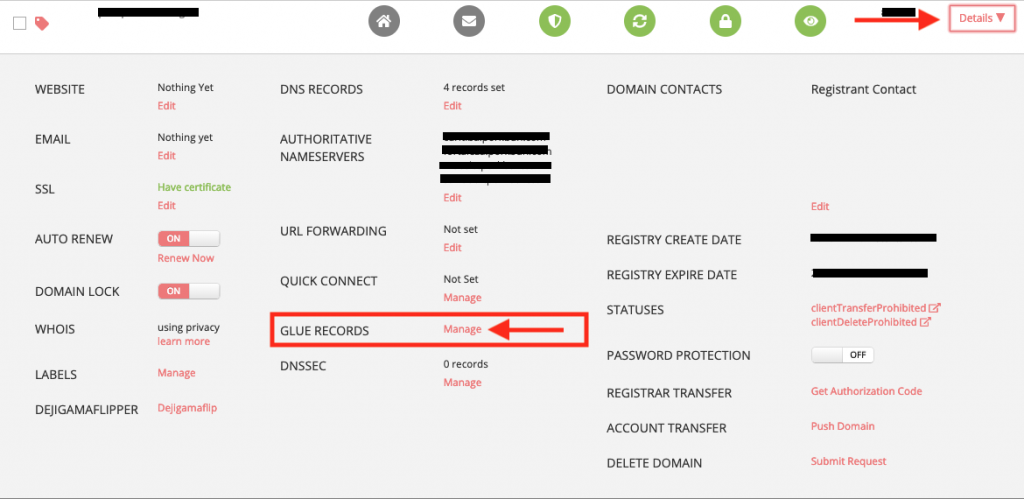
STEP 2: Manage Link
In the ‘Domain Management’ page, click on ‘Details’ for the domain you want to update the name server. Now, click on ‘Manage Link’ which is near to ‘Glue Records’.
STEP 3: Registering Name servers
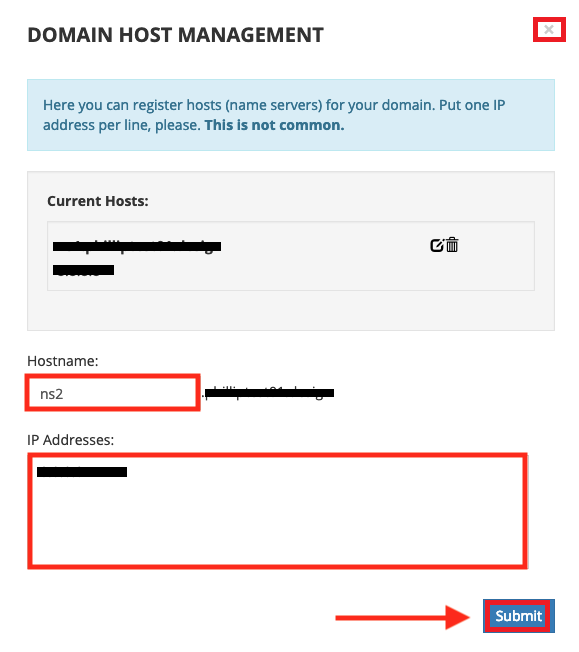
Enter the name servers (ns1, ns2) and its allocated IP address in the provided box. Then, click on ‘Submit’. The name server for the domain are registered now.
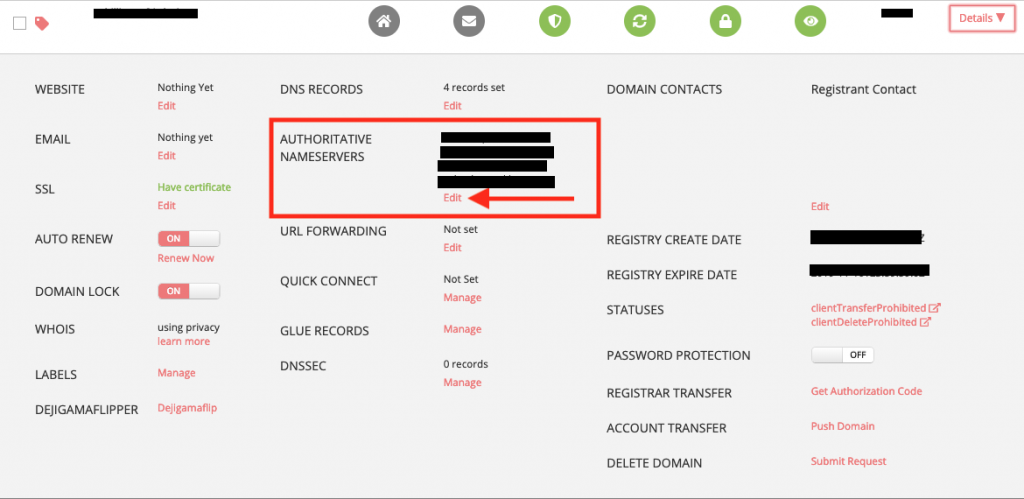
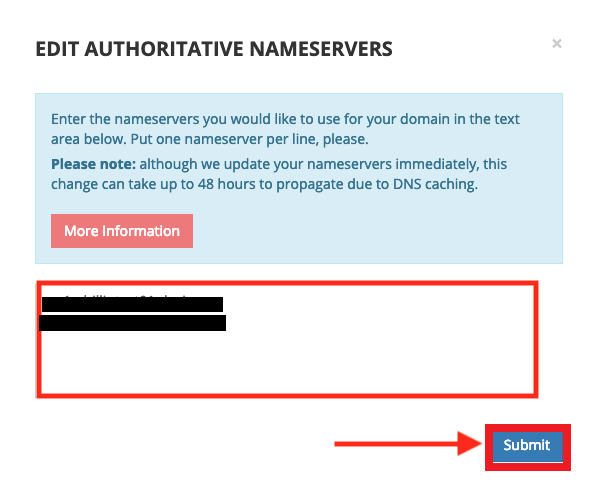
STEP 4: Authoritative Name servers
After that, click on ‘Edit’ option which is present in the ‘Authoritative Name servers’ section.
STEP 5: Updating Name servers
There, enter the registered name servers of the domain and click on ‘Submit’.
Now, you have updated nameservers in Porkbun. These are the steps should be followed for updating the nameservers in Porkbun.
[Tweet “How To Update Name Servers In Porkbun?”]
If you like to know more about the Private Name server and why it’s used on domains hosted under PBN Hosting package, contact our Live Chat Support or mail to support@seekahost.com for more details.