 SeekaHost.com Client Area
  SeekaHost.app
  SeekaHost.co.uk
  SeekaHost.in
How to Upgrade or Change the PBN Hosting Plan in SeekaHost

By Aravind
SeekaHost PBN Hosting has been offering the best services at the cheapest prices. We provide you with different class IPs so that you get natural IP profiles for your blog networks. You will get a unique DNS for each of your domains. You also get a free HTTPS set up with our free SSL certification. So, your domains are secured and gain more trust from Google and on any search engine.
Our Unique IP is also coming from multiple locations which gives you the unique look & footprint less setup. Currently, our IPs are diversified from 13 different countries.
In this article, we are going to see How to Upgrade or Increase the PBN Hosting Package from your current Package.
Important Information:
1. Before upgrading, please cancel your subscription (auto-payment enabled) or contact our support team to prevent payment conflicts or overpayment for the package.
2. If you have any additional disk space added for your websites (PBN/SEO Hosting), contact our support team to adjust the amount so you do not miss any amount.
Step 1:
Login to the SeekaHost Client area.
Step 2:
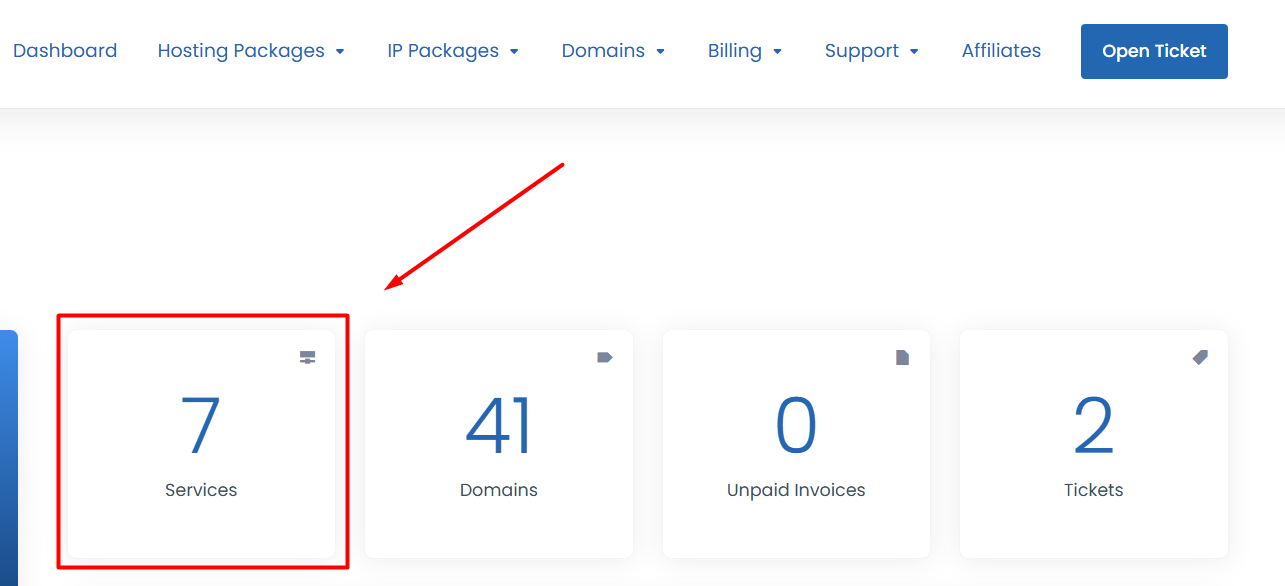
Click “Services” section in the admin dashboard.
Step 3:
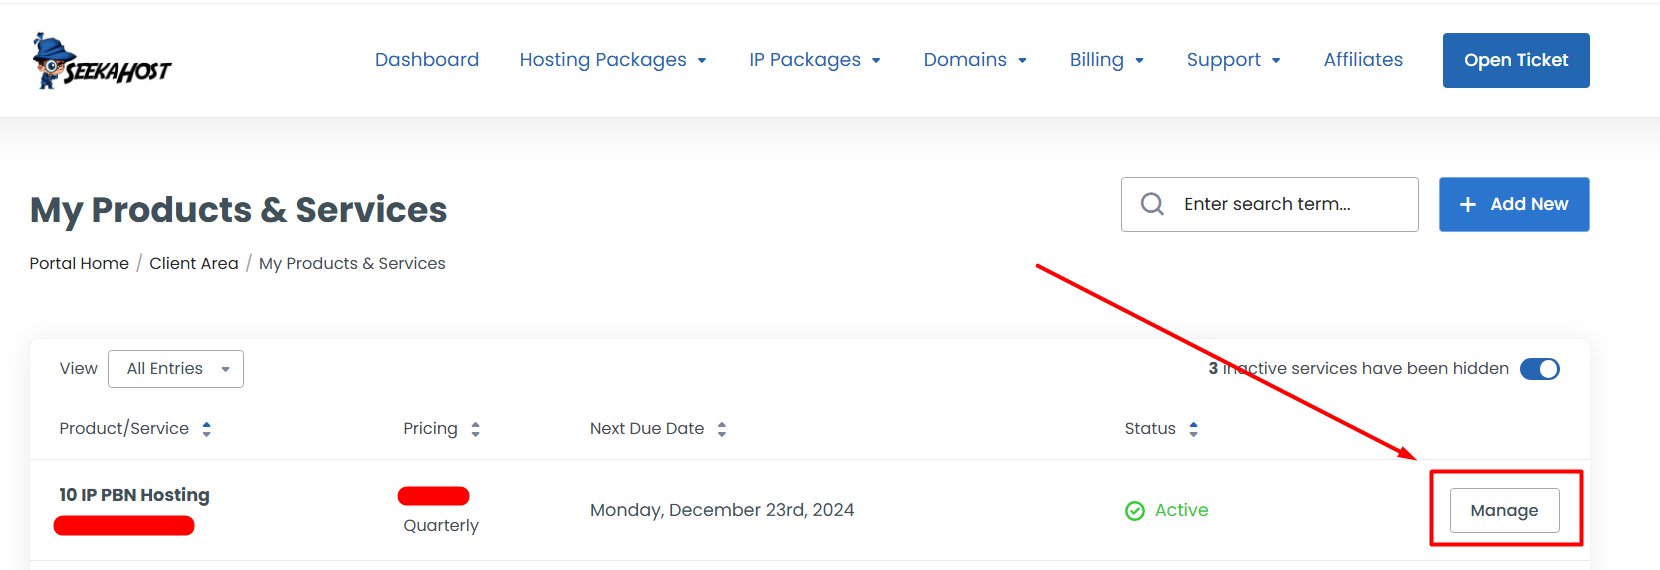
Under the My Product/Services, click “Manage” on particular product for which you want to upgrade.
Step 4:
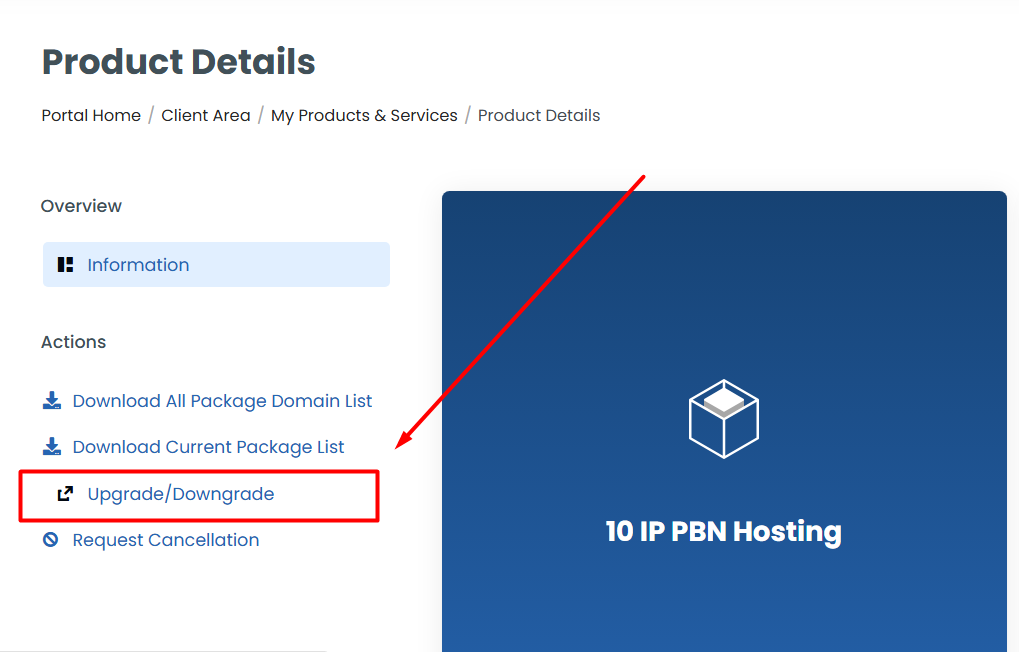
Click on the Upgrade/Downgrade option which is on the left side.
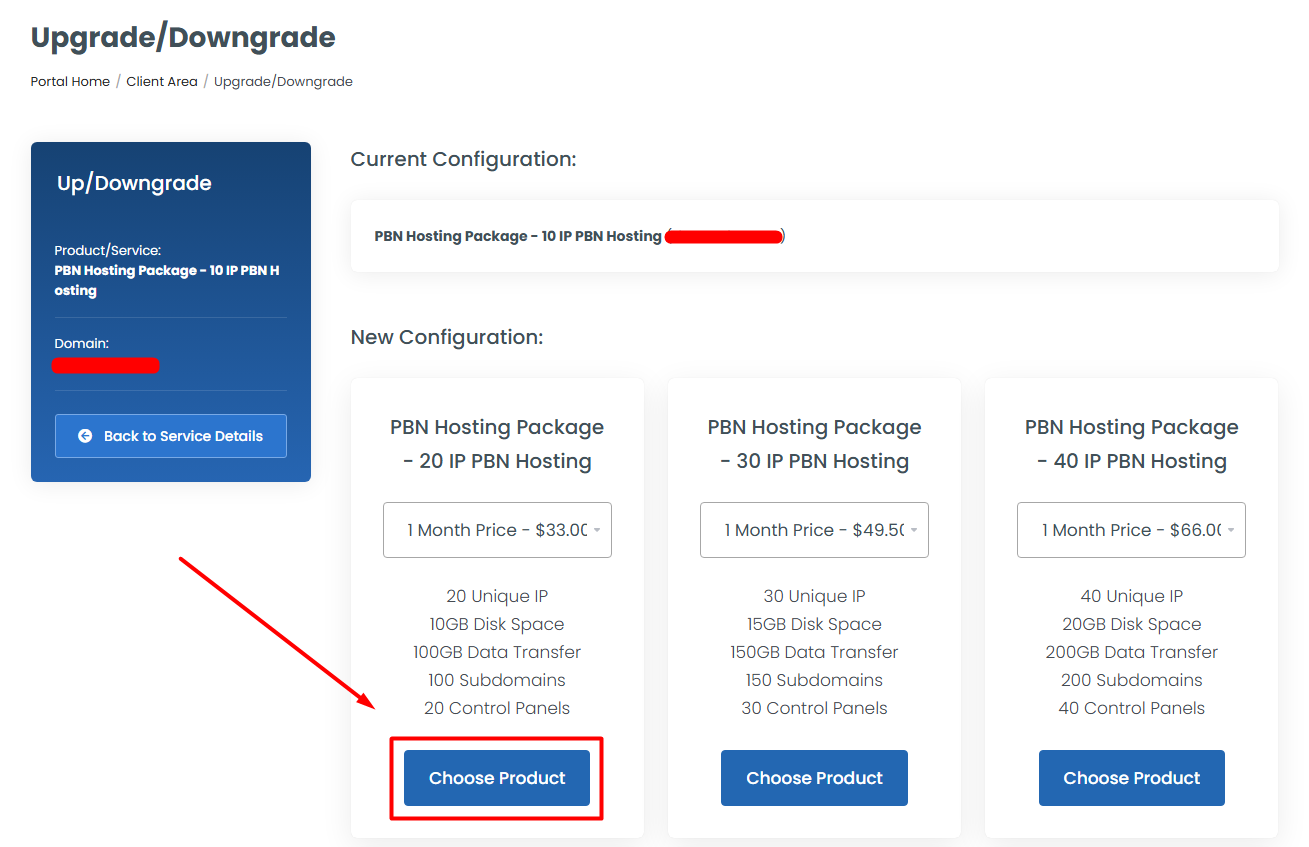
Step 5:
After clicking, You will redirect to the Upgrade/Downgrade Package Page. There choose the plan and the billing cycle to which you want to upgrade from your current package and click “Choose Product” button.
Step 6:
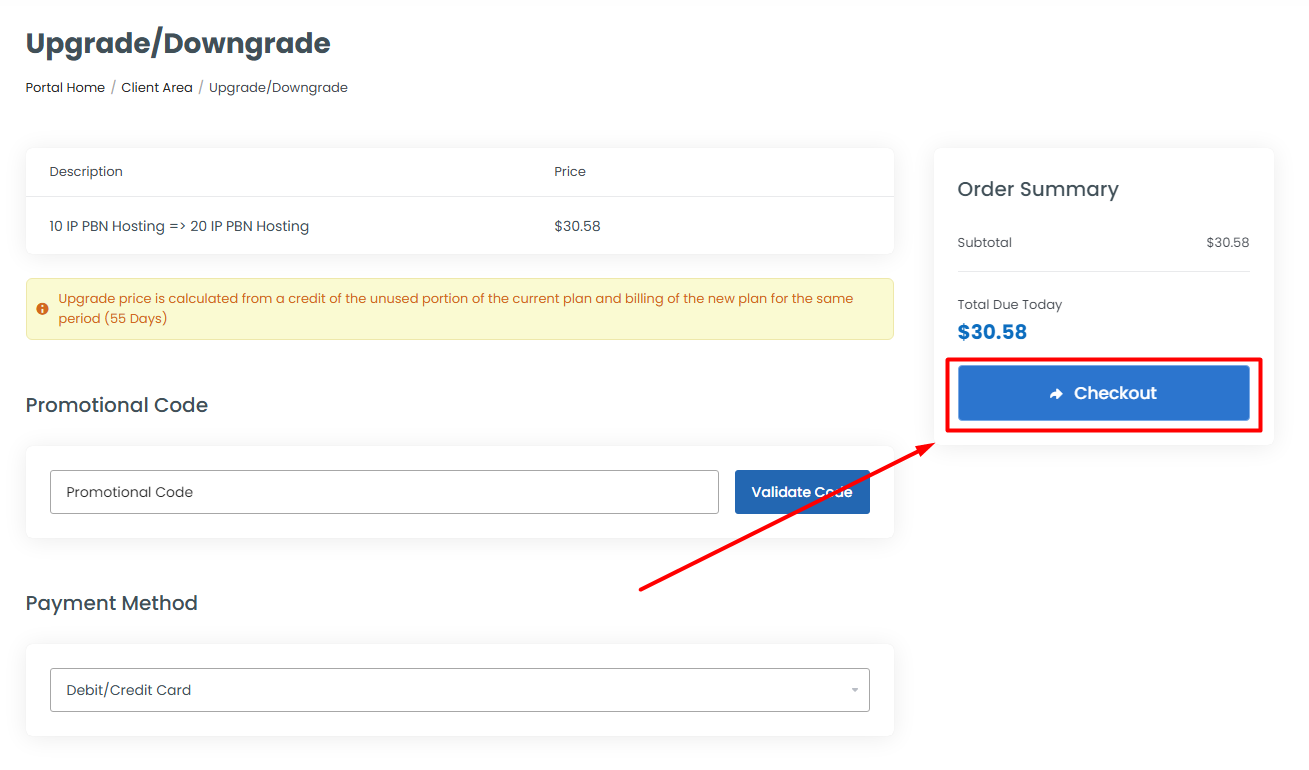
Once you choose the product, you will redirect to the Payment page. If you complete the payment, your package will be upgraded successfully. Here, choose the payment method you want and click “Checkout” button to initiate the order and make the payment.
Disclaimer: Prices shown in the screenshots are for reference only, may change over time. For current and official pricing, please visit the official SeekaHost product page.
If you are a registered user in SeekaHost and have any queries to be clarified or issues to be sorted, you can raise a ticket through the client area dashboard or email to support@seekahost.com. For immediate interaction or guidelines, contact our support team available in Live Chat at the right bottom corner of the website.