 SeekaHost.com Client Area
  SeekaHost.app
  SeekaHost.co.uk
  SeekaHost.in
How to Increase Upload Limit in Virtualmin

By Aslam Saah
Table of Contents
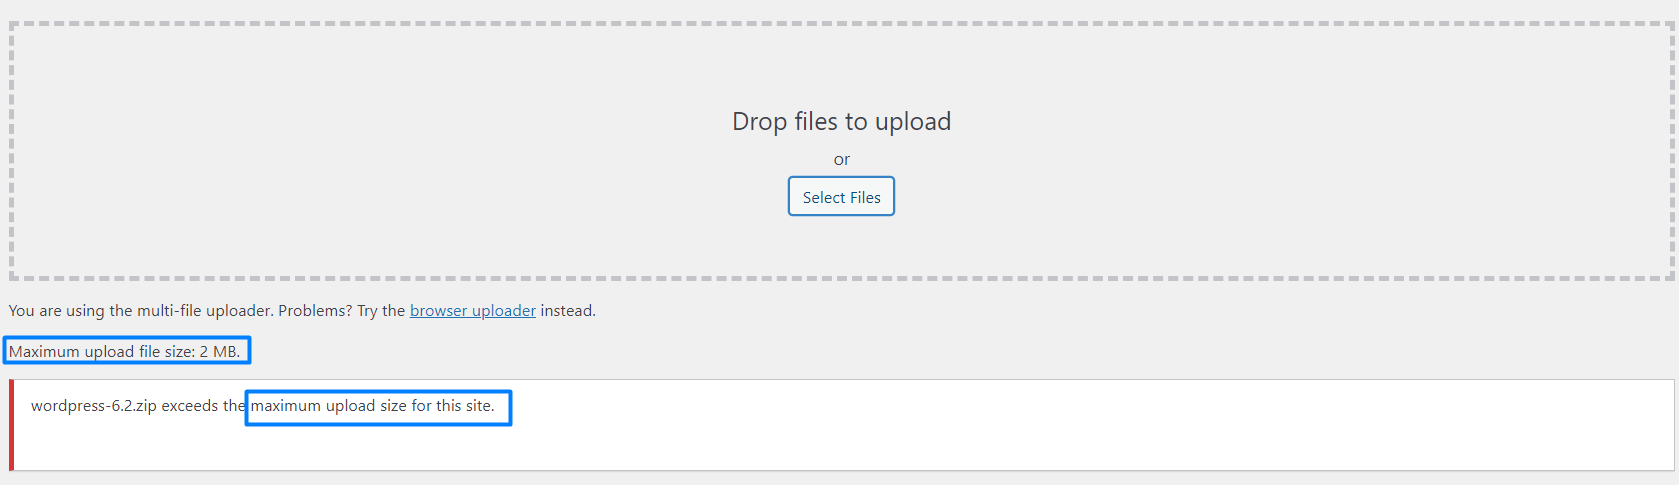
You may have many files that you want to upload through the WordPress dashboard but will face a restriction by asking us to increase upload limit in Virtualmin or Webmin in most cases as shown below,
When your account’s disk space is full, you may face an error as disk space/quota exceeded. So it doesn’t allow you to upload any files even though you have set a higher value in upload_max_filesize. In that case, you have to contact your hosting provider and get their support to help you.
Coming to the point, to increase max upload file size in Virtualmin, we will guide you with the following process below, which you can also do by yourself.
Methods to Increase Upload Limit in Virtualmin:
- Assigned PHP configuration.
- Assigned PHP configuration folder.
- Through .User.ini file.
Change 1: Assigned PHP configuration
Step A: Login to Virtualmin for your domain using domainaname:10000. For example, if the domain name is article.com, then article.com:10000. If you can’t log in via Virtualmin, get the access to Webmin URL and log in with your domain credentials.
In case you want to change the password, you can reset the password inside your Virtualmin account under change password.

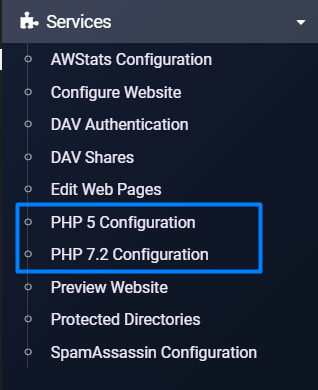
Step B: Go to Services -> PHP 5/7.2 Configuration whichever your website PHP version is assigned currently.
Step C: Click “Resource Limits” and update your values on the respective columns. You can refer to the below screenshot to Increase PHP Upload Limit in Virtualmin.
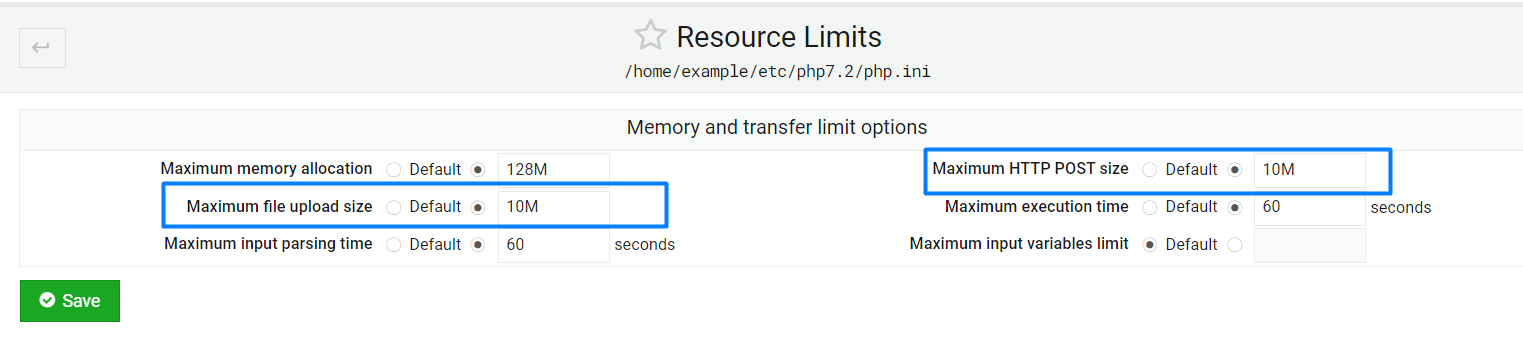
Now click save to make the effect apply.
NOTE: The upload file size and post must be either the same or post_max_size > upload_max_filesize.
Change 2: Assigned PHP configuration folder.
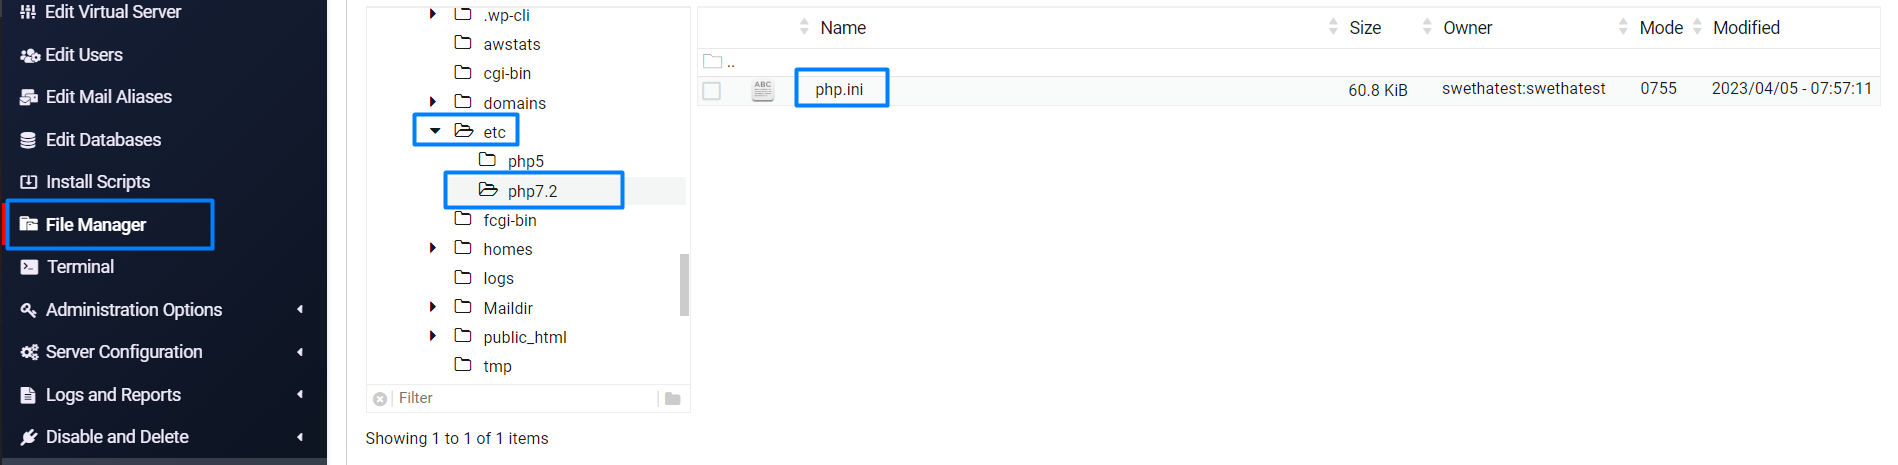
Go to file manager -> etc -> PHP (assigned version) 7.2 -> Right-click on the file and click the edit option. Search the name and change the value.
Change 3: Through .User.ini file.
You can change the same values as above or change the upload limit in Virtualmin by creating the file “.user.ini” and updating the code below with the values you want for that factor.
[PHP]
display_errors = Off
max_execution_time = 90
max_input_time = 60
max_input_vars = 1000
memory_limit = 512M
post_max_size = 50M
upload_max_filesize = 50M
IMPORTANT INFORMATION:
The value set in the .user.ini file will be taken as a priority or currently in effect value than the value set in the PHP 7.2 configuration.
Related Articles:
Hope the above information helps you finish the task without any help.
If you are a registered user in SeekaHost and have any queries to be clarified or issues to be sorted, you can raise a ticket through the client area dashboard or email support@seekahost.com. For immediate interaction or guidelines, contact our support team available in Live Chat at the right bottom corner of the website.