
 SeekaHost.com Client Area
  SeekaHost.app
  SeekaHost.co.uk
  SeekaHost.in
How to Buy SEO Hosting in SeekaHost?

By Aravind
Table of Contents
When you want to upgrade the website performance, faster load times, enhanced security measures, and better resource allocation for various types of websites (e-commerce, portfolios, etc.), then you Premium SEO Hosting is the perfect plan for you.
Let’s explore more about the Premium SEO hosting service and how you can purchase the package with us!
What is SEO Hosting?
SEO Hosting provides you the highest level of super fast technology for increased performance and better uptime. When you want to upgrade from PBN hosting that support your search engine optimization as well, then you should go with SEO hosting service. It offers your dynamic C Class IP for your websites from different server to boost your website speed even if user visited from different country and keep your website with natural IP profile.
Ground-up with Free Malware & Virus Scanner security measures on the SEO server, your website will be free from suspicious files being injected. With LiteSpeed Server and SSD Storage, your websites will load faster than ever before with SSL secure installed right after nameserver are being updated.
Steps to Buy SEO Hosting in SeekaHost:
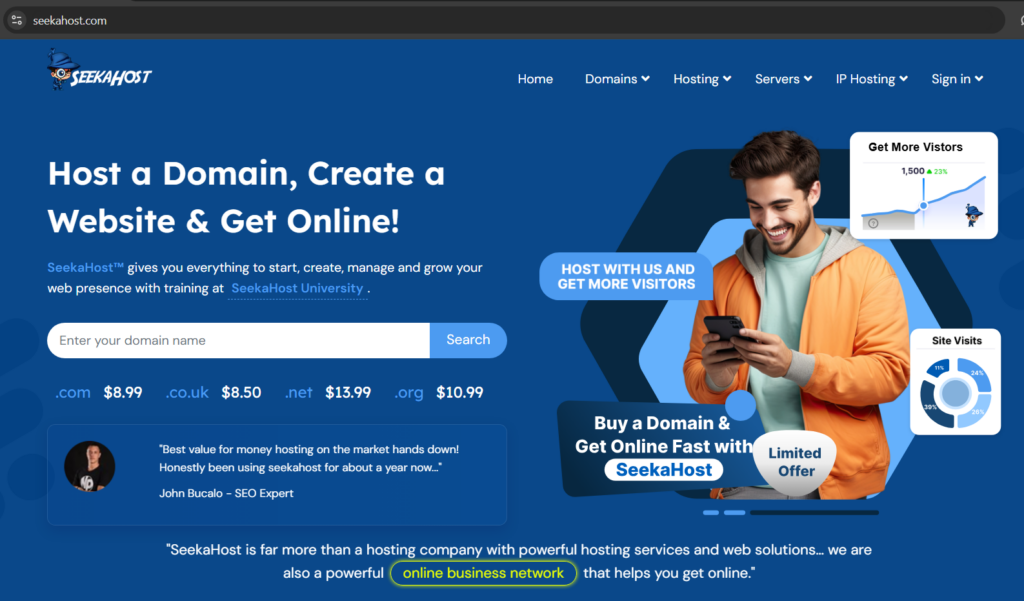
Step 1: Check Official Website
Load our official SeekaHost website to check the available hosting plans.
Step 2: Select Premium SEO Hosting
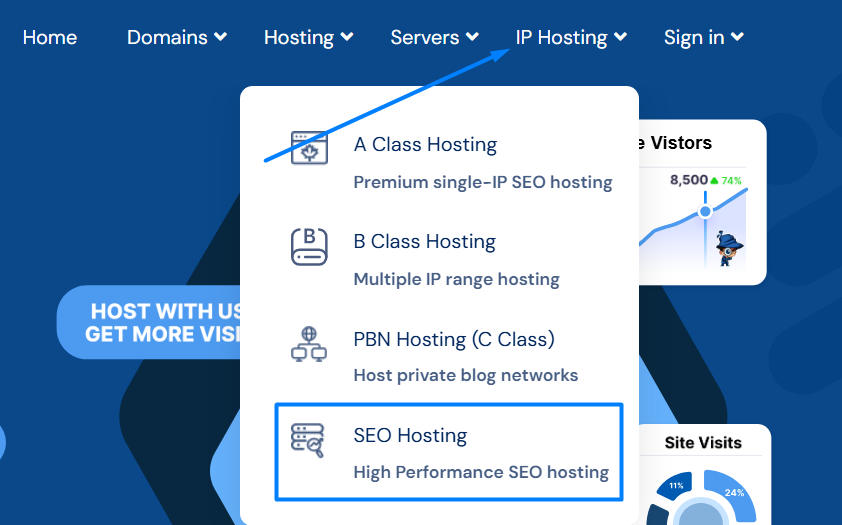
In the home page, hover the mouse over the hosting section in the top navigation option. From the dropdown menu, Click on the Premium SEO Hosting.
Step 3: Choose the Hosting Plan
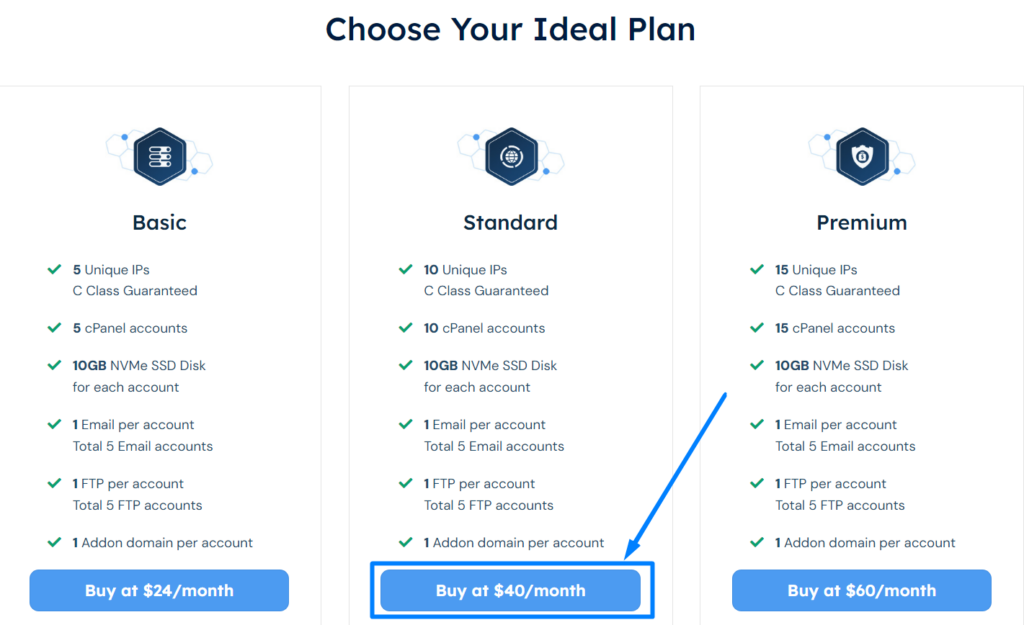
Scroll down and click “Buy at” under the plan which you can select based on the number of domains you want to host.
Step 4: Choose Billing Cycle
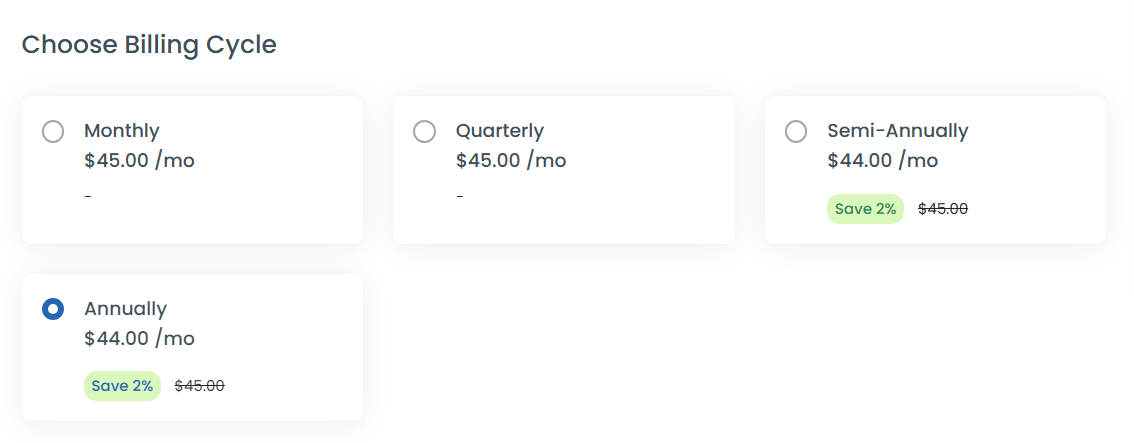
For the hosting package, select the billing cycle which you want to order. If you choose the annual billing cycle, you can save 2% percent on the total cost which will help you pay only yearly instead of paying each month.
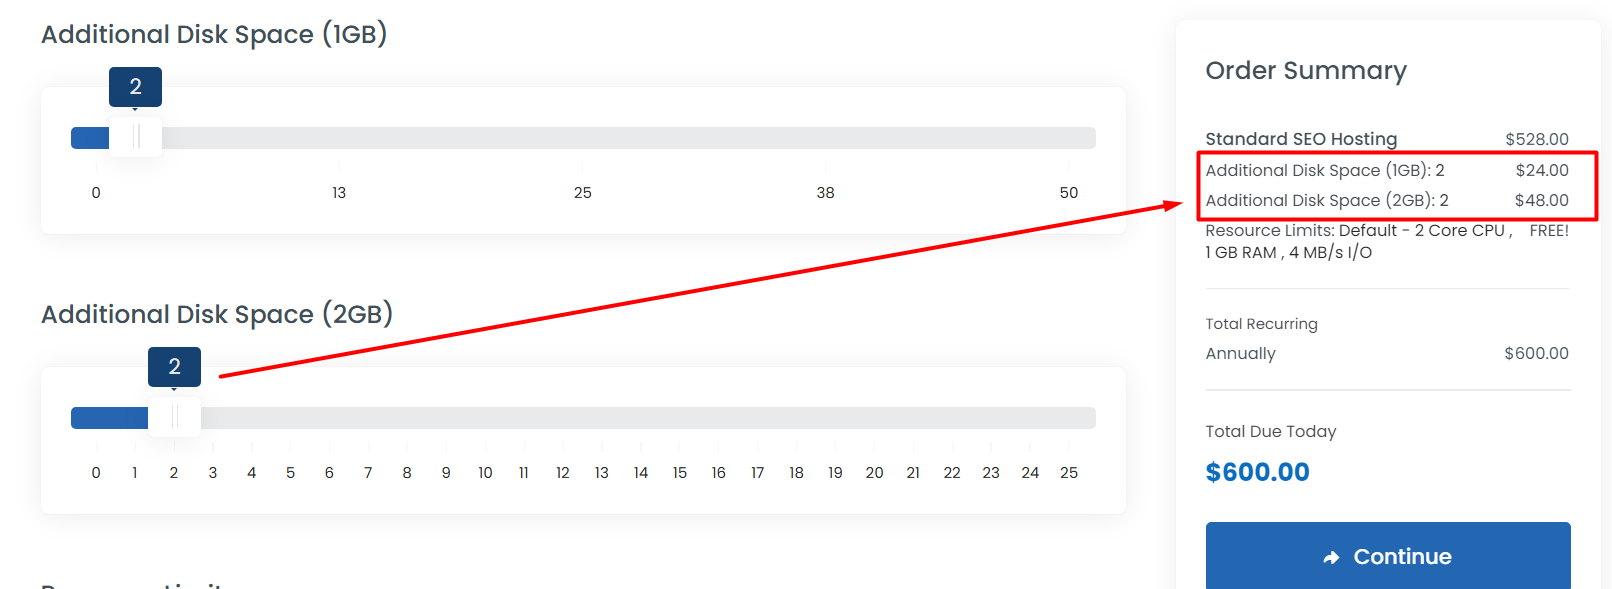
Step 5: Add the Additional Resources for Websites
Here you can increase the limit under Additional Diskspace (1GB) and Additional Diskspace (2GB). For example, if you increase the count to 2, then you will get 2GB and 4GB disk space respectively for entire package which our team will allocate unless you specify how you want to allocate the resources for specific websites by raising the ticket.
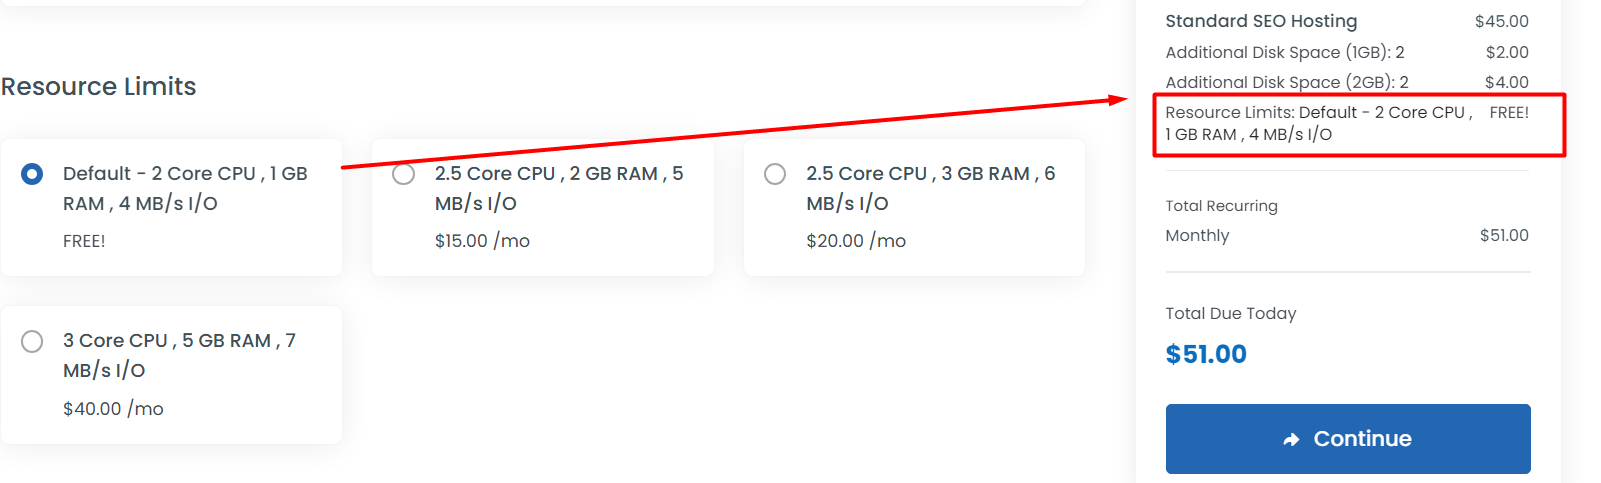
Step 6: Increase Resource Limit
If you want to have more resources for the cpu, ram, I/O to manage the traffic and request for your website, you can increase the resource limit separately now.
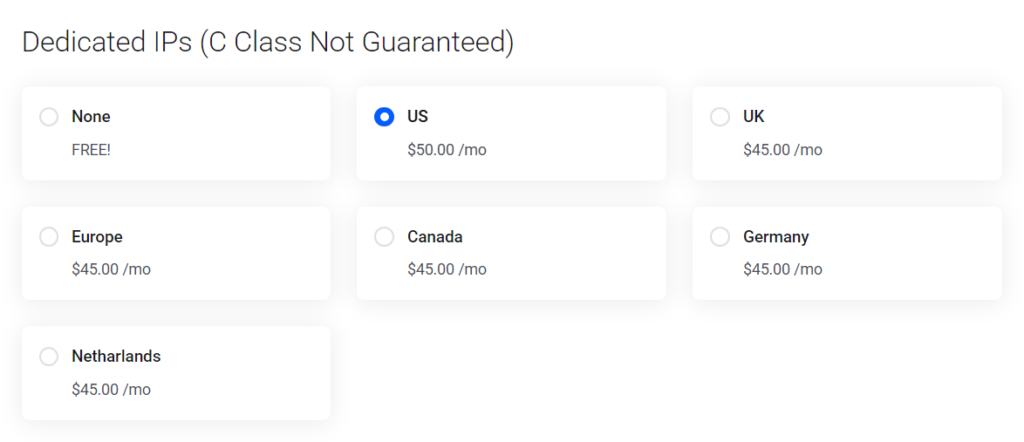
Step 7: Dedicated IP
If you want dedicated IP or location based dedicated IP for your websites hosted under SEO Hosting, you can choose the desired location. Once selected, click “Continue” button.
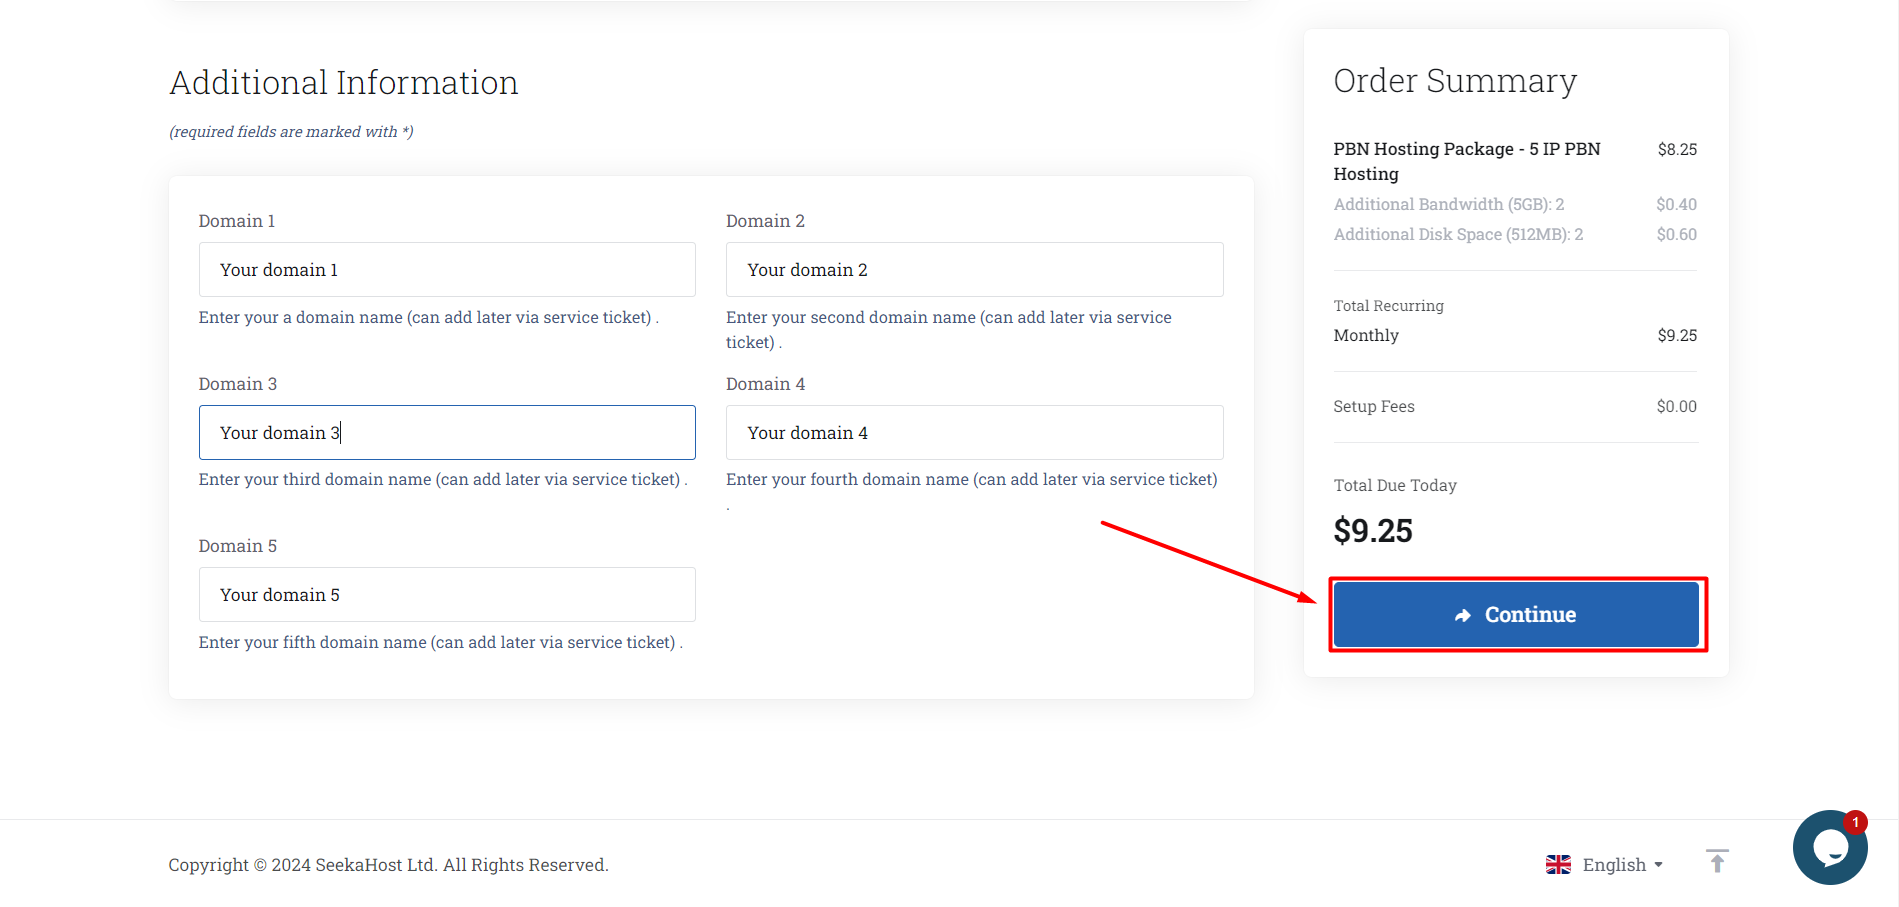
Step 8: Enter the Domain Name or Share List
If you already purchased domains, enter the domain names in each of the slots given under the “Additional Information” section or mention the domain names by raising a ticket. If you haven’t purchased any domains yet, you can either register new domains with us or purchase high quality expired domains from our available list.
If you purchase and host the domains with us, it will be easier for you to manage everything under one interface and support for your service will be easier and faster for you. Also, we will be updating nameservers, install ssl and force https redirection to help you start your journey with building the website instead of waiting for the propagation time or other updates.
Step 9: To Create an Account with us
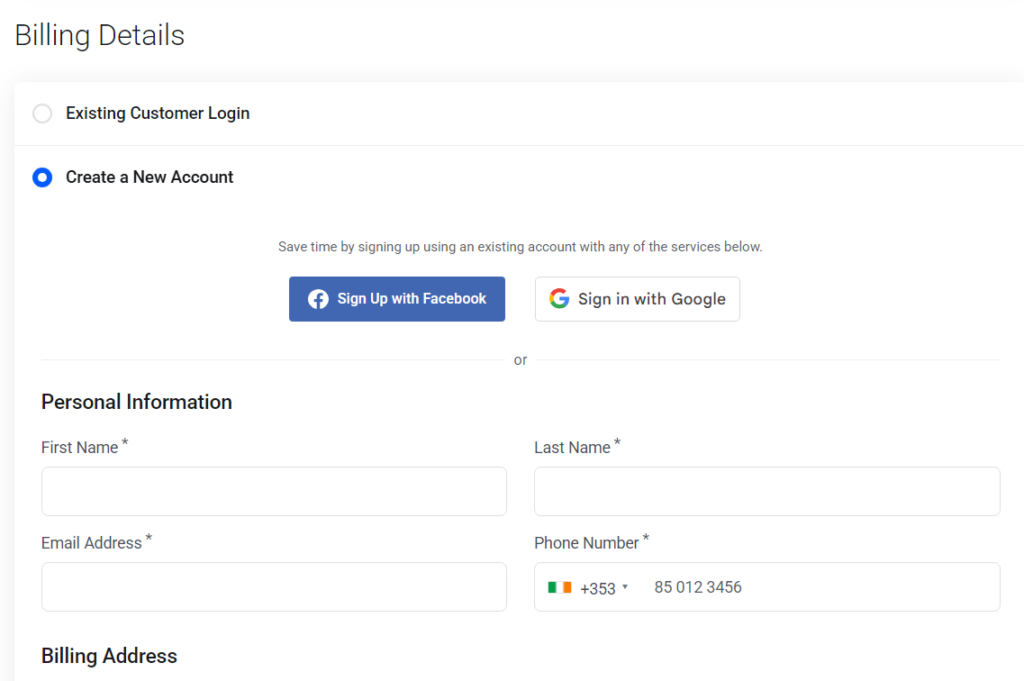
If you already had an account with us, choose “Existing Customer Login” option. If you doesn’t have any account, choose “Create a New Account” and update the valid and correct details. You can also login using your Facebook or Gmail account hassle free now.
Step 9: Choose Payment Method
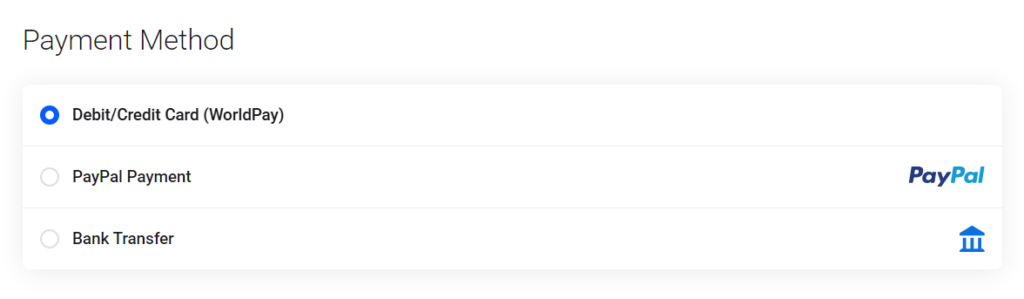
Choose the Payment method from the available options on the review and checkout page, if your preferred payment option is not available. (Currently we are not accepting any Crypto payments).
Once selected, please click the Check box for the term of service and checkout.
Step 10: Receive Confirmation
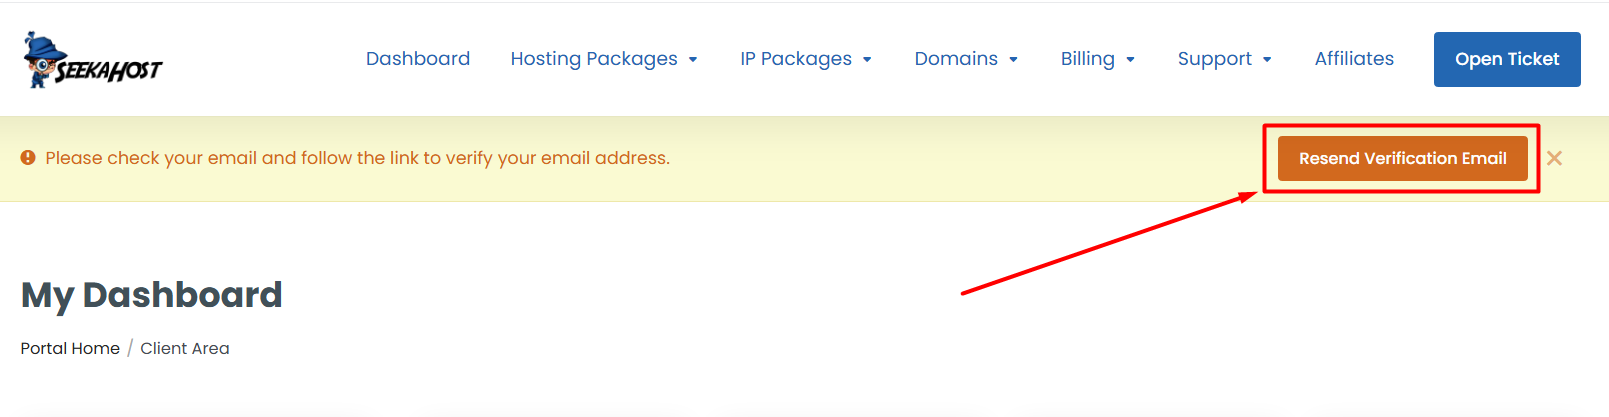
After the payment is done, you will receive an order confirmation via email. After that, you need to verify the email verification for the account so you do not miss any important updates from us and to validate the account.
If you didn’t receive any emails, please cross the email address spelling and click “Resend Verification Email” to get the link.
Step 11: Setting up the hosting
Once the order has been placed with the domain list either in the package slots or in the ticket, you will get the hosing details including private nameserver, IP address, cPanel login details, information about process to follow for accessing the cPanel.
Contact Support:
If you face any issues, you can Just Contact our support team for assistance via chat/ticket.