 SeekaHost.com Client Area
  SeekaHost.app
  SeekaHost.co.uk
  SeekaHost.in
Creating and Managing database in Virtualmin

Virtualmin is a powerful web hosting control panel that enables users to manage their websites, email accounts, and databases from a single platform. In this article, we will discuss how to create and manage databases in Virtualmin.
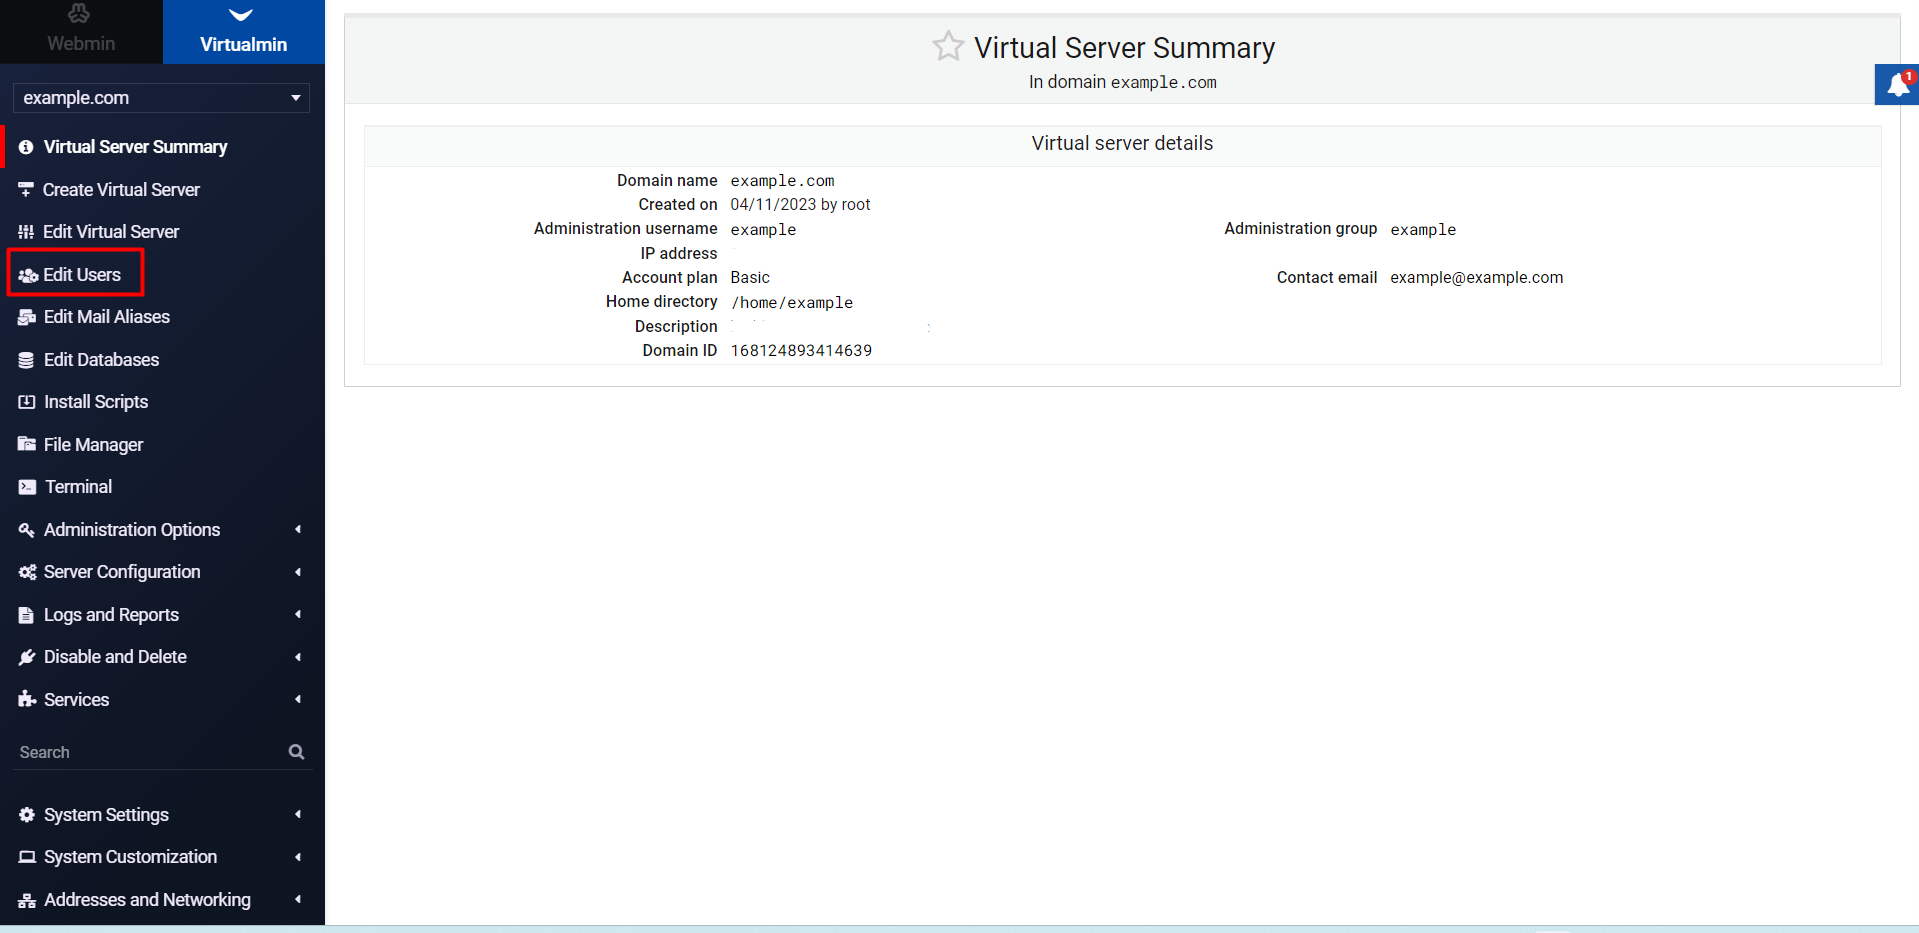
Step 1: Login to your Virtualmin account and select the domain for which you want to create a database.
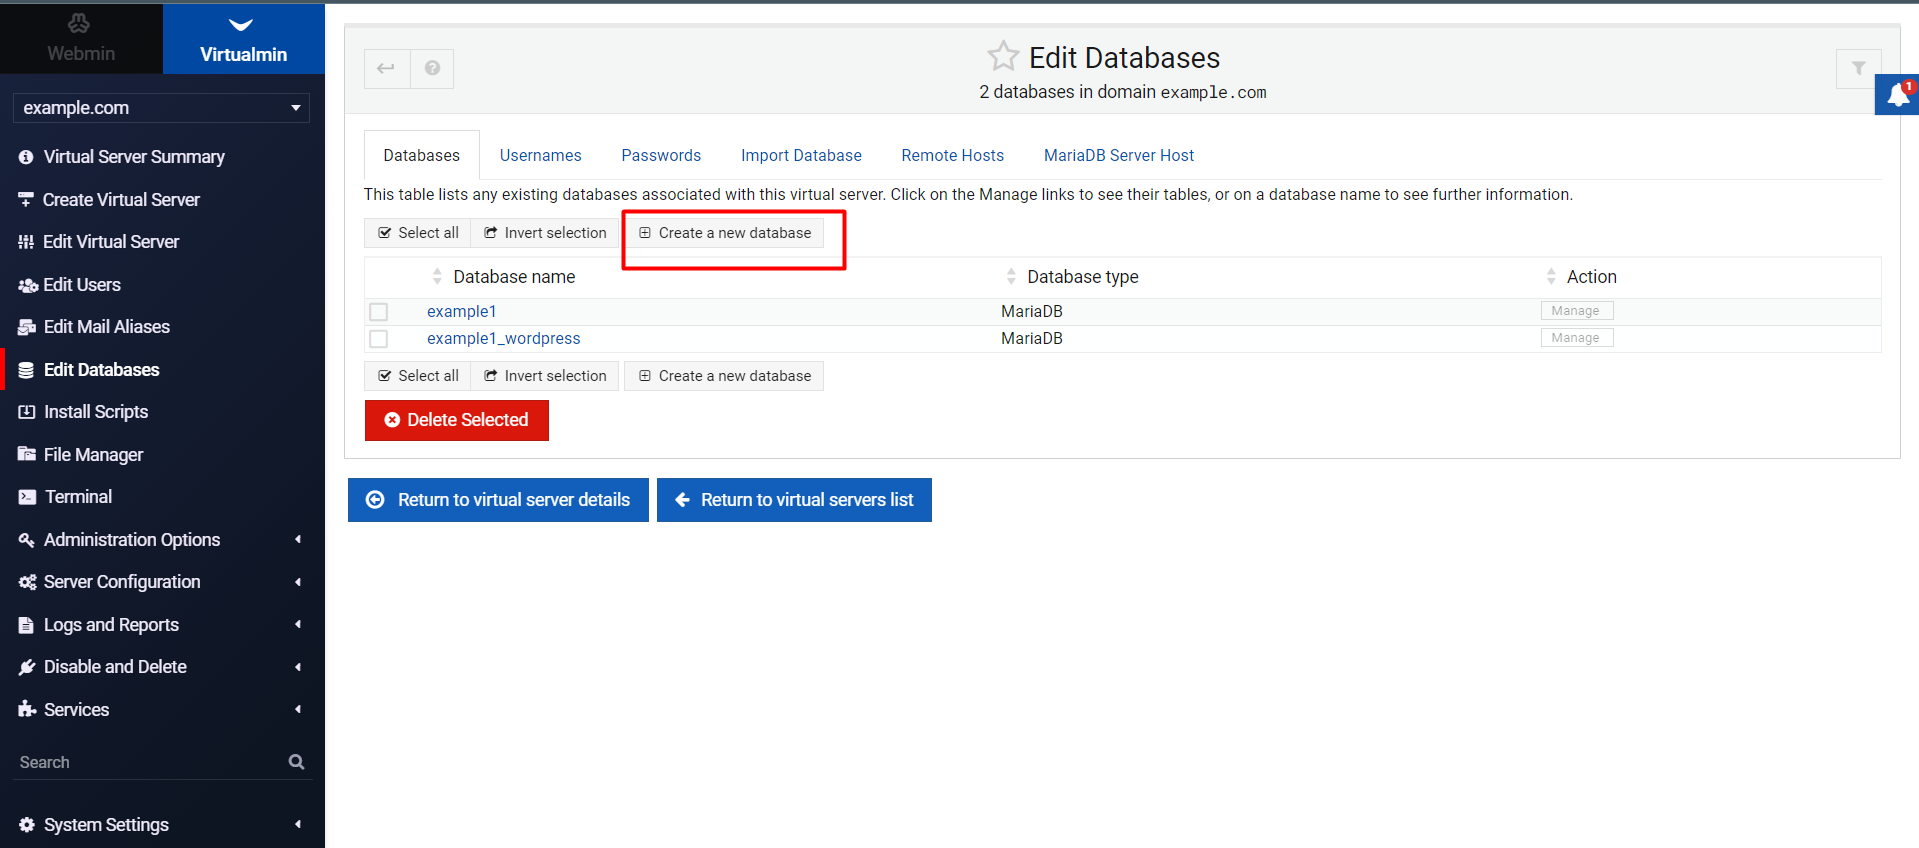
Step 2: Click on the “Edit Databases” option from the left-hand menu.
Step 3: Select the type of database you want to create, such as MySQL, PostgreSQL, or MariaDB.
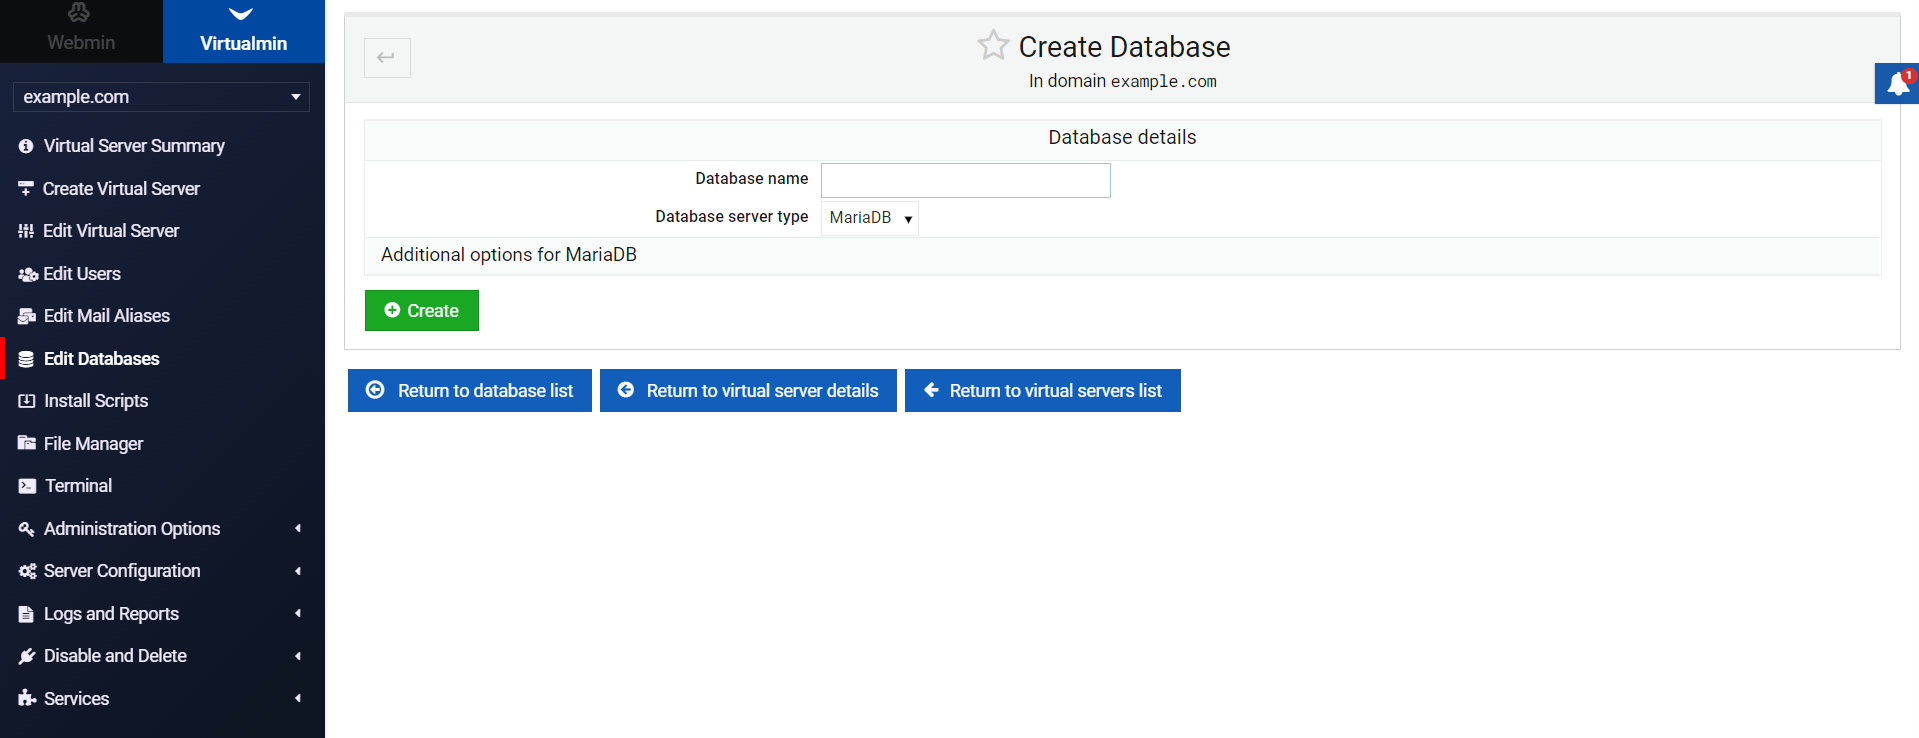
Step 4: Select the database size and click on the “Create database” button to create your database.
Step 5: Enter a name for your database and choose a username and password. Make sure to use a strong password to ensure the security of your database.
Managing a Database in Virtualmin
Now that you have created a database, it’s important to know how to manage it in Virtualmin. Here are some of the key management tasks you can perform
Backup and Restore
To backup your database, click on the “Backup Database” option in Virtualmin. You can also restore a backup by clicking on the “Restore Database” option.
Manage Users
Virtualmin allows you to manage the users who have access to your database. You can add or remove users, change their passwords, and set permissions for each user.
Conclusion:
Creating and managing databases in Virtualmin is a straightforward process. By following the steps outlined above, you can create a database and manage it with ease. Whether you need to backup your data, optimize your database, or repair a corrupted database, Virtualmin provides all the tools you need to manage your databases effectively. So, get started now and streamline your website management with Virtualmin.
Check it now how to take database backup in cPanel