
 SeekaHost.com Client Area
  SeekaHost.app
  SeekaHost.co.uk
  SeekaHost.in
How to Enable DNSSEC For Domain in cPanel

By Frank Carson
Table of Contents
Enable DNSSEC to protect your domain’s DNS records from spoofing, hijacking, and cache poisoning by adding cryptographic signatures to your zone. DNSSEC verifies that DNS responses come from an authoritative source and haven’t been altered in transit, improving integrity and user trust – especially for e-commerce, banking, and healthcare sites.
This guide explains KSK vs ZSK, lists the benefits, and shows how to create and enable DNSSEC (DS or public DNSKEY) in cPanel, with an alternative export method.
What is DNSSEC?
DNSSEC stands for Domain Name System Security Extensions. It is a set of security protocols that protect DNS data from being forged, hijacked, or tampered with by ensuring its authenticity and integrity.
What are KS and ZSK records?
When you generate the DNSSEC records, you will get two types of DNSSEC Keys after generating them.
KSK – Key Signing Key:
- It is used to sign the ZSK, proving that the ZSK is authentic and trusted.
- KSK is used to generate a DS [Delegation Signer] record.
- This DS record is updated in your domain registrar to link your domain to the global DNSSEC chain.
- KSK changes less often than the ZSK, since it requires coordination with the registrar.
ZSK – Zone Signing Key :
- It is used to sign your actual DNS records, like A, MX, and TXT records.
- These signatures make sure that DNS data hasn’t been altered during transmission.
- ZSK stays entirely within your DNS zone and is not shared with your registrar.
- It is typically rotated changed) more frequently to maintain strong security.
Benefits of DNSSEC Records:
1. Protects against DNS spoofing– DNSSEC digitally signs DNS records so resolvers can verify they haven’t been tampered with.
2. Ensures data integrity – cryptographic signatures confirm records (A, MX, TXT, etc.) are authentic and unchanged.
3. Prevents cache poisoning – stops attackers from injecting false DNS responses into resolvers’ caches.
4. Builds user trust – adds an extra security layer, important for banking, e‑commerce, and healthcare sites.
5. Supports a more secure chain of trust – when combined with DNS over HTTPS/TLS and proper key management, it strengthens overall DNS security.
Create and Enable DNSEC with Record in cPanel:
Step 1: Login to the cPanel.
Step 2: Search and click zone editor option.
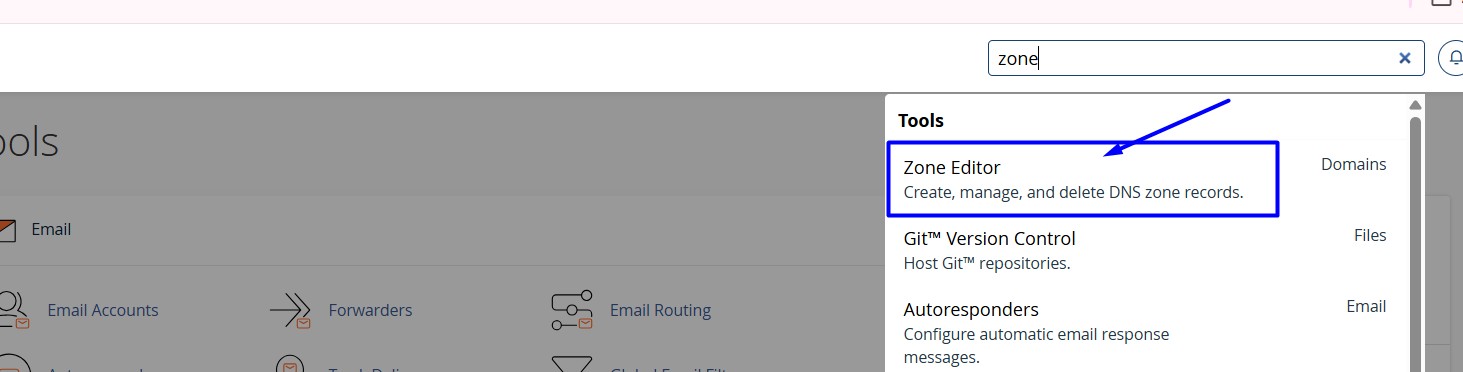
Step 3: Click “DNSSEC” button near the domain name.

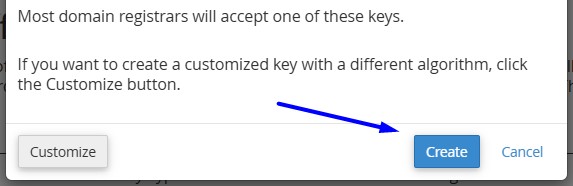
Step 4: On the righthand side, there is a “Create Key” button. A pop-up will appear.

Click Create on the pop-up box. It will be dismissed and you will see an interface with your DS records.
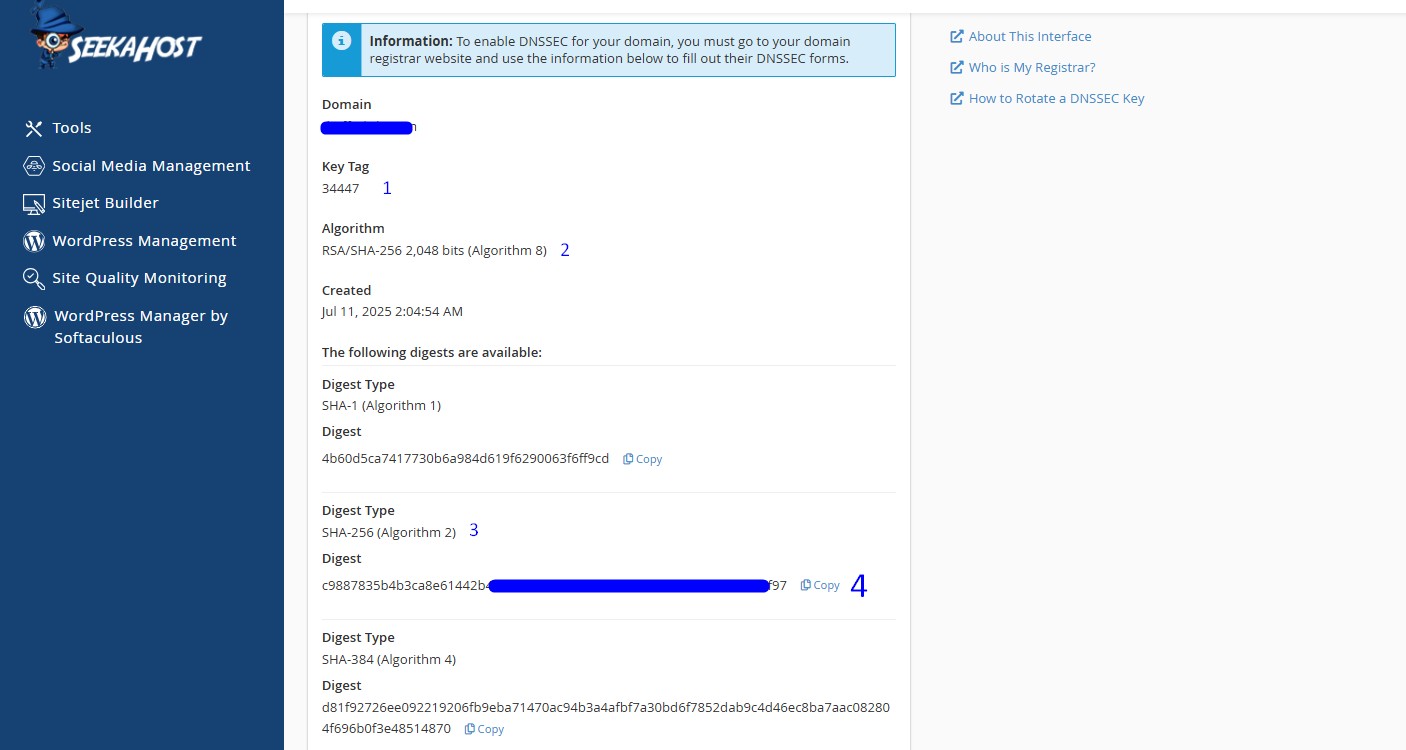
Step 5:Copy the below records to paste in the proper interface of your domain’s registrar.
- Key Tag
- Algorithm
- Digest Type
- Digest
Alternative Method to Enable DNSSEC:
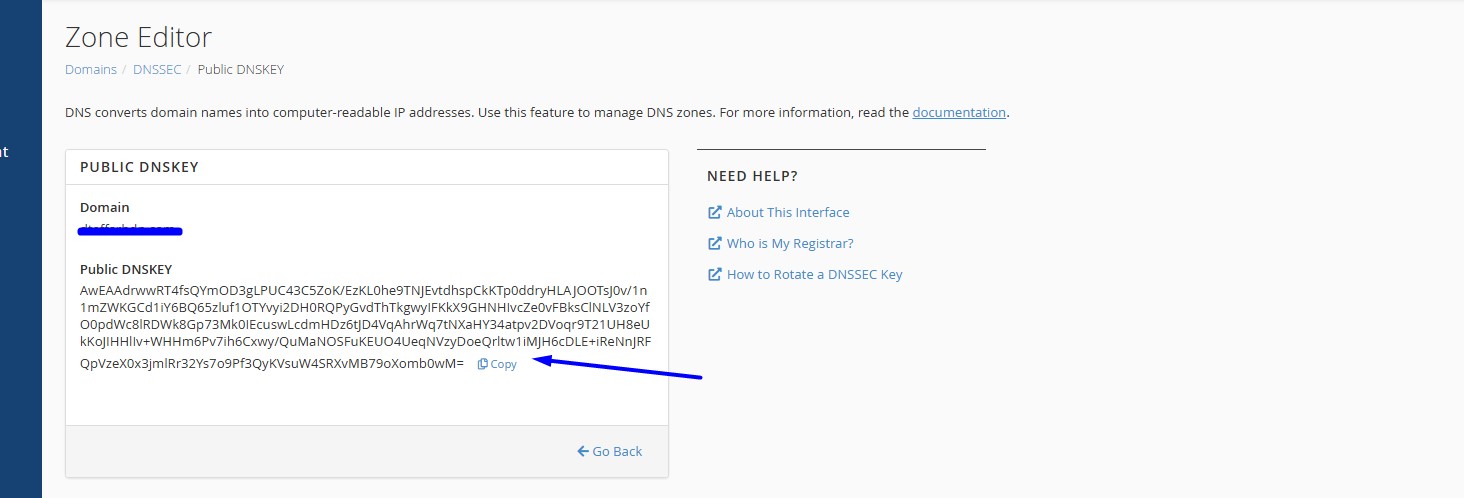
If you need the public key instead of digest records, use this method:
Step 1: In the Zone Editor’s DNSSEC page, click the down arrow beside the DNSSEC record to export the public key. You’ll see the algorithm used (e.g., RSA/SHA-256, Algorithm 8).

Step 2: Next click the Public DNSKEY button.

Step 3: Finally, copy the value under public DNSKEY
If you have purchase both domain and hosting with us, please raise the ticket, our backend team will check and update the DNNSEC record on domain behalf of you.