
 SeekaHost.com Client Area
  SeekaHost.app
  SeekaHost.co.uk
  SeekaHost.in
How To Verify Google Search Console For Your Website?

By Frank Carson
Table of Contents
If you’re looking to verify Google Search Console, you first need to confirm ownership of your website. Google Search Console is a free platform from Google that helps website owners monitor search performance, submit sitemaps, and ensure their pages are indexed in Google Search results.
In this guide, you’ll learn how to verify Google Search Console using different methods, including HTML file upload, HTML tag verification, and DNS record verification, so you can start tracking website performance.
Steps to Verify Google Search Console For Website:
Step 1: Sign into Google Search Console to create account.
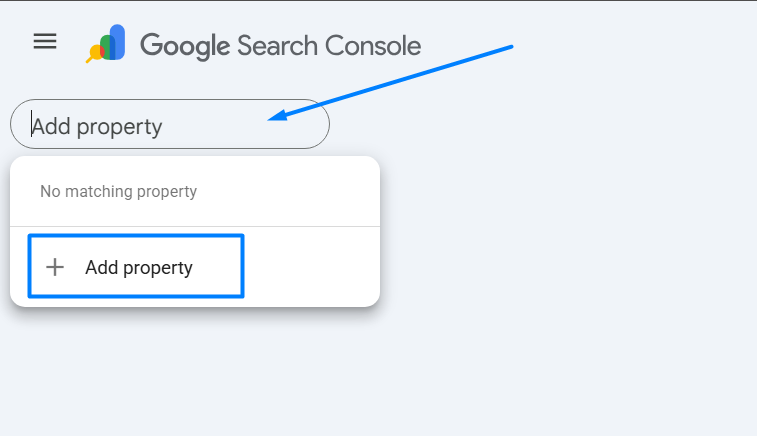
Step 2: Next, on the left corner, click Add property
Step 3: Then, enter your “Domain Name” or “URL Prefix” and click “Continue“.
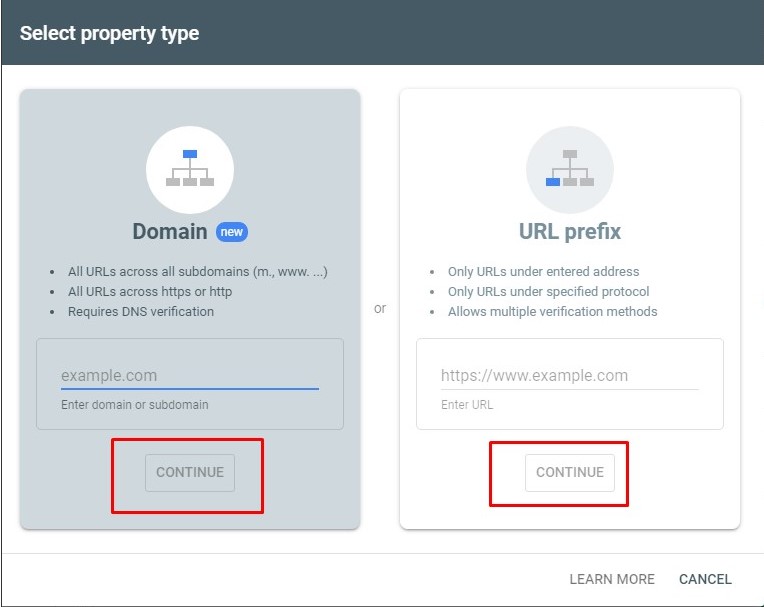
This will take next step to verify Google Search Console through different methods.
Different Methods to Verify Google Search Console:
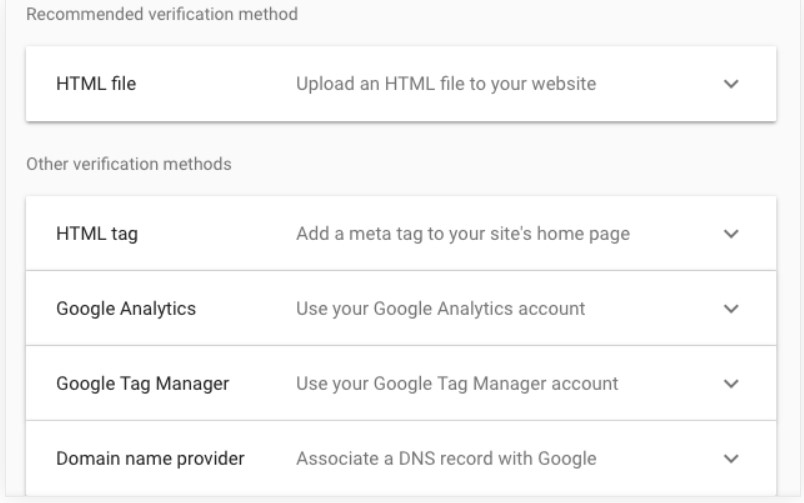
Below image you can see the methods with Recommended verification method and Other verification method. For any method, click the Down Arrow at the end of the file name to view the DNS records.
You only need to verify any one of the methods for your domain.
1. HTML file:
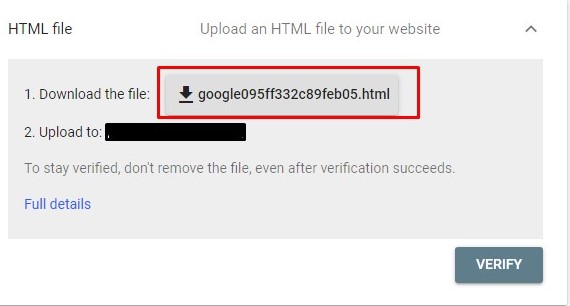
Step 1: In the HTML file method, click download the file.
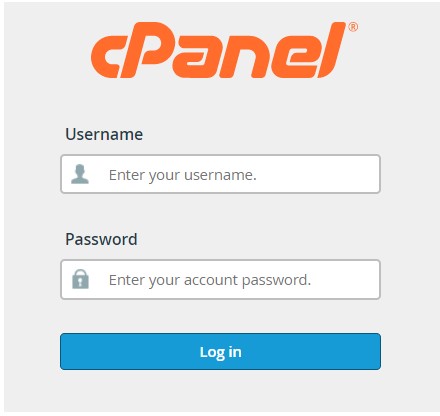
Step 2: Next, Login to the cPanel.
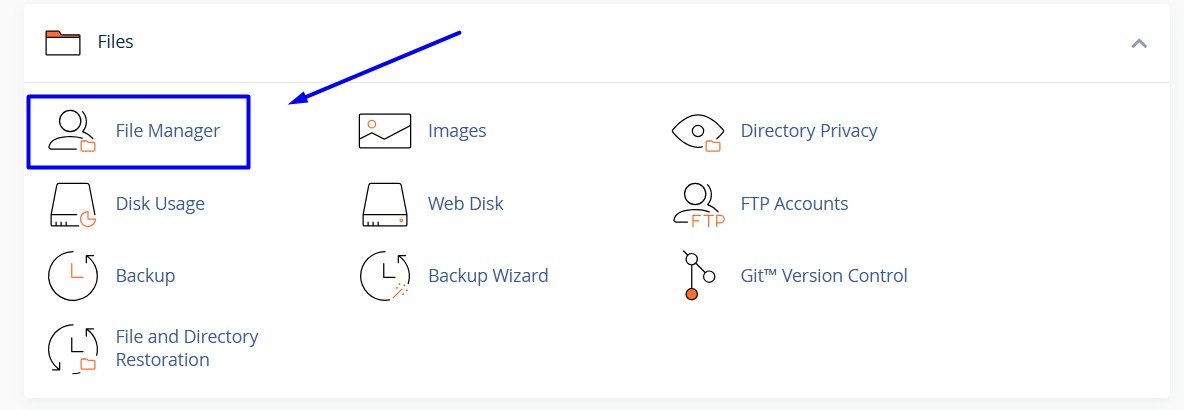
Step 3: Search and locate the file section, and click File Manager
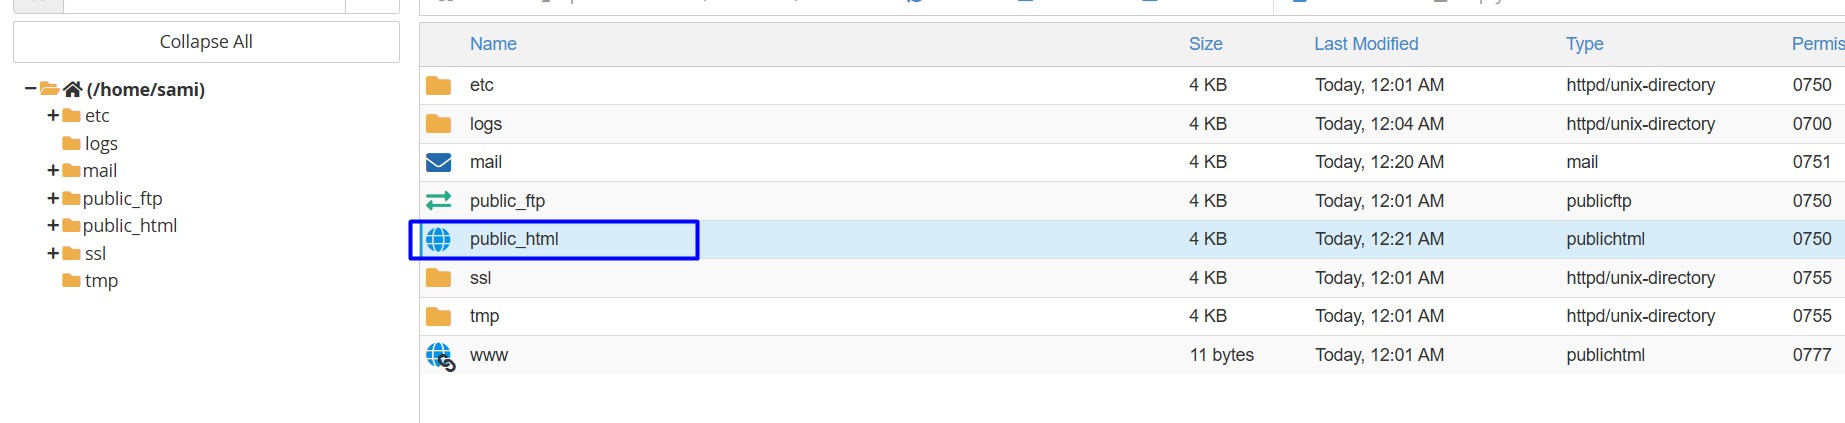
Step 4: After that, open Public_html directory, where the all website files will be located.
Step 5: Click Upload option on top.
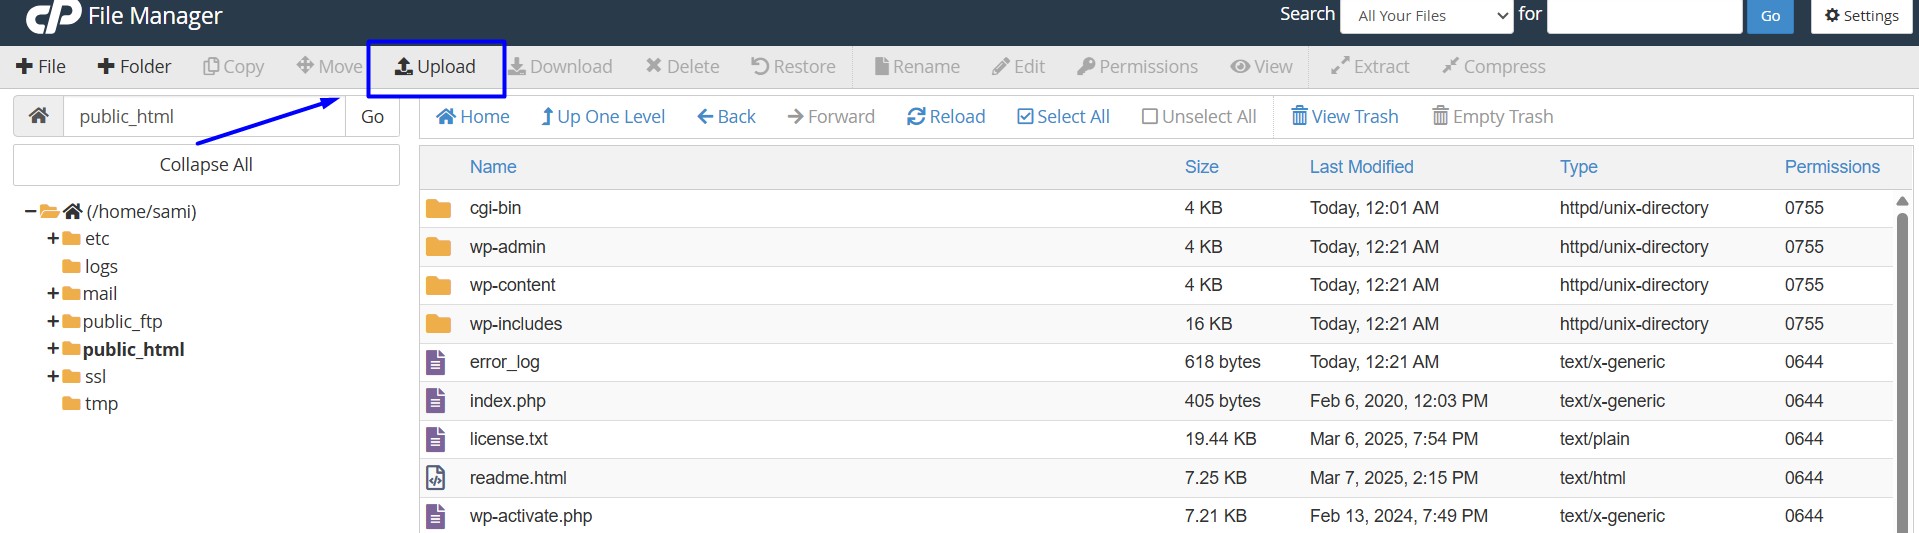
Step 6: Click Select file button and upload the html file.
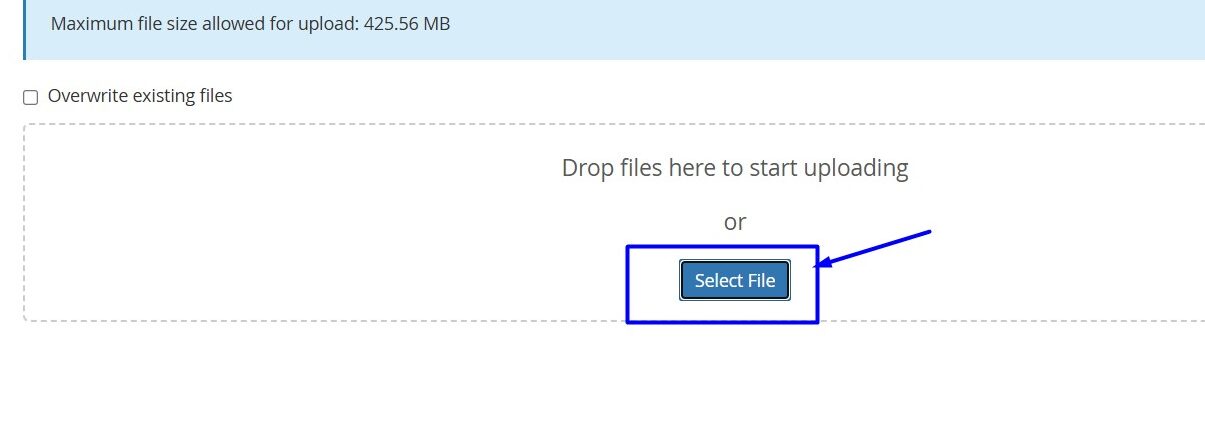
Step 7: Finally, return to Google Search Console and click the “Verify” button. Now ownership verification will be successfully completed.
2. HTML Tag:
Step 1: Login to the WordPress and install the plugin “Insert Headers and Footers”.
Step 2: Next, copy the verification code provided by Google Search Console
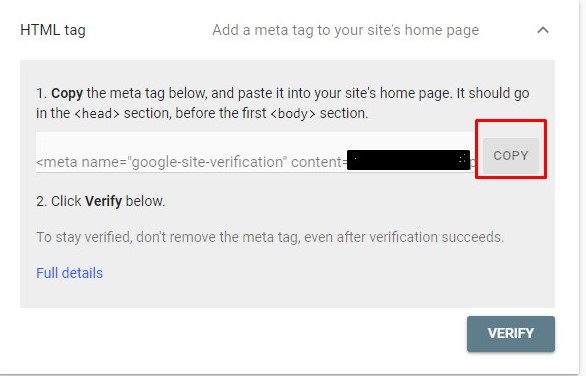
Step 3: Then, navigate to “Insert Headers and Footers” option under Settings section left side. Paste the code in “Scripts in Header” and “Save” the changes.
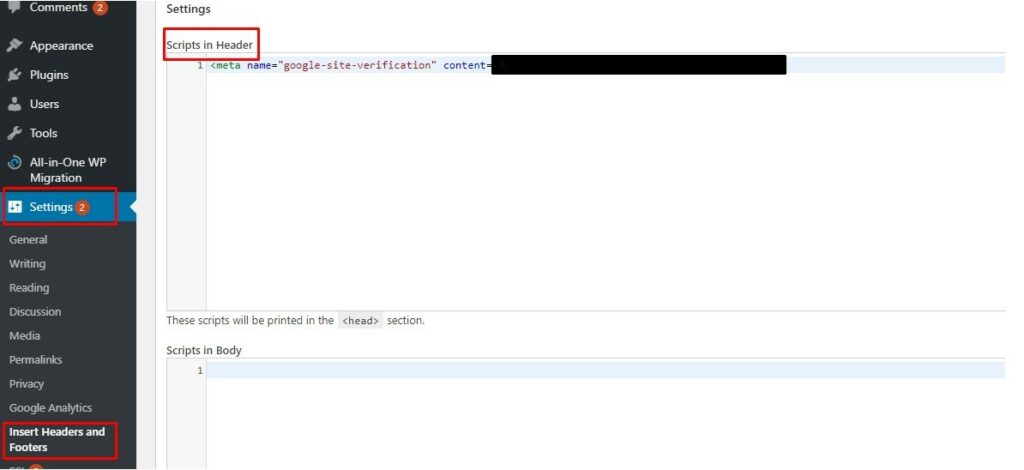
Step 4: Finally, return to Google Search Console and click on the “Verify” button. Your owner verification is successfully verified.
3. Domain Name Provider:
Alternatively, you can verify ownership using your domain provider.
Domain in SeekaHost:
Step 1: Copy the verification code from the Google search console for Domain Name provider method.
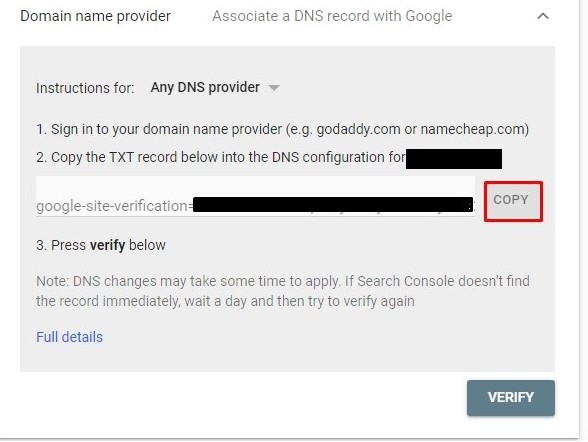
Step 2: Log in to your SeekaHost Client area -> click “Domains” section
Step 2: Click “Manage” button near the domain name.
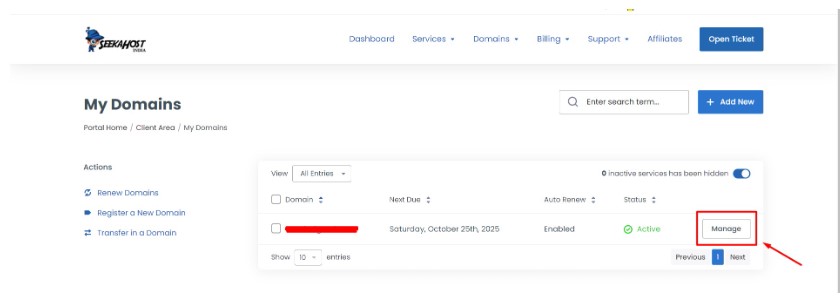
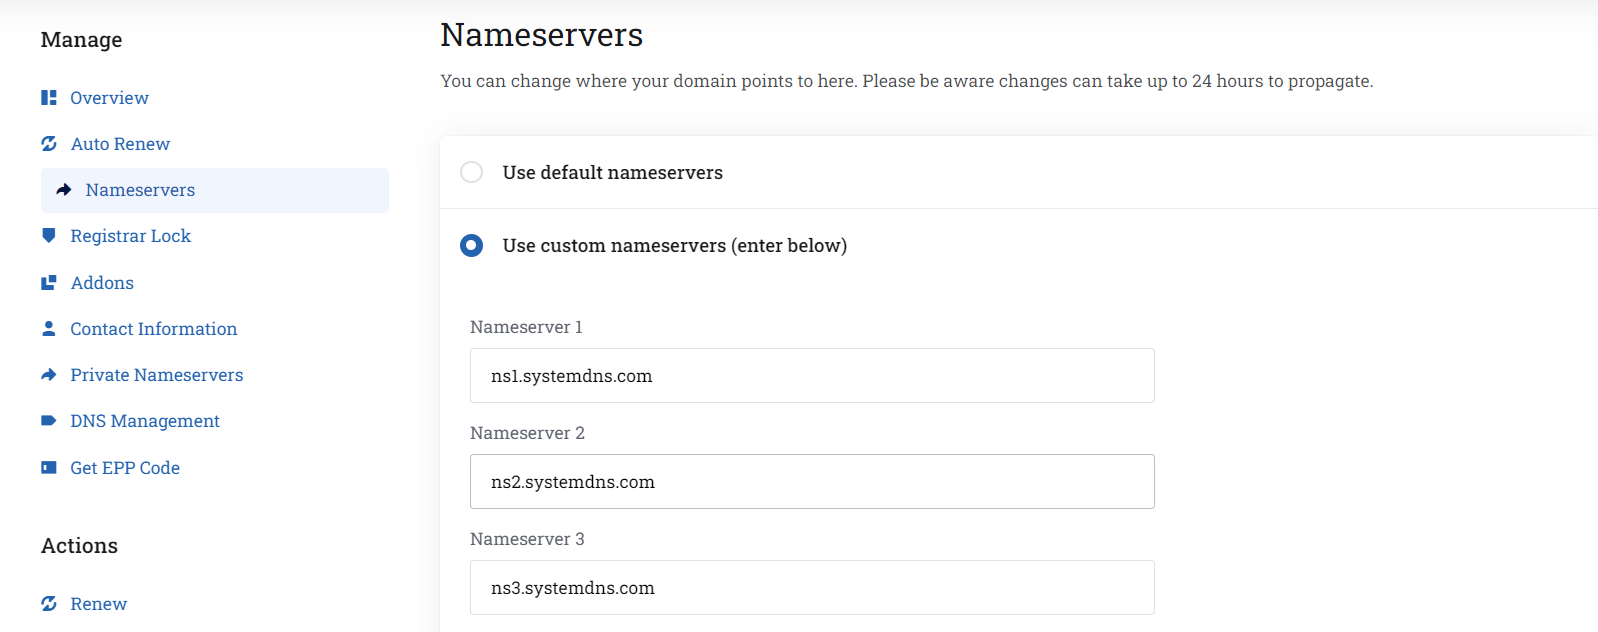
Step 3: Click “Nameservers” -> “Use Custom Nameserver” and enter our domain default nameservers as below,
ns1.systemdns.com
ns2.systemdns.com
ns3.systemdns.com
Step 4: Click “DNS Management” option and choose the record type as “SPF (TXT)”.
Add or edit TXT records to include SPF information by specifying:
- Host Name: Leave it as blank if it is domain name.
- Value: SPF policy specifying authorized mail servers or any txt value.
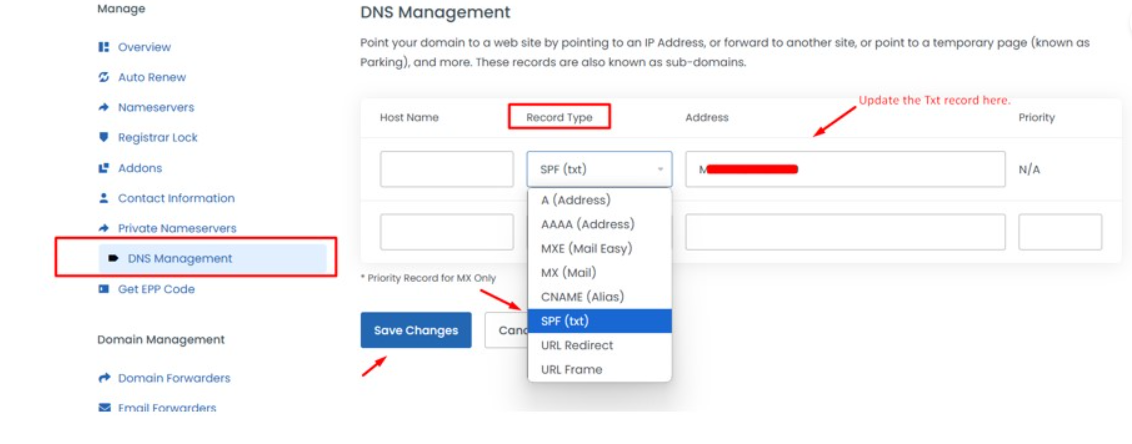
After updating, click on “Save Changes”.
Hosting cPanel:
If your DNS records are managed through hosting, follow the cPanel method below.
Step 1: Login to the cPanel.
Step 2: Search and click zone editor option.
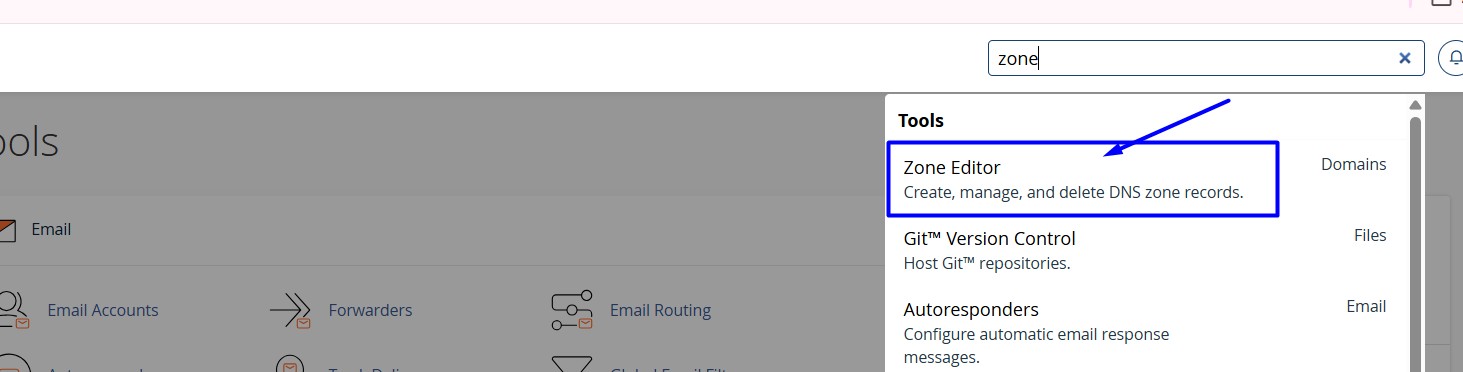
Step 3: Enter your domain in Name, choose TXT, paste the verification code, and click Add Record.

Step 4: Go to the Google Search Console and click on the “Verify” button.
By following the methods above, you can successfully verify Google Search Console and gain access to important website performance data. Once verification is complete, you can submit your sitemap, monitor indexing status, and track search visibility.