
 Client Area
  SeekaHost.app
  SeekaHost.co.uk
  SeekaHost.in
How to Handle 404 ‘Not Found’ Errors?

By Ryan Bradman
You might have come across many errors on a WordPress site. Of all those errors, 404 is a potential error which means your site is not accessible.
It is quite frustrating when you, the site owner, encounter a 404 error. This is a lot to worry about as the same error occurs when a user visits your site.
With such errors, you would see a dip in your site traffic.
If you face a 404 error on your website, this article will help you get your site up and running again.
What are the various 404 Errors?
There are different variations of 404 errors. You get different error messages on different browsers. Some of them include:
- 404 Error
- 404 Not found
- Error 404
- HTTP 404 Not Found
- Error 404. The page you are looking for can’t be found.
- The requested URL was not found on this server.
By default, many WordPress sites have a 404 page created. So, when a visitor comes across the 404 error, the site shows a custom error page instead of the error page.
While creating a custom 404 error page, you should include a search option. Additionally, you can show blog posts so visitors can get information on what they are looking for.
Does 404 Not Found Impact Your Site’s Performance and SEO?
Impact on SEO
The impact of the 404 error on SEO depends on why the error is happening.
If the error occurs due to visitors mistyping the site URL, then that won’t affect your site SEO. There won’t be a negative impact on your site’s SEO as Google would recognize this as the user’s mistake.
On the contrary, if your site has broken links, then this would lead to 404 errors. In such a case, Google won’t be able to crawl your webpage. This will result in a negative impact on your site’s SEO.
A sitewide 404 error caused by a permalink issue results in Google’s inability to crawl your entire site.
Impact on Performance
404 errors impact your site’s performance to a great extent. Such error pages are not cached immediately. Now, if your site receives a lot of traffic on such pages, you need to ensure automatic caching is enabled.
With automatic caching, visitors will be redirected to the new page with the same URL.
To check 404 errors, you can install the free WordPress plugin Redirection. This is the best free WordPress plugin to redirect your URLs to a new page. It keeps a log of 404 errors.
Another best way to analyze your site for 404 errors is none other than the King of Internet, i.e., Google Search Console.
How To Fix 404 Not Found Errors on your website?
A 404 not found error can occur sitewide or for specific content. No matter how it occurs, there are ways to handle it and ensure you eliminate such errors. Below we are sharing some tips to handle 404 Not Found errors.
404 not found errors mainly occur sitewide due to permalinks issue. Other reasons include changing the URL slug for specific content or deleting the existing post pasted into a new post.
To resolve both issues, you should follow these methods:
Fixing Permalinks Issue
The primary cause of 404 not found errors is an issue with the permalinks, or if the host uses Apache, the problem might be with the .htaccess file.
To overcome the .htaccess file issue, you should choose a host with Nginx.
Go to your site’s WordPress admin dashboard to fix the permalink issue. The next thing you need to do is go to Settings > Permalinks.
There are several permalinks options. This includes:
- Day and Name
- Month and Name
- Numeric
- Post Name
- Custom Structure
You can optionally set the category base or leave it blank to the default.
Once you are done with the settings, click on Save Changes. Now check your site for the error issue.
Fixing URL slug or moving the content issue
Whenever you change the URL slug of a page or a post and forget to redirect the old URL to a new URL, a 404 error occurs.
Another blunder is when you manually move old content to a new one and delete the old one. This also requires a redirection of old content to the new one. Not doing so results in a 404 error.
To fix these issues, you simply need to enable auto-redirections. You can install Redirections plugins that would automatically redirect the old URL to the new one. So, when visitors visit the old URL, they will get redirected to the new URL.
Instead of the Redirections plugin, you can get the redirections done automatically with the RankMath Pro plugin.
RankMath Pro is the ultimate SEO plugin for your site SEO. Read complete steps on how to use RankMath Pro for redirections.
One of the biggest impacts of not creating redirection is losing the domain authority. All the backlinks associated with the URL will get lost.
If you are setting up the redirection using the Redirections plugin, follow these steps:
Go to Plugins > Add New and search for Redirections.
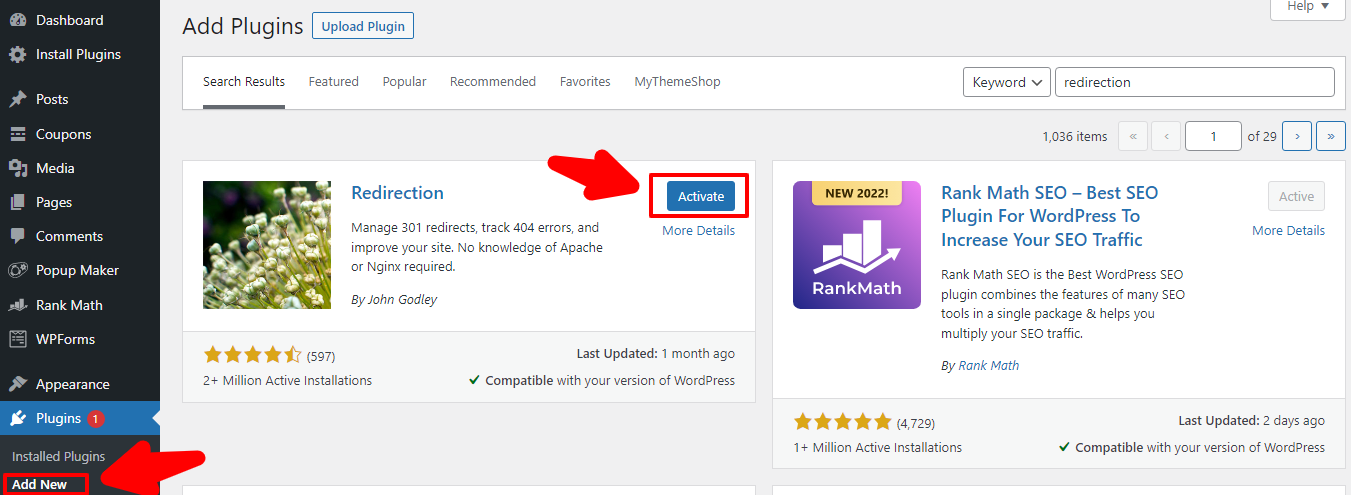
Install and activate the plugin.
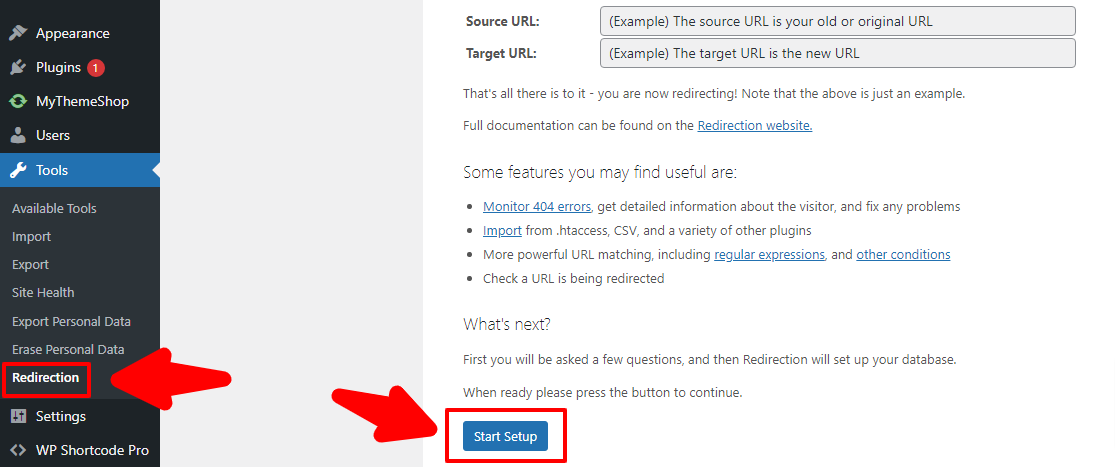
Now on the left side go to Redirections and start the setup by clicking the Start Setup button.
You will get options to enable or disable some settings. This includes Monitoring permalinks, keeping a log of all redirects and 404 errors, and storing IP information. You can enable all the options or let them be disabled.
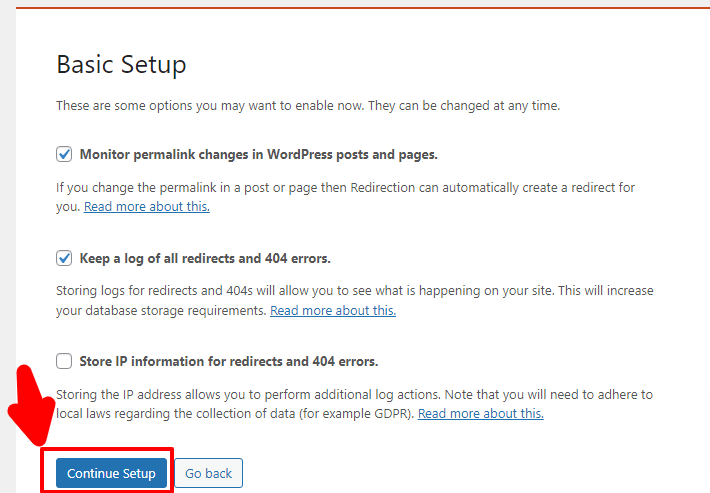
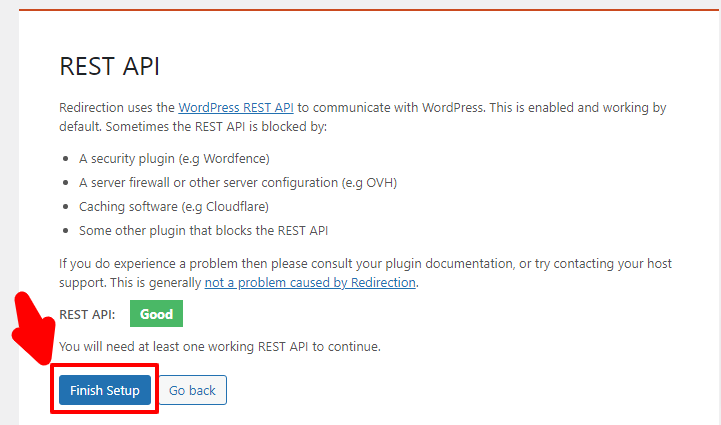
Finally, click on Finish setup, and the plugin will take a few seconds to complete the setup.
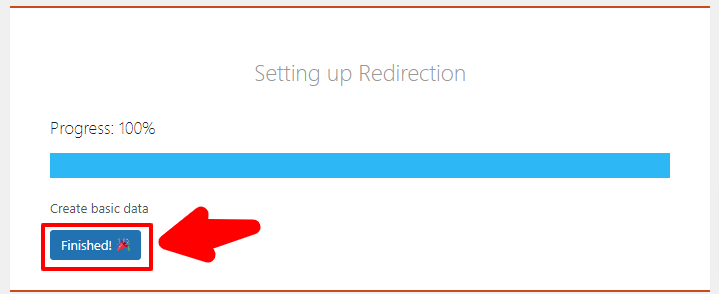
Once the progress is 100%, it means the setup is complete. Click on Finish and start adding URLs for redirection.
In the Source URL, enter the 404 error page URL. In the Target URL, enter the URL where you want the site to be redirected.
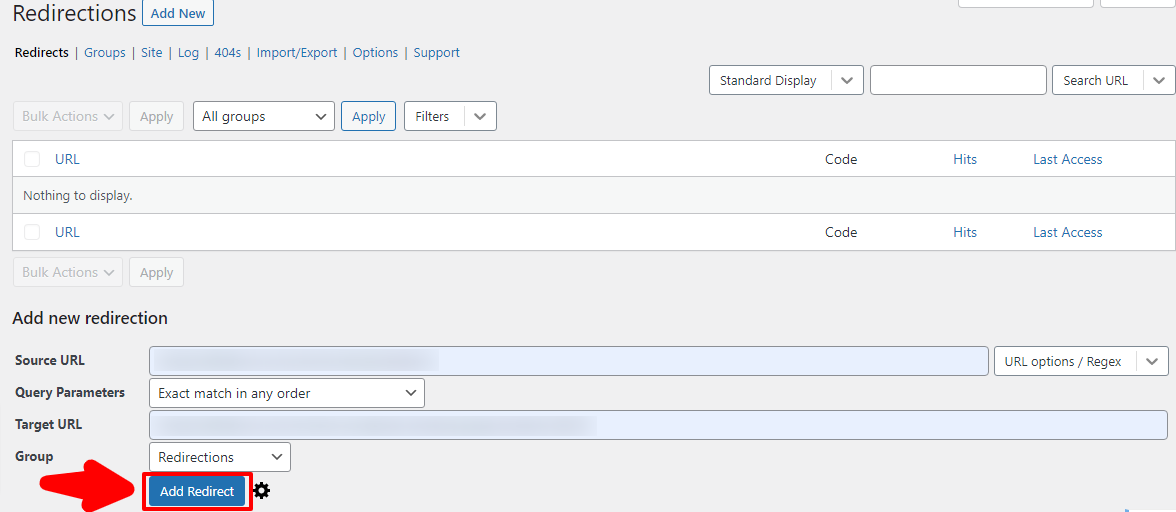
Click on Add Redirect, and your old URL with the 404 error will resolve.
Final Words
I hope this guide will help you handle and fix 404 Not Found errors. The Redirections plugin or RankMath Pro is the safest and easiest way to get URL redirections automatically.