
 SeekaHost.com Client Area
  SeekaHost.app
  SeekaHost.co.uk
  SeekaHost.in
Install SSL in Plesk Using Free and Paid SSL Certificates

By Frank Carson
Table of Contents
Install SSL in Plesk to secure your website and protect data exchanged between your server and visitors. SSL encryption ensures that sensitive information like login details and transactions remains safe while improving user trust and SEO rankings.
In this guide, you will learn how to install SSL in Plesk using Let’s Encrypt, upload a custom SSL certificate, and manage or remove existing certificates directly from the Plesk dashboard.
Why Need SSL Certificate?
Installing an SSL certificate is an important step in securing your website and protecting sensitive data transferred between your server and visitors. A website with HTTPS encryption not only improves security but also builds user trust and supports better search engine rankings.
Methods to Install SSL in Plesk:
1. Free Let’s Encrypt SSL
2. Upload Purchased SSL
Method 1: Free Let’s Encrypt SSL
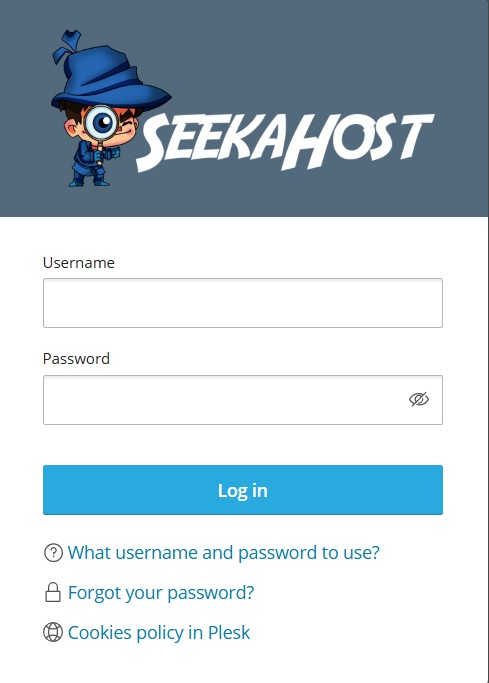
Step 1: Log in to your Plesk Control Panel using domain:8443 or IP:8443
NOTE: Replace the domain/IP with your actual website details.
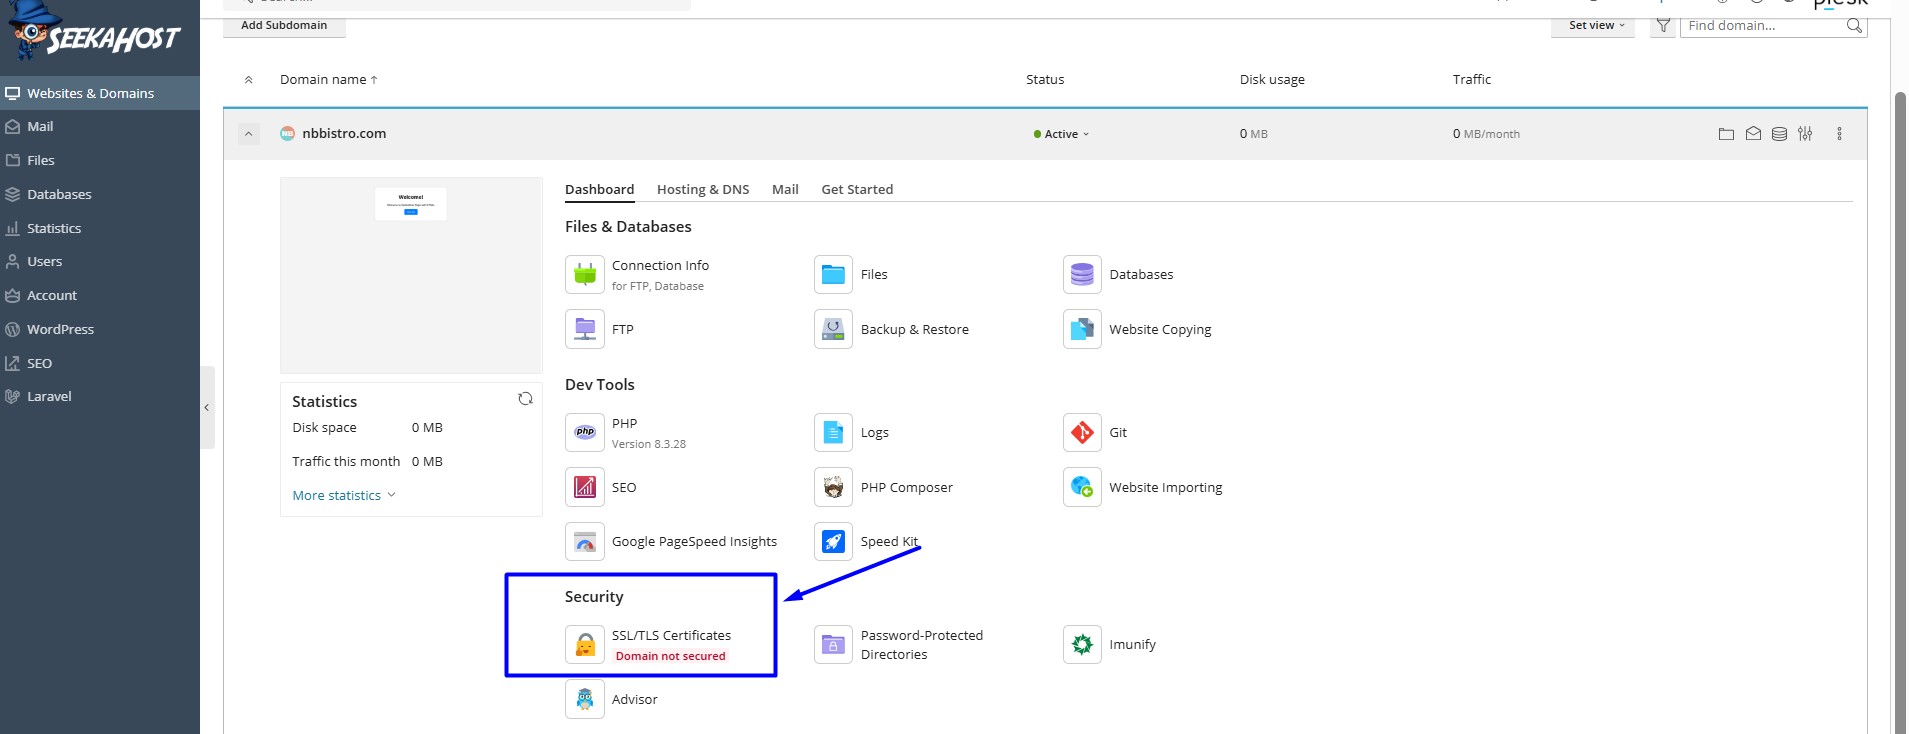
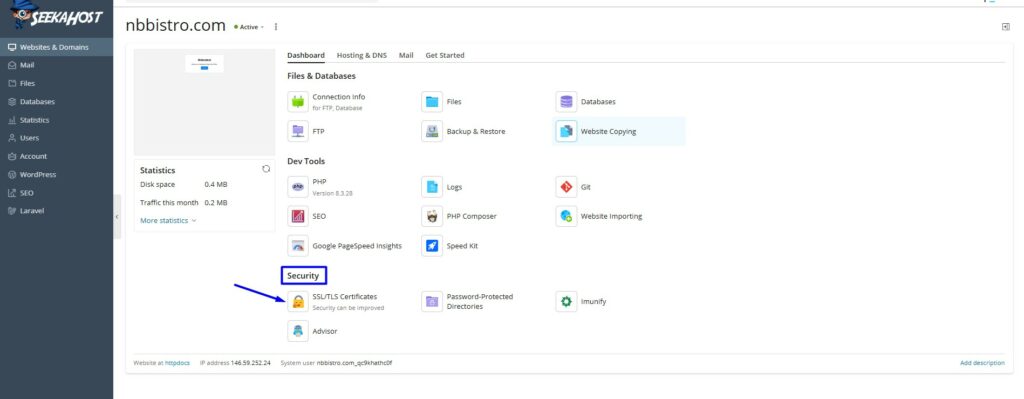
Step 2: In Websites & Domains section, click SSL/TLS Certificate option under Security section.
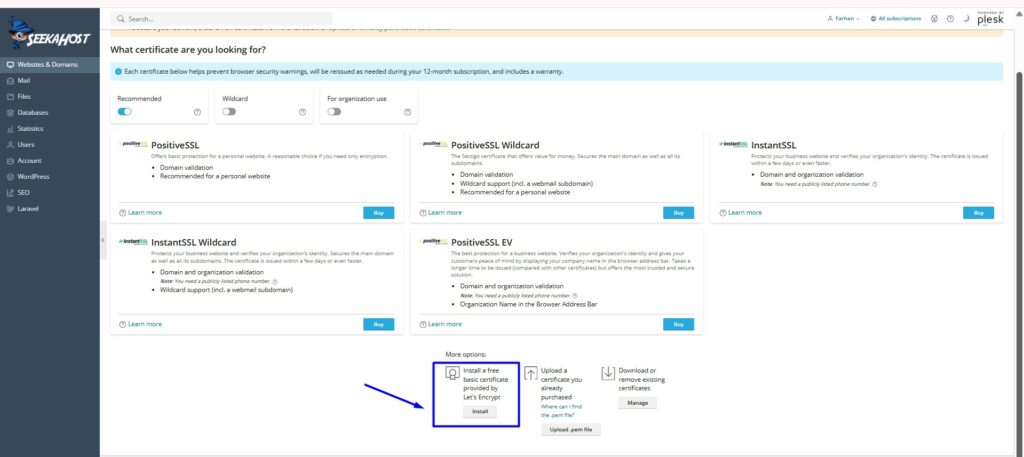
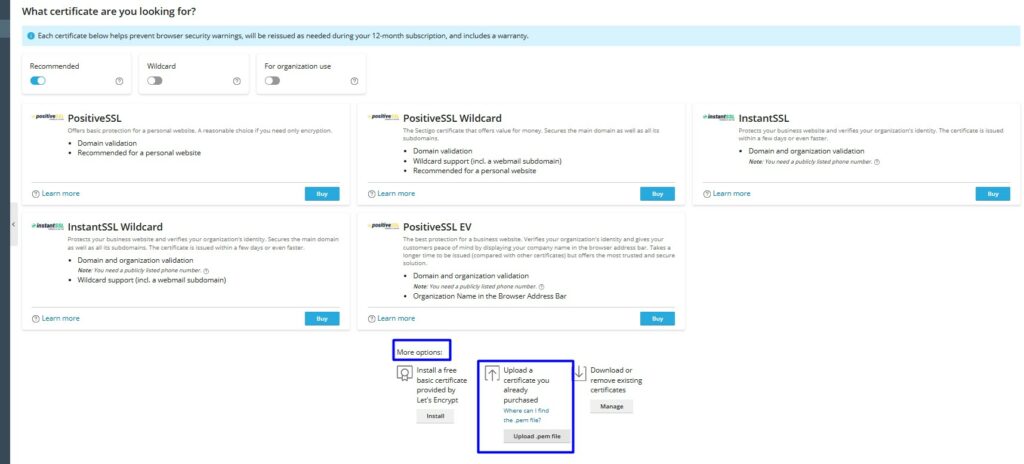
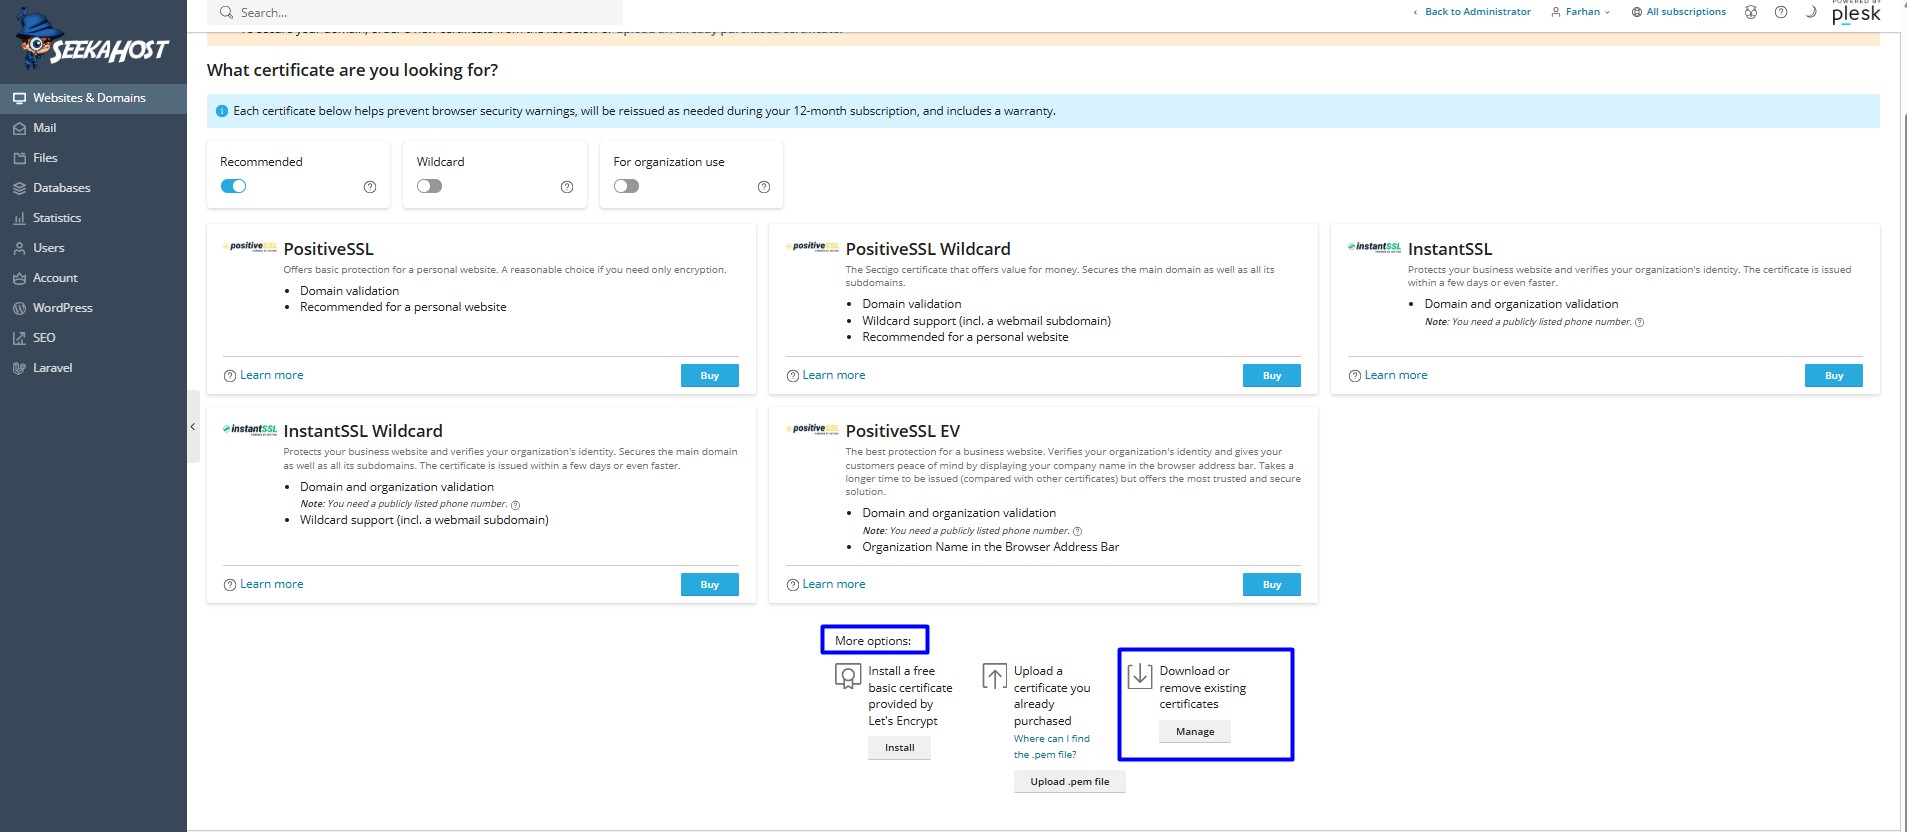
Step 3: Scroll down to view more options at the bottom of the page.
You will get three option.
- Install a free basic certificate provided by Let’s Encrypt.
- Upload a certificate you already purchased.
- Download or remove existing certificates.
Here choose Install a free basic certificate provided by Let’s Encrypt option.
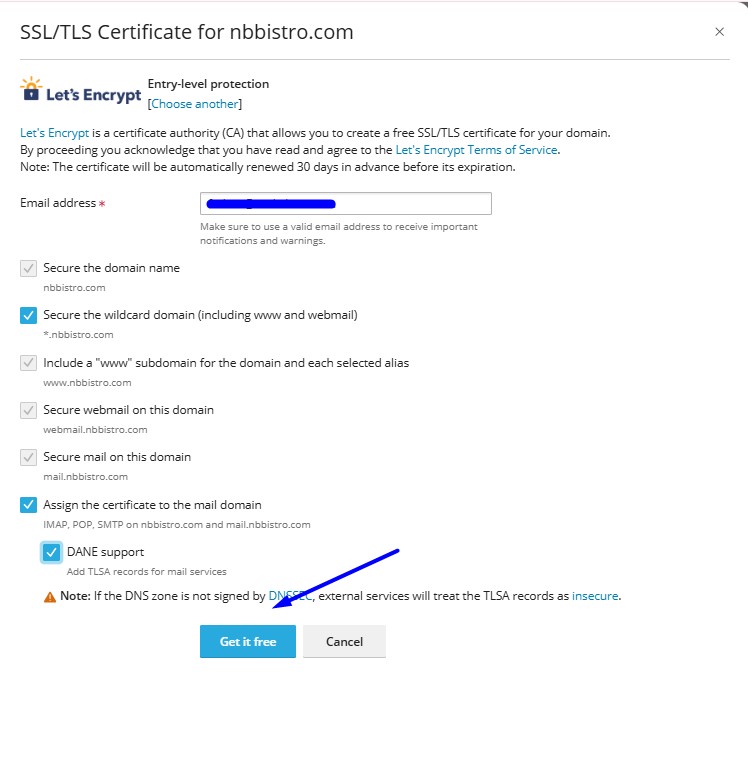
Step 4: Here select all checkbox for the SSL certificate option and click “Get it Free” button.
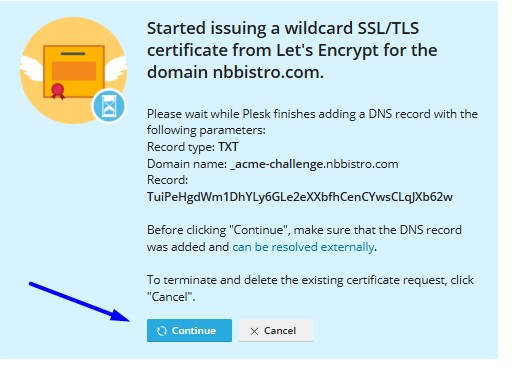
Step 5: If you have selected secure wildcard domain option above, then you need to update the DNS record in hosting or domain dns management and then click “Continue” button.
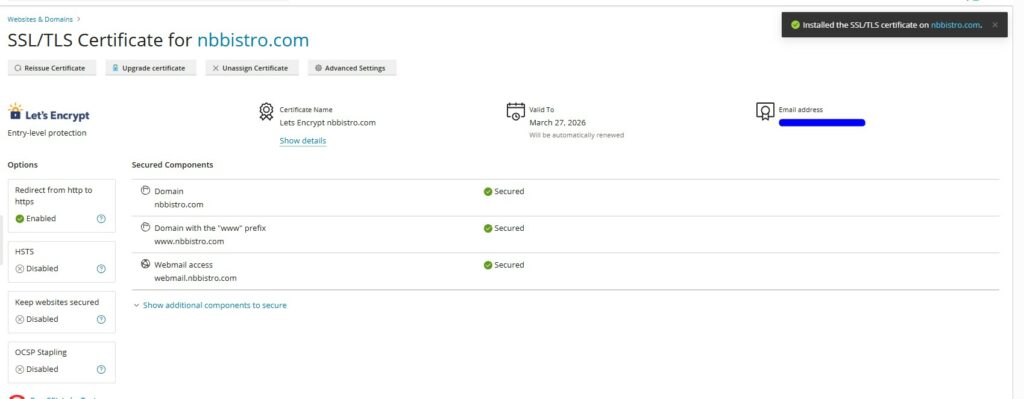
Once it is installed, you will see the secured option next to your domain name.
Method 2: Upload Purchased SSL
Step 1: In Websites & Domains section, click SSL/TLS Certificate option under Security section.
Step 2: Scroll down to view more options at the bottom of the page and Click the Upload .pem file button. Then, upload the certificate you already purchased.
How to Unassign the SSL Certificate:
Step 1: In Websites & Domains section, click SSL/TLS Certificate option under Security section.
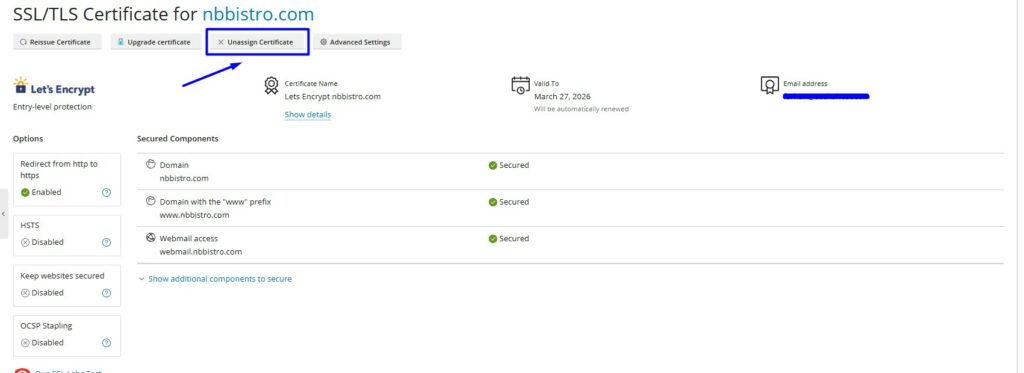
Step 2: Click the Unassign Certificate button to uninstall the SSL certificate
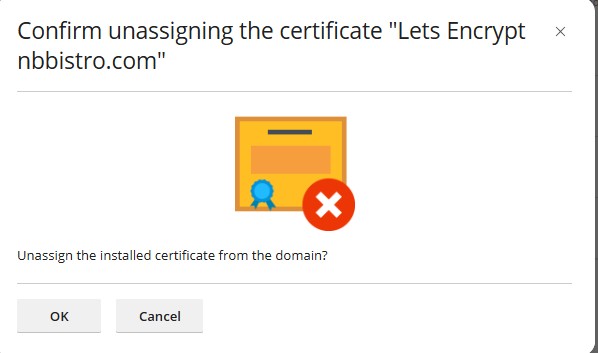
It will ask the confirmation, click ok to unassign the certificate
Download or Remove SSL:
Step 1: In Websites & Domains section, click SSL/TLS Certificate option under Security section.
Step 2: Step 3: Scroll down to view more options at the bottom of the page, Click the Download or Remove existing certificates
Step 3: Select the checkbox and Click the download button Icon next to the SSL certificate.
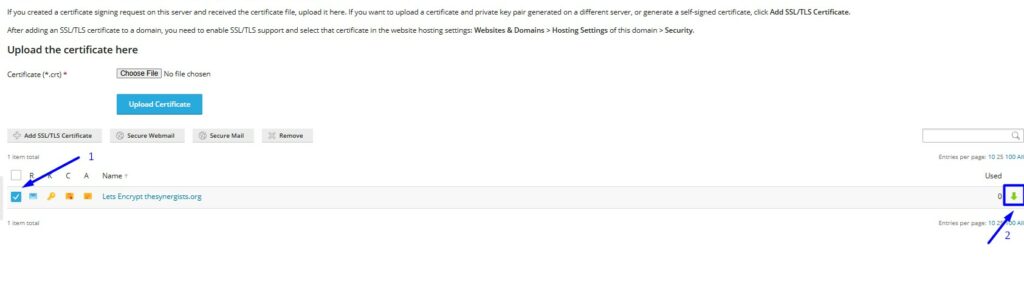
Step 4: To remove the SSL certificates from Plesk, select the check box, click the remove button to remove the SSL certificate.
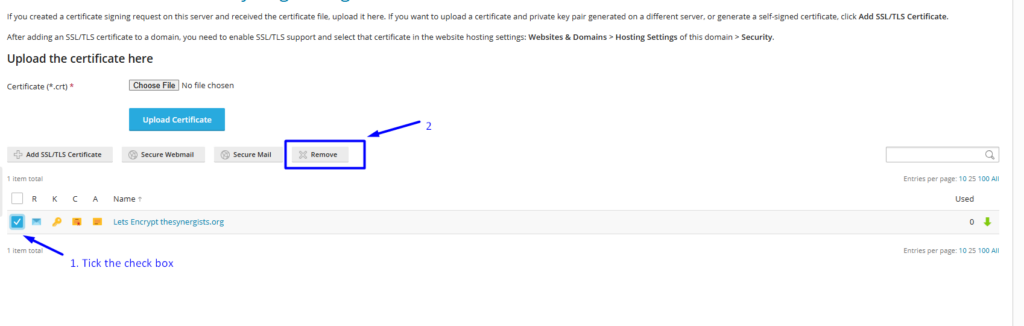
It will ask confirmation to remove, click remove option to proceed with removal of the SSL certificate.
Useful Article Resources:
I hope with this article, you have learn how to install SSL, resign and remove the certificates from the Plesk.