 SeekaHost.com Client Area
  SeekaHost.app
  SeekaHost.co.uk
  SeekaHost.in
 How to Move A WordPress Site to PBN Site And Host With Multiple IP Hosting?

Table of Contents
Looking for how to move your WordPress site to a PBN site and host it with Multiple IP hosting?
In this guide, you will be shown how to do it step by step.
Steps to Moving Your WordPress Site
We have included this article as moving your WordPress site to a PBN site is slightly different and has a few move steps involved that moving your WordPress site to another WordPress host.
There are many benefits to using a Private Blog Network including using Expired Domains to grow your site’s authority. PBN blogs are on separate IP’s so will get counted as a separate site when viewing or linking to your other sites. When done properly this can really boost your site’s rankings due to having more blogs pointing at your main site with strong back links.
If you’re looking to simply move WordPress Site from one host to another WordPress host you might want to check out our video here.
Table of Content
- Export Your Current Site into a File
- Prepare New Hosting For Your Site
- Changing Private Name Servers + IP’s
- Changing Name Servers
- Delete Old Site
- Import Site to New Host
- File Size Problems
- Settings Up Your Migrated Site
Export Your Current Site Into a File
A very important action you need to do first is making sure you have your SSL certificate activated before you begin this process. All hosting providers will differ but usually you have the option to activate it through your main client area and the WordPress Page Information.
To export our site we will be using the All In One WP Migration Plugin. This will make everything easier by exporting a good readable file that it can import with ease again on your new Blog Network.
Once downloaded to your site and activated simply press Export under the WP Migration option on your WordPress Dashboard. Then select File as the option to export it too. Once finished just download this to your PC and you now have a good back up of your entire site.
Prepare New Hosting For Your Site
Now you want to make sure your hosting is ready to move your site too. If your unsure where to go for PBN Blog Hosting you should check out SeekaHost’s new hosting management system. For more information on SeekaHost PBN Blogs you can read an article here explaining the benefits of using their system.
So log into your new hosting panel and create a new PBN blog, for this example we will be using the SeekaHost.app site as its make easier to manage and navigate.
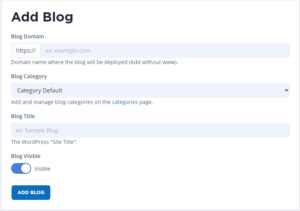
Once logged in you will need to add your blog by entering its URL, Site Title, Category and adding it to your PBN blog list.
Make sure to take note of the new username and password they have created for the blog, these are somewhat temporary untill we import your site back up but you will need them for the time being.
Although it may appear as your site is now up and live it is and we need to complete the rest of the steps to make sure the domain will be pointing at the right place so it can send traffic to your site.
Changing Private Name Servers + IP’s
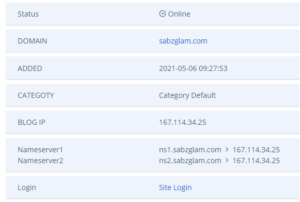
Before changing the name server 1 and 2 we will need to change the private name servers and IP first for your domain. You can find the new name servers and IP’s from the empty blog site you just created. Just find the info for your blog.
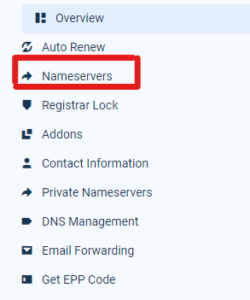
To do this just log into your domain hosting service, in this case I have bought my domain from SeekaHost.com and you need to find the manage domain option.
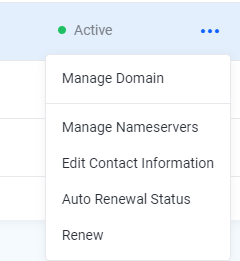
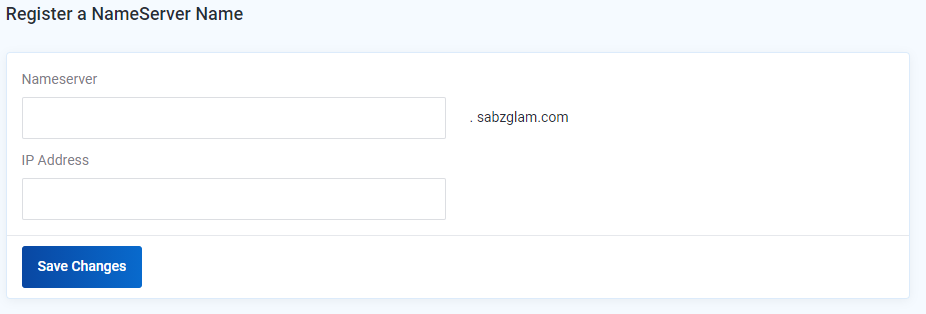
First off you need to change the Private name servers with the new IP, to do this go to Private name servers.
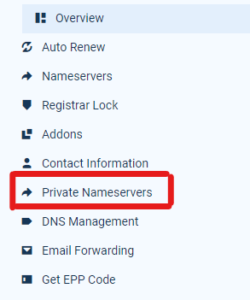
Next Type into the Nameserver ns1 and fill in with the IP provided from your new PBN Blog. Hit Save and then repeat the same again but this time typing ns2 in the Nameserver option and the same IP from your blog again, tap save once more.
Changing Name Servers
Once the Private name servers are changed we need to go ahead and change the name servers on your domain to match the ones by your new hosting also.
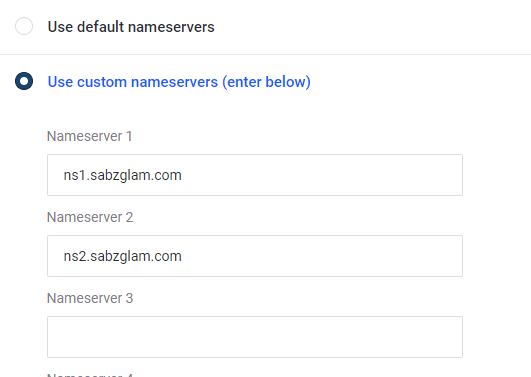
You can find your name servers at your new blog hosting like the in picture here. You will be provided with the ns1 and ns2 from your new hosting page.
Start by selecting Use Custom Server. Like before we need to change them over to the new ones so its pointing at the right site from the domain. Go ahead and copy your name server 1 into the correct box (replacing the one filled in by the hosting company) and the same with the name server 2.
Copy Name Server From New Hosting

Paste it Into The Domain Name Server
Delete Old Site
Once you have your back up from the first step. You have changed your Private name servers and Name servers. You can now go ahead and delete the old blog from the original hosting. This is because it cant be hosted in two different places so you need to delete it to start it up on the new hosting.
If you have an email created and your using SeekaHost you will need to delete the email account first to procced with deleting.
Import Site to New Host
Now your name servers are propagated you can activate the SSL certificate for your site. You can now use your New but temporary login and password information you gathered earlier from starting the new PBN blog. Sign in using these credentials log into your site, it will currently be an empty WordPress site. Do not forget your original Username and Password as you will need them to log in once your site is imported.
From your dashboard head to plugins and install the same WP Migration Plugin as before. Once downloaded this time your going to select import from the options it gives you. You can select File and then find the file you exported of your site and download it to your new site completely.
If your site downloads with out any site limitation problem skip the next step and go to Setting up your Migrated Site.
File Size Problems
If your get the message saying you files size exceeds the maximum file size allowed then you can use another free service they provide by tapping on the get unlimited option on that message pop up.
Select the free service that will let you download up to 512mb now. There is another paid service but unless you have a huge site you arent likely to need this.
You will go ahead and download another plugin. At this point head back to Plugins from your WordPress dashboard, click on Add New and then Upload Plugin. Select the plugin you just downloaded and activate it.
Your problem will now be fixed, repeat the process of selecting Import, File and then selecting your back up you downloaded earlier.
Settings Up Your Migrated Site
Only 2 steps remain once your site is uploaded and these two are important so make sure you complete these also.
Firstly you will need to log back in as soon as you press anything on your page as you will now need to log in using your original Username and Password, you dont need the temporary ones anymore.
Step 1
Go to settings and add the www. to your WordPress Address (URL) and your Site Address (URL)
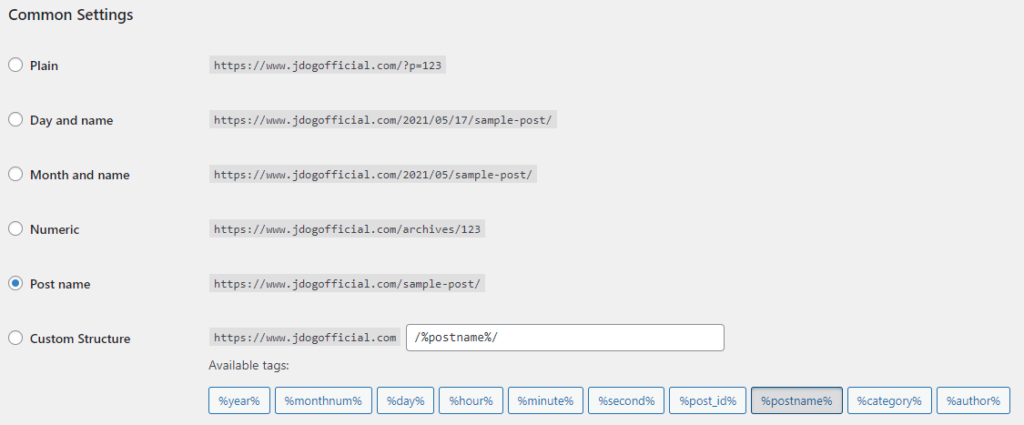
Step 2
From settings go to Permalinks and select post or the way you had it before on your site as migrating your site over will set this back to default.
Conclusion
Although the process might be a bit daunting at first you will soon get the hand of it. And once completed the first time you will find the process quicker and easier every time you need to do it again.
I highly recommend the WP Migration plugin due to its ease of use, free features and also because I have moved many sites myself and have never had anything go wrong. It moves everything over exactly as you left it including plugins, database and everything else effortlessly.