
 SeekaHost.com Client Area
  SeekaHost.app
  SeekaHost.co.uk
  SeekaHost.in
How To Update Personal (Child) Nameservers in Spaceship?

By Frank Carson
Every domain registrar has a different way or interface for updating the Private Nameservers. In this article, you will be guided on how to update private nameserver details in Spaceship.
Setup Personal Nameservers in Spaceship
Before following steps, ensure you are already logged into your spaceship account.
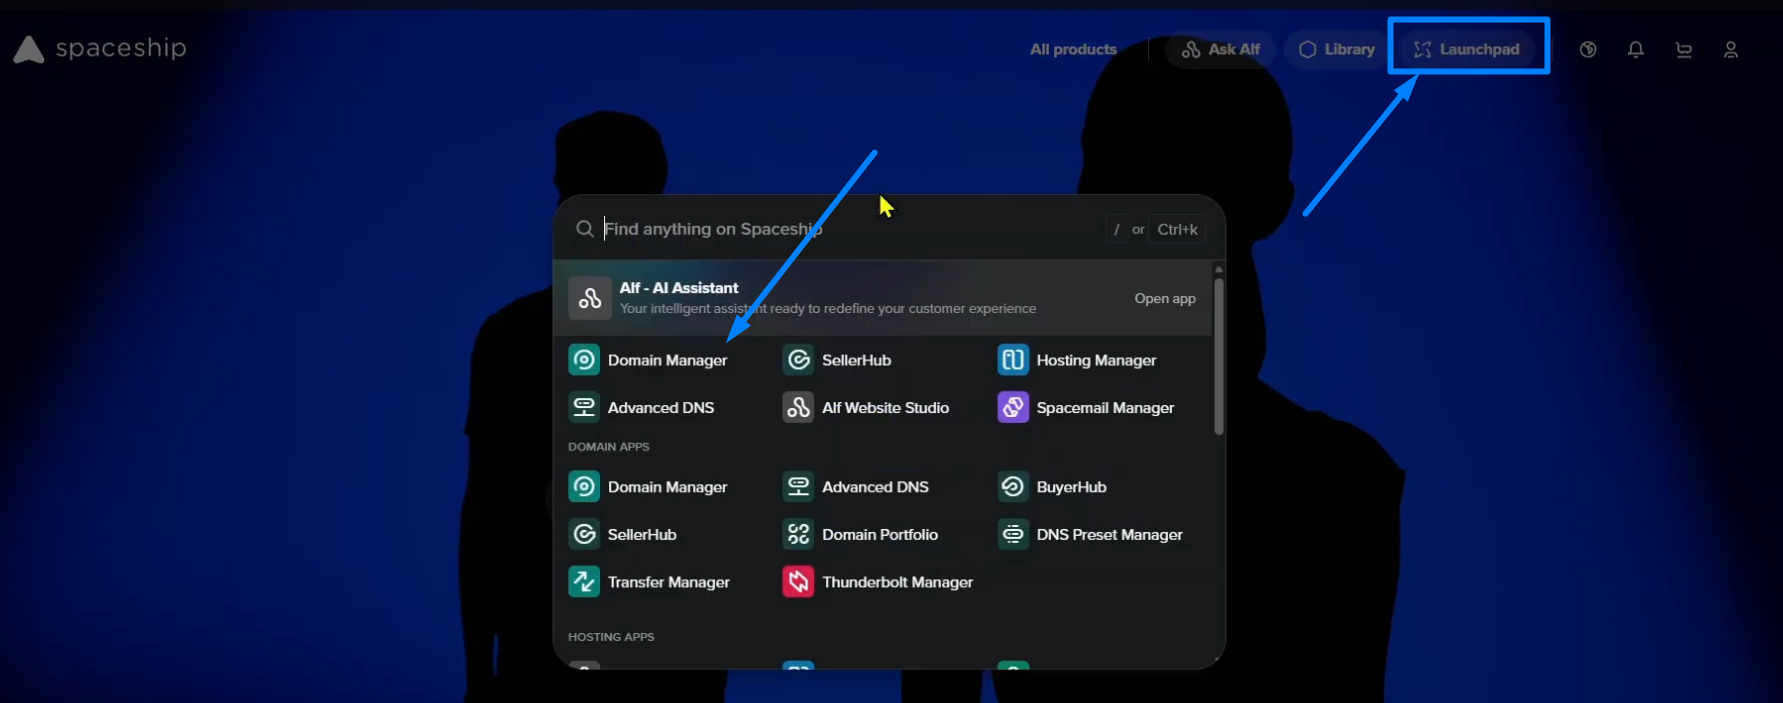
Step 1: Visit Spaceship -> On top click “Launchpad” -> Domain Manager
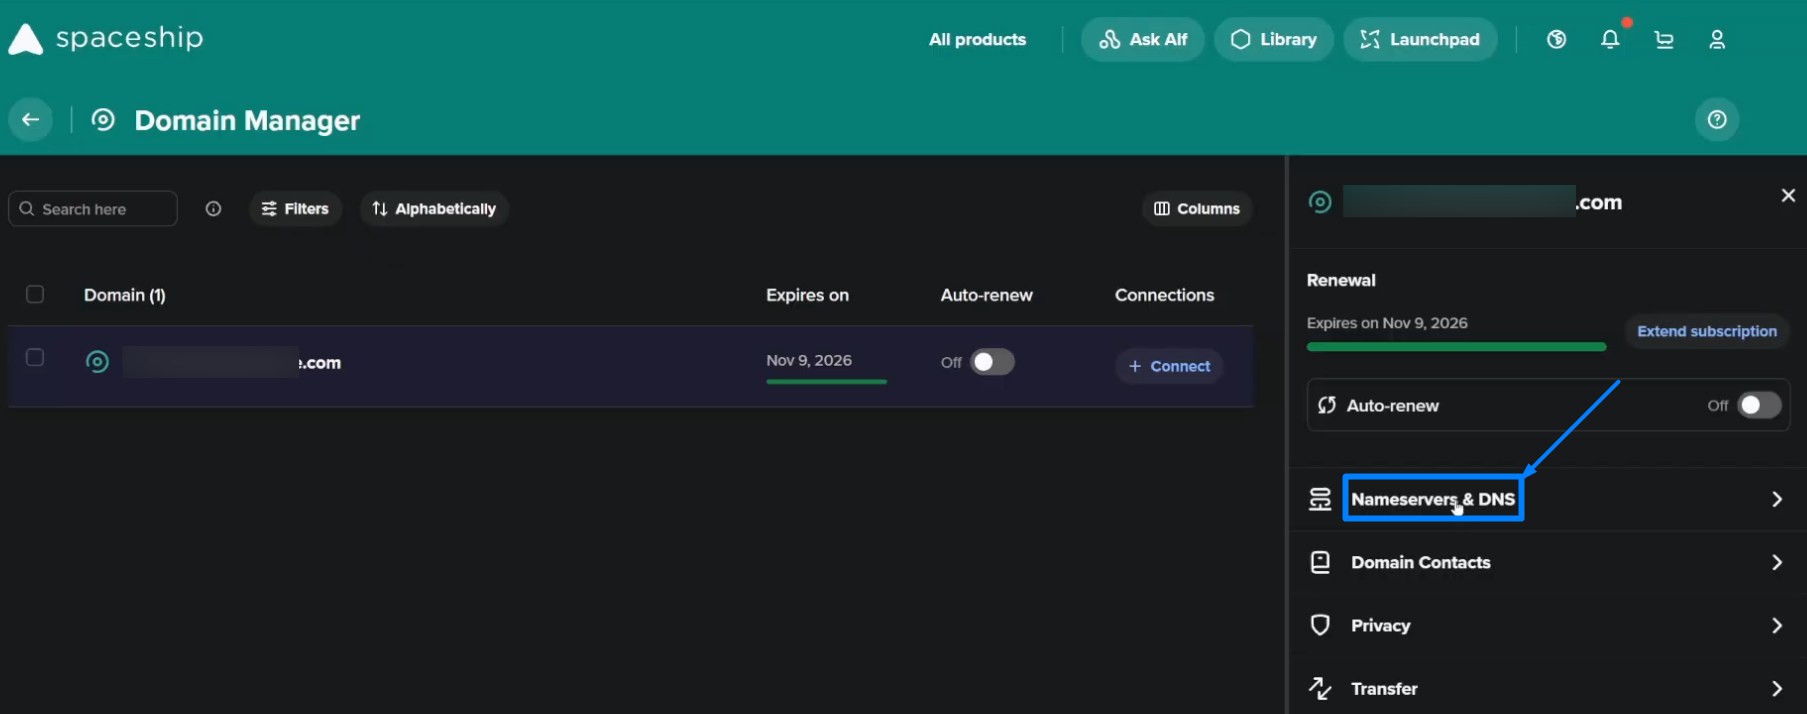
Step 2: Select the Domain -> click Nameservers & DNS option on the right side.
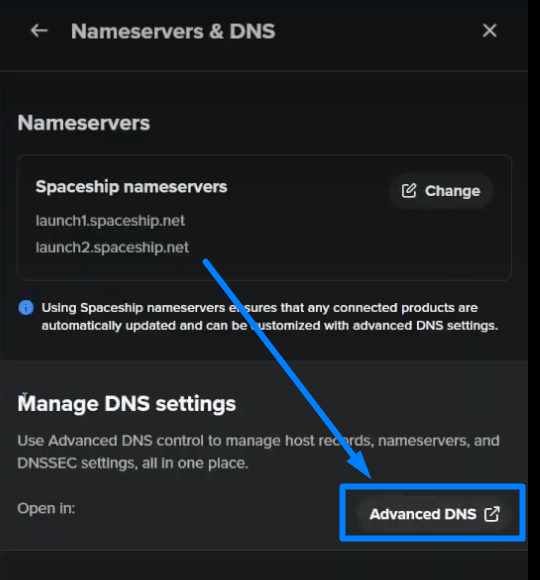
Step 3: Next, click Advanced DNS.
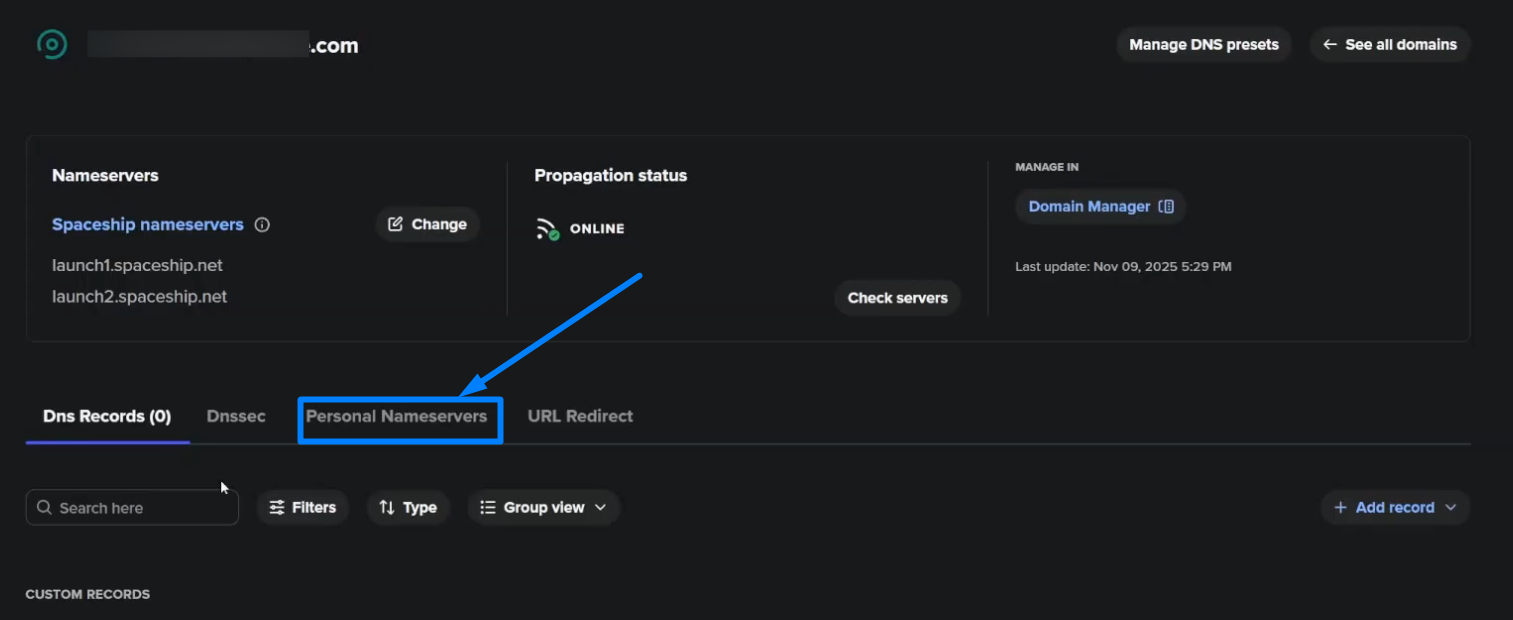
Step 4: Under Advanced DNS option, Choose Personal Nameservers tab.
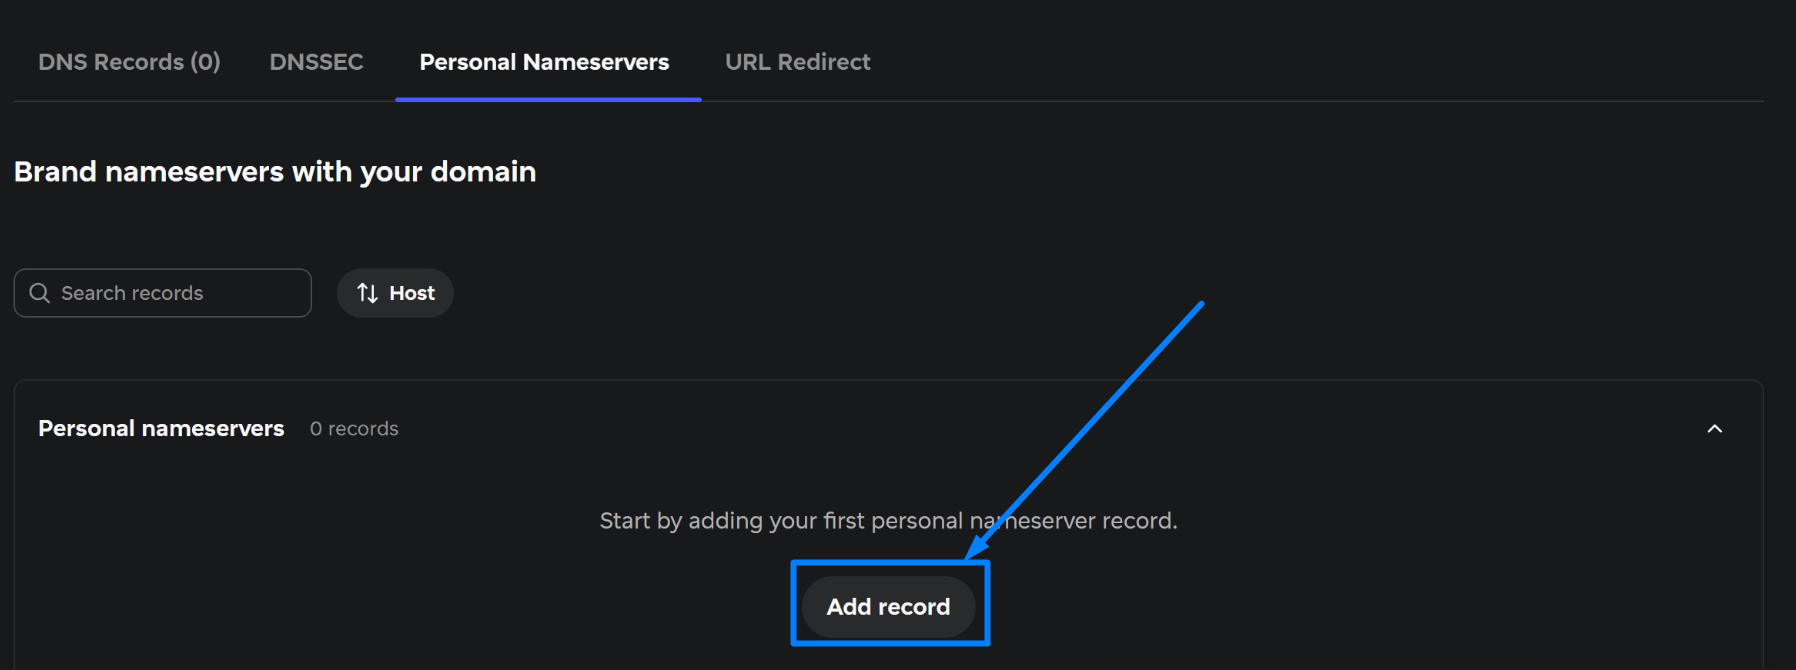
Step 5: Now click ‘Add record’ button.
Step 6: Enter the nameservers and respective Ip address in the fields. Once done, click Add button at the end of the records.
Host: Enter ns1
IP Address: Enter the IP address for ns1 record.

Step 7: Again, click +Add record button below the updated records and do the same process for “ns2” record as well.
Step 8: Next, select “Custom DNS” tab on the same page.
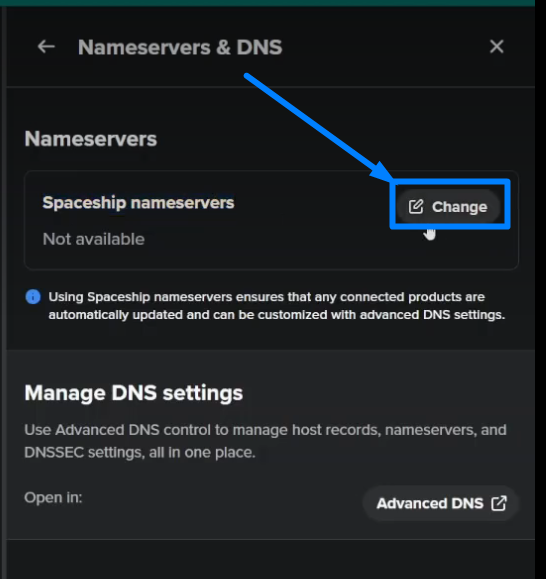
Step 9: Switch to the Custom DNS tab, go back to Domain Manager section -> Nameservers & DNS -> click Change button
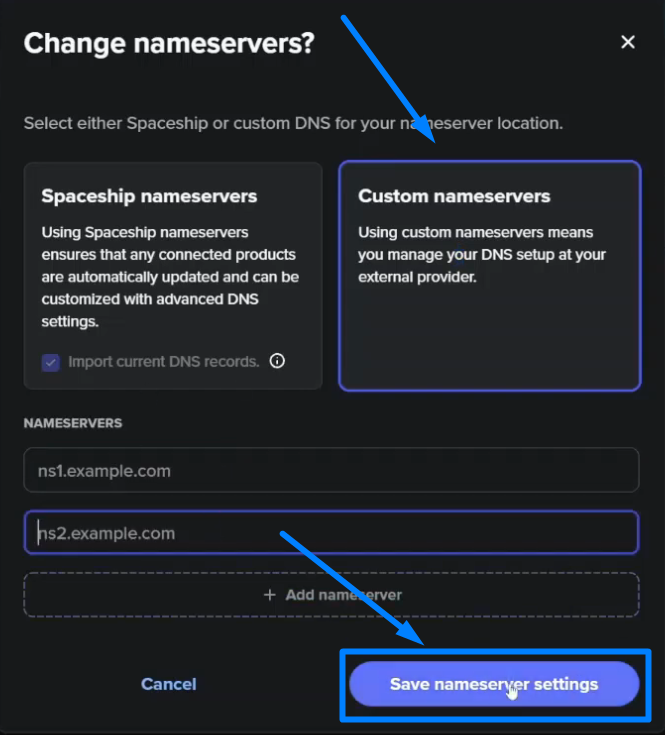
Step 10: Select Custom Nameservers option -> enter the private nameservers -> click Save Nameservers Settings button.
After completing the setup, you can verify DNS propagation using tools like WhatsMyDNS. Keep in mind that DNS changes may take 24-48 hours to fully propagate across the internet.
If you’re building private blog networks or need scalable hosting setups, you can explore PBN hosting solutions that are optimized for managing multiple domains efficiently. You may also consider using quality premium domains to improve your website ranking with quality backlink and SEO content.
Hope you have successfully updated the private nameserver for your domain to connect with hosting.