 SeekaHost.com Client Area
  SeekaHost.app
  SeekaHost.co.uk
  SeekaHost.in
How to Create cPanel Account in WHM?

Table of Contents
If you buy any dedicated or VPS Hosting service and configured cPanel licence to manage the accounts, then you should create cPanel account for each website you would like to host in your server.
Without hosting a domain, you cannot create a website and live the content or point domain to the server.
With WHM and cPanel, you can host individual account, allocate dedicated space to each one of them according to their requirements and keep unaware of other account holders that they are using shared resources or the server with. This essentially gives them separate “sandboxes” to use for their own websites and email.
In this tutorial, we will walk you through how to create cPanel account in WHM.
Things to Cover when create cPanel Account:
1. Purchase Hosting plan with Fully Qualified Domain Name.
2. Add a Package based on Business or Website Needs
3. Create cPanel Account and allocate the suitable package.
Steps To Create cPanel Account in WHM:
Step 1: Login to WHM
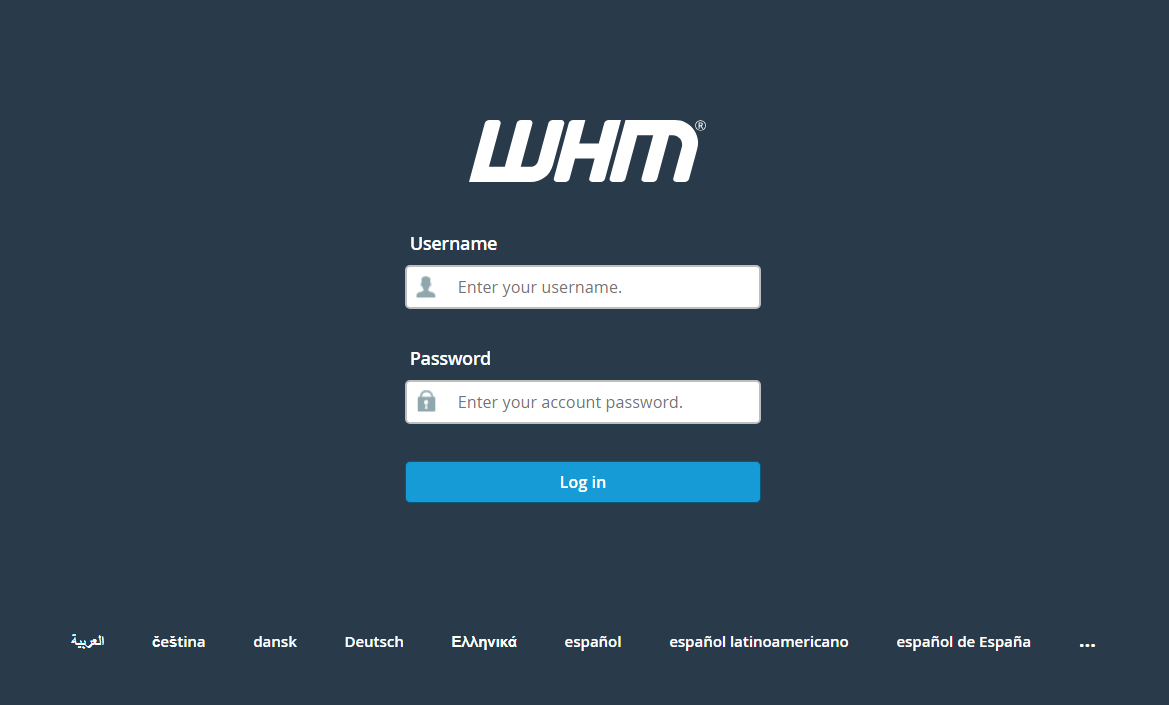
You can either access through IP:2087 or you access with URL – panel.domainname:2087
For example,
If you are accessing with IP (51.71.152.122) allocated, then you have use – 51.71.152.122:2087.
If you are accessing with domain name (seekahost.com), then you can use – portal.seekahost.com:2087.
NOTE: Portal.domainname:2087 will only created by our server team and can be accessible if you have purchased hosting plan with Fully Qualified Domain Name.
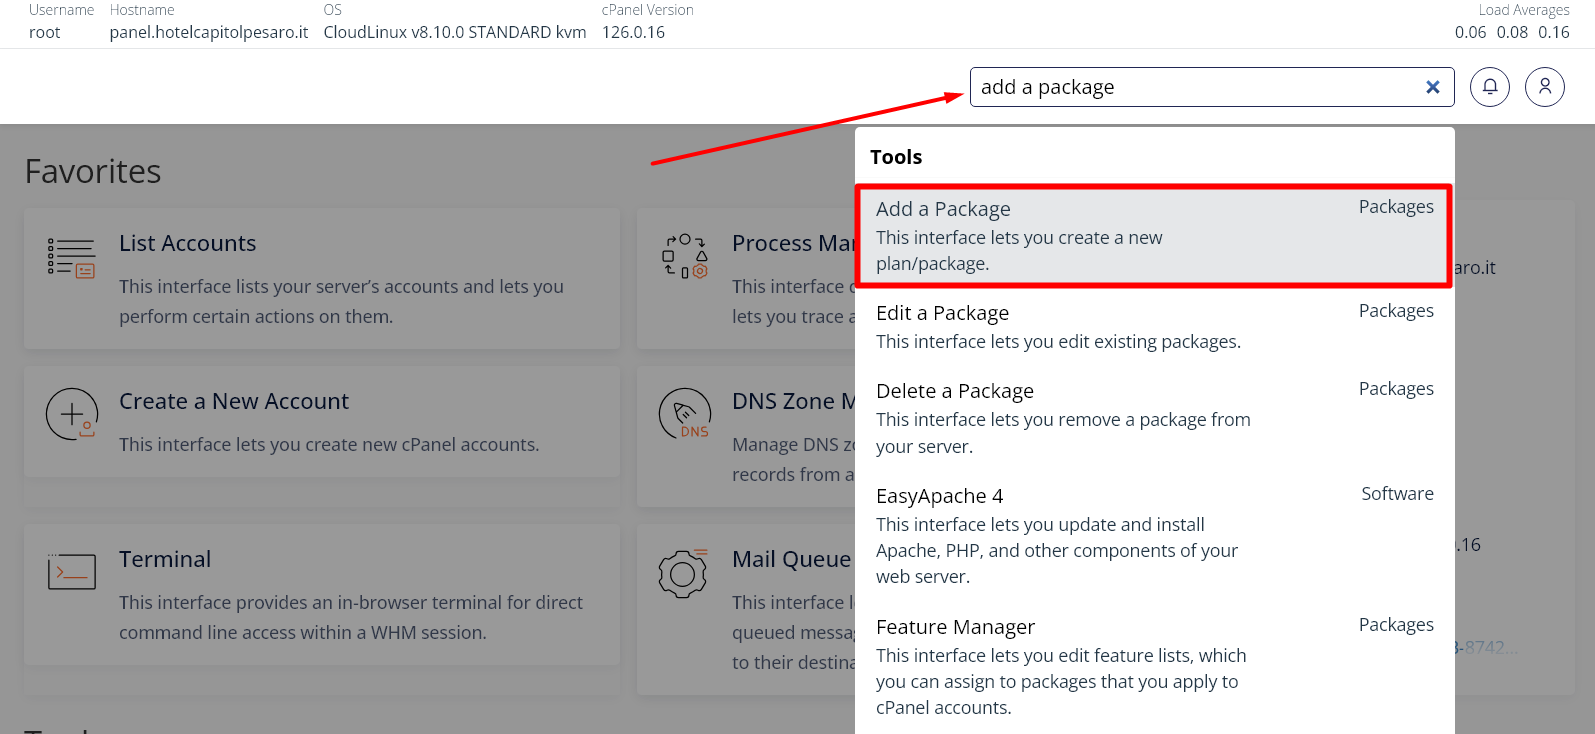
Step 2: Search “Add a Package” in WHM.
Information:
You can set custom resource limits in cPanel/WHM based on each client’s needs or the price of their hosting package. For example, if you’re hosting a simple “blogging” site that requires minimal resources, you can assign lower bandwidth and disk space limits and offer a lower price. More resource-intensive sites can be given higher limits and charged accordingly. These limits help you manage server resources efficiently and tailor your offerings to different client requirements.
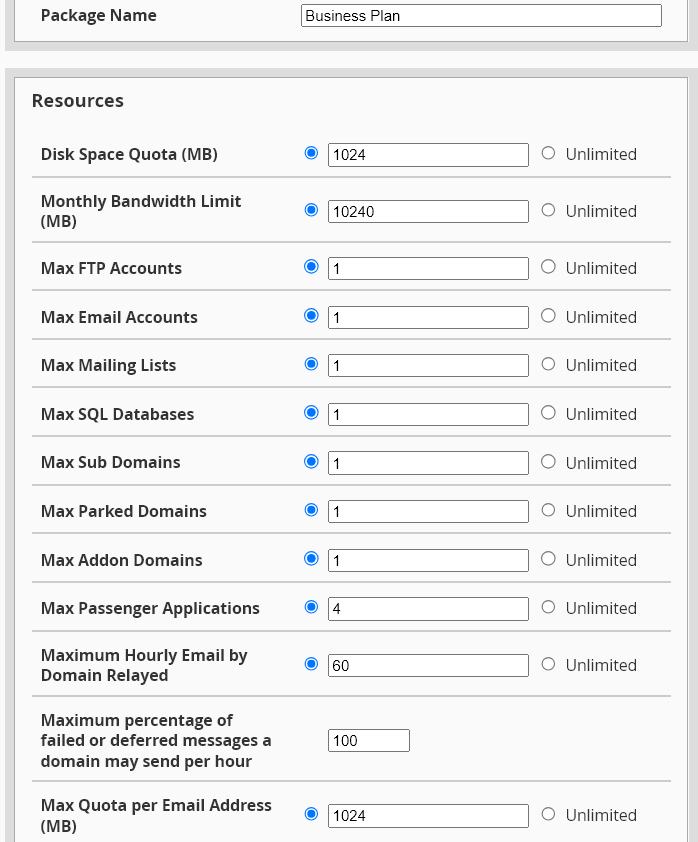
Step 3: Set the resource limitation for the package and name the plan to allocate when hosting domain.
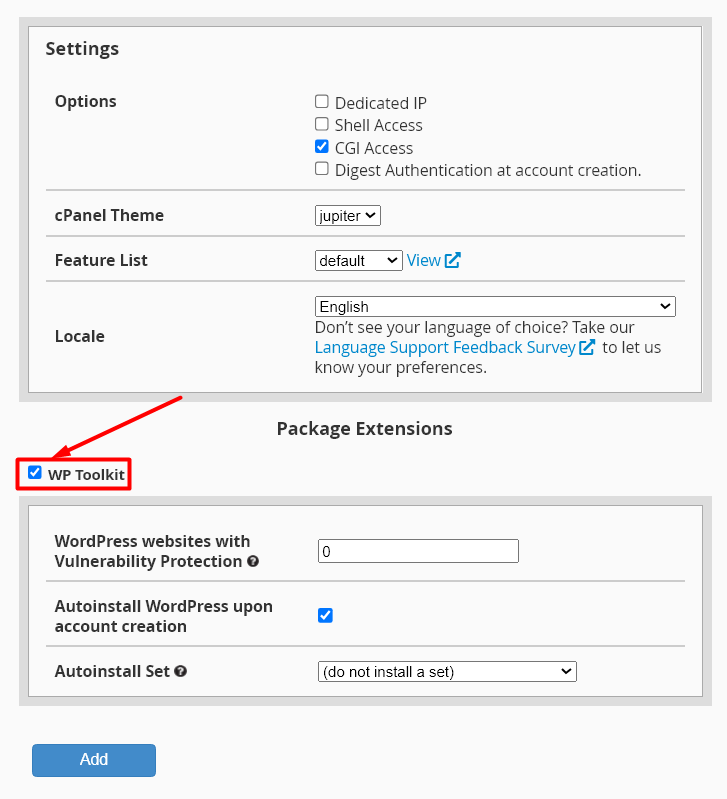
Step 4: Right below the resource details for the package, you can set additional settings and as well set automatic WordPress Installation through wp-toolkit option.
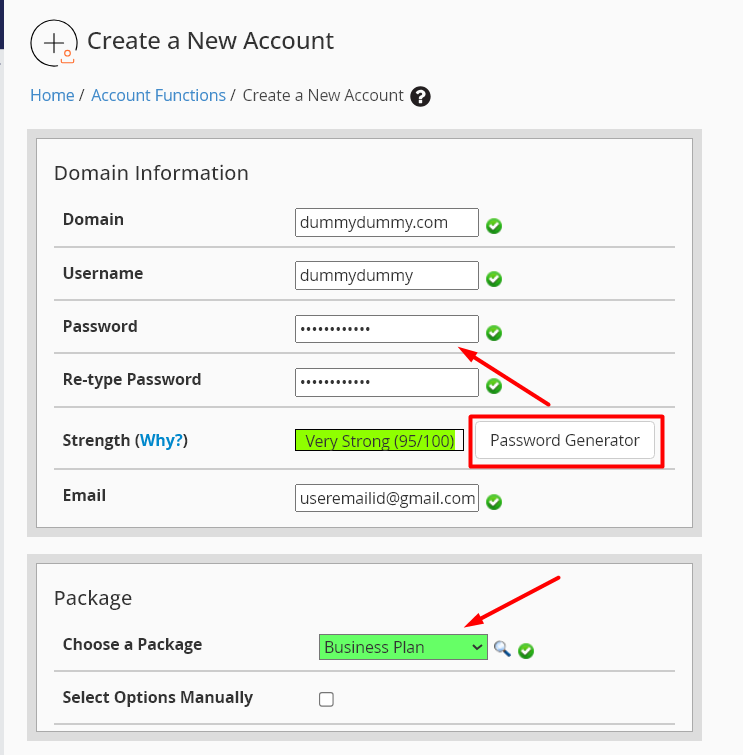
Step 5: Search “create a new account” in search box and enter the domain name which you want to host by choosing the package name “Business plan“.
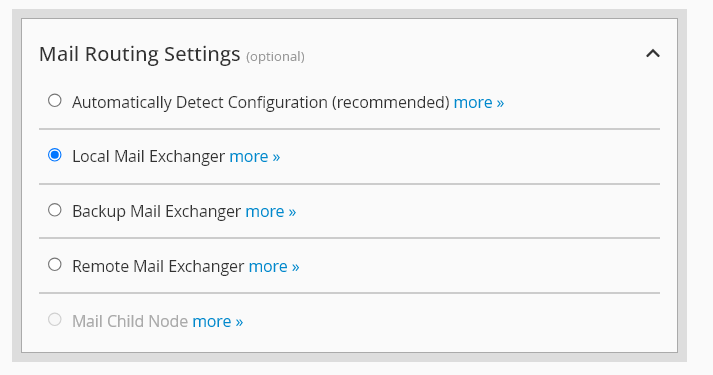
Step 6: Set Mail routing settings for the account.
If you set local mail exchanger, then it will allow to send and receive for the email account created in cPanel. If you set remote mail exchanger, then it will allow to send and receive emails from external email service by ignoring the email account created in cPanel.
Step 7: At the final step, enable checkbox for which you want to function on DNS Settings.
By default, DKIM and SPF options are enabled which is required to send and receive emails with validation. You must also enable the DMARC option for the same.
Additionally, you can enable “Use the nameservers specified at the Domain’s Registrar” so it takes automatically what nameserver set in domain registrar.
With this, you can enable “Overwrite any existing DNS zones for the account” if you want to overwrite dns records as well. It is recommended to not enable last two of these options unless you want to overwrite or required to take domain registrar dns records.
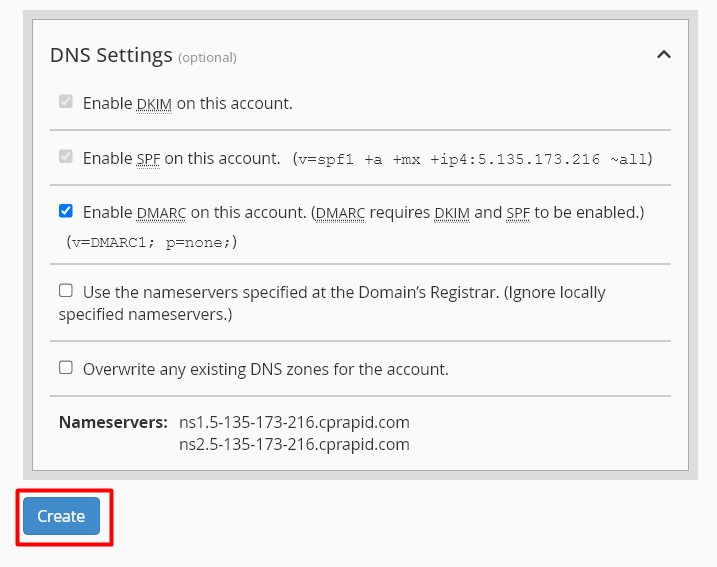
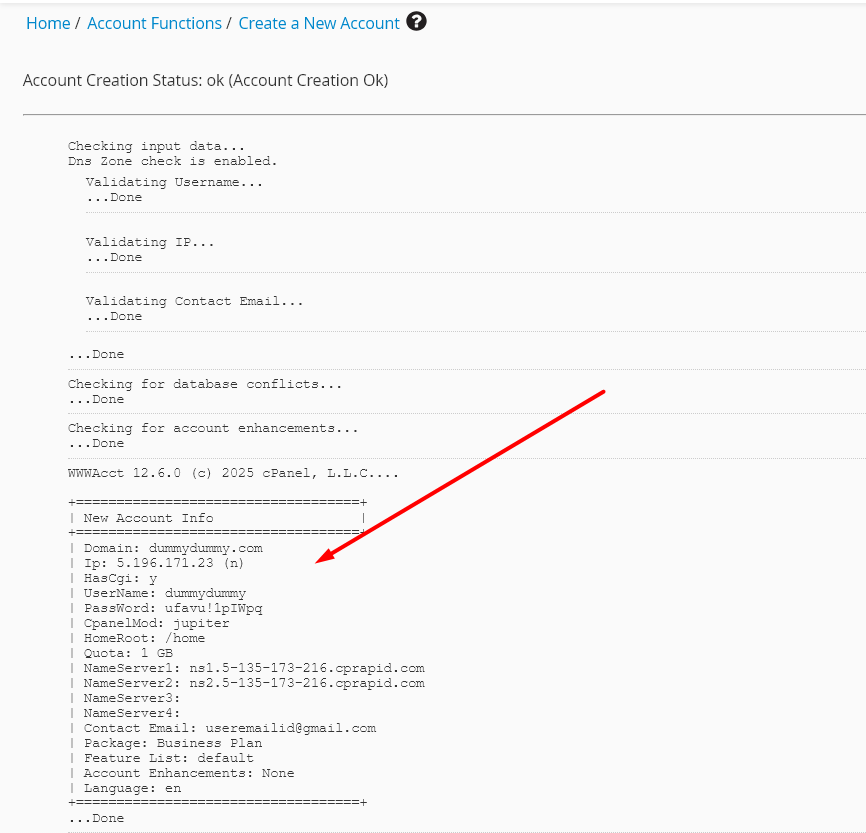
Step 8: Now you will get all the necessary hosting details along with ip allocated by default after click Create button.
Step 9: If you want to change the IP allocated for the domain, search “change site’s ip address” option in whm. Now enter the domain name and click change button to allocate different IP available in your server.
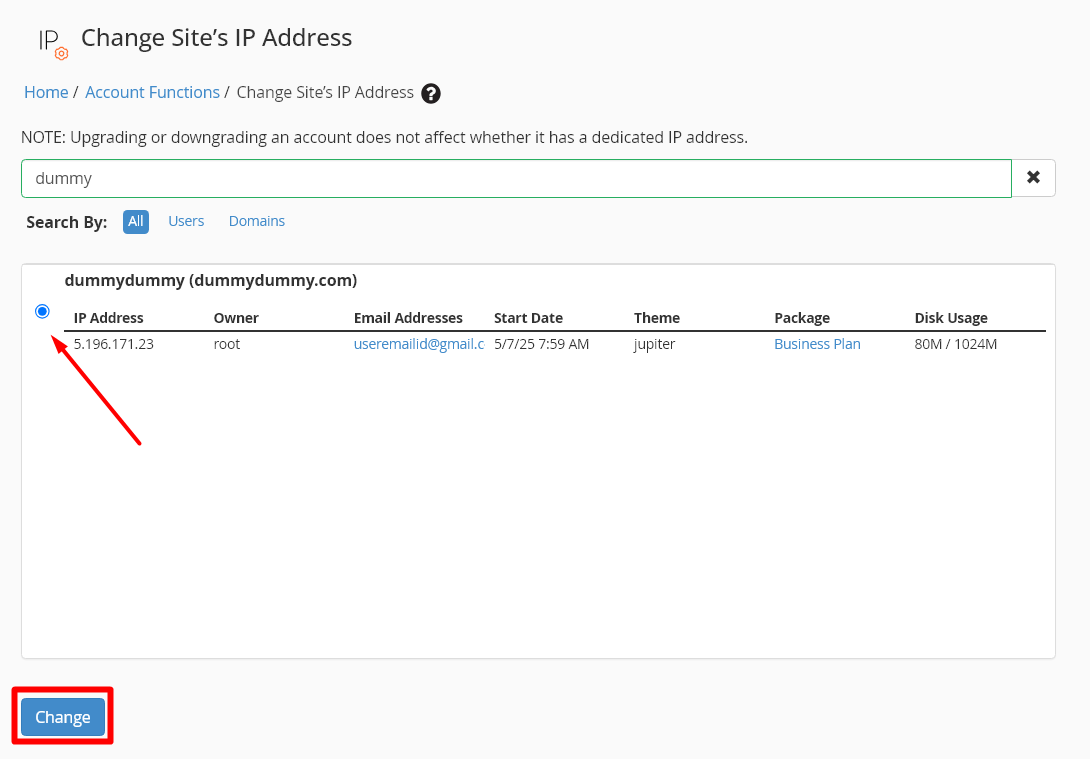
Step 10: From the drop down, choose the different IP address for the website and click change button to change the IP.
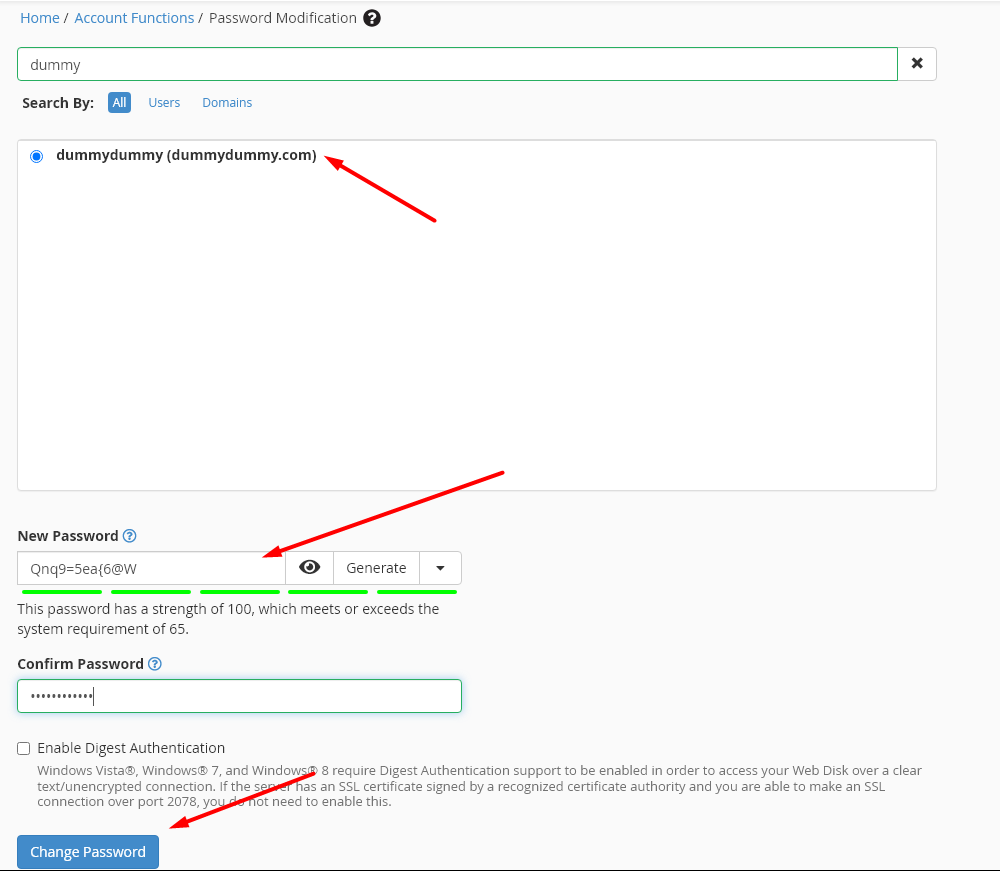
Step 11: If you want to change the password for the particular cPanel account, search “Password Modification” option in whm. Now enter the domain name -> click generate password button -> click Change password.
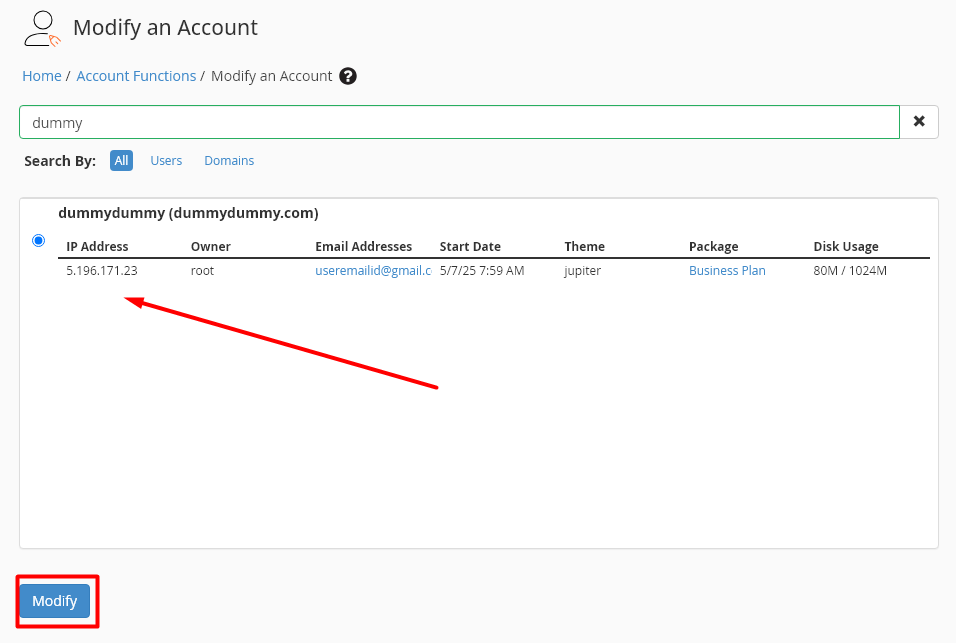
Step 12: If you want to change any of the details updated for the domain, search “Modify an Account” in whm. Now enter the domain name and click Modify button.
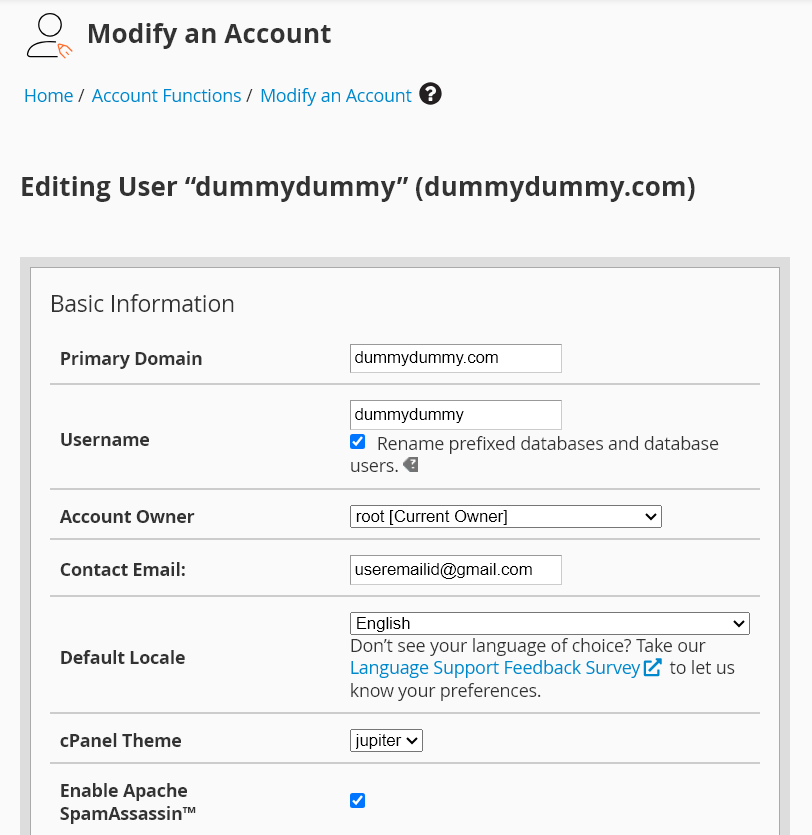
Step 13: Here you can edit the domain details like, domain name, username or email address. If you want to change the value for the package, do not change in this option which will either create new package or replace with existing values.
Step 14: If you want to edit the package values, then search “Edit a Package” and click edit button.
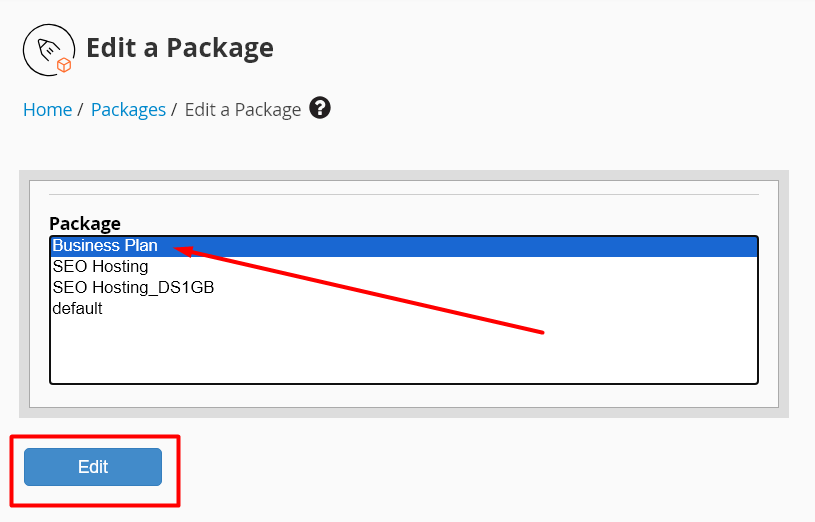
Step 15: As you have done in the step 3 and 4, you can update or change the values in specific field needed.
Reference Articles:
1. Login to Individual cPanel account.
2. Install SSL for website in cPanel.
Hope this article guides with necessary information related to create, manage and modify an cPanel account.