 Client Area
  SeekaHost.app
  SeekaHost.co.uk
  SeekaHost.in
Learn How to add Addon/Subdomain in Virtualmin

By Ryan Bradman
Virtualmin is a web hosting control panel that allows you to manage your domains and websites with ease. One of its most useful features is the ability to add “addon/subdomain” to your primary domain. In this article, we will show you how to do it step-by-step.
Before we begin, make sure that you have access to your Virtualmin control panel and that you have already created your primary domain.
Step 1: Log in to Virtualmin
First, log in to your Virtualmin control panel. This can usually be accessed by visiting https://yourdomain.com:10000. If you are unsure of the login details, check with your hosting provider.
Step 2: Navigate to the Addon/Subdomain section
Once you’re logged in, navigate to the create sub server. This can be found in the left-hand menu under the ‘create virtual server’ tab.
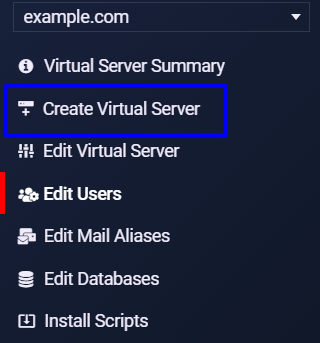
Step 3: Add the Addon/Subdomain
Click on the Create a new sub-server button to add an addon/subdomain. You will be prompted to fill in the following details:
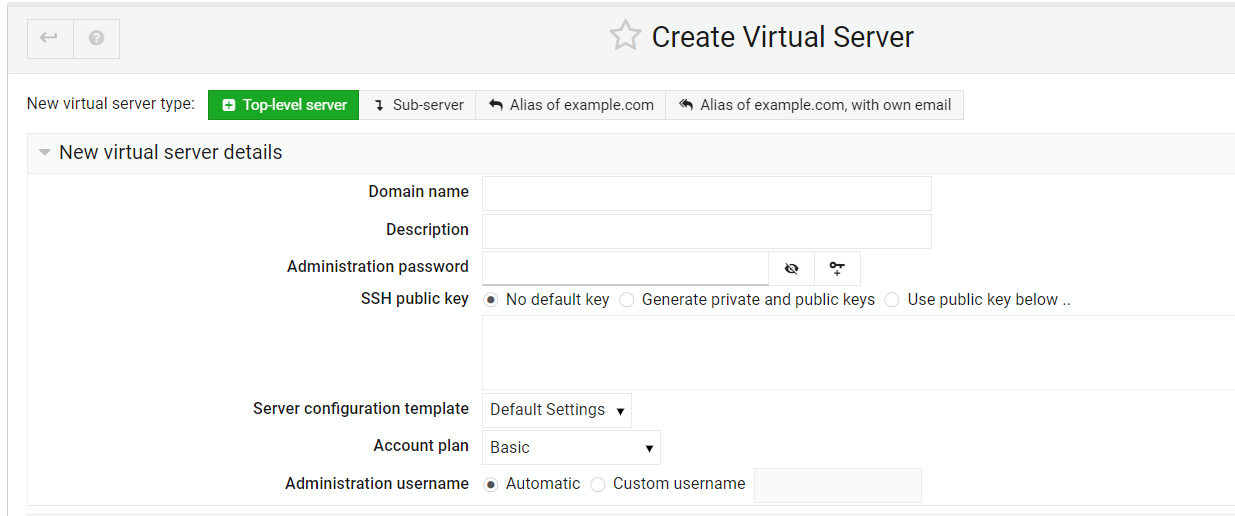
Subdomain name: Enter the name of the subdomain you wish to create. For example, if your primary domain is example.com, you might choose ‘blog’ as the subdomain name to create host.example.com.
Domain name: If you have multiple domains associated with your account, choose the domain you wish to add the addon/subdomain to.
Description: This field is optional, but can be useful for keeping track of your domains.
Step 4: Configure DNS
After you have filled in the details, click on the Create Server button. This will create the addon/subdomain, but you will still need to configure the DNS settings to make it accessible.
Step 5: Update DNS settings
In the DNS settings, you will need to create an A record for the addon/subdomain. This tells the DNS server where to point requests for that domain. Enter the following details:
Name: Enter the name of the subdomain. For example, if you created blog.example.com, enter blog.
Address: Enter the IP address of your server.
Click on the Add record button to save the changes.
Check the addon/subdomain
Once you have updated the DNS settings, you can test the addon/subdomain by visiting it in your web browser. If everything has been set up correctly, you should see your new site.
Now you can easily manage multiple domains and websites from a single location.
Know more:
How to install SSL certficate for the website on virtualmin?
How to change Virtualmin password?
How to install scripts on virtualmin?
Hope the above information helps you finish the task without any help.
If you are a registered user in SeekaHost and have any queries to be clarified or issues to be sorted, you can raise a ticket through the client area dashboard or email Webmin [email protected]. For immediate interaction or guidelines, contact our support team available in Live Chat at the right bottom corner of the website.