
 SeekaHost.com Client Area
  SeekaHost.app
  SeekaHost.co.uk
  SeekaHost.in
How to Migrate WordPress to Plesk From cPanel

By Frank Carson
To Migrate WordPress to Plesk from cPanel, you need to transfer your WordPress files, database, and settings from a cPanel hosting account to a Plesk control panel.
This process ensures your website runs smoothly on a new server without data loss or downtime. In this guide, you’ll learn simple step-by-step methods to backup, move, and configure your WordPress site from cPanel to Plesk easily.
Migrate WordPress to Plesk From cPanel:
1. Take Backup From cPanel
2. Migrate to Plesk
Take Backup From cPanel:
Step 1: Firstly, log in to your cPanel for the website
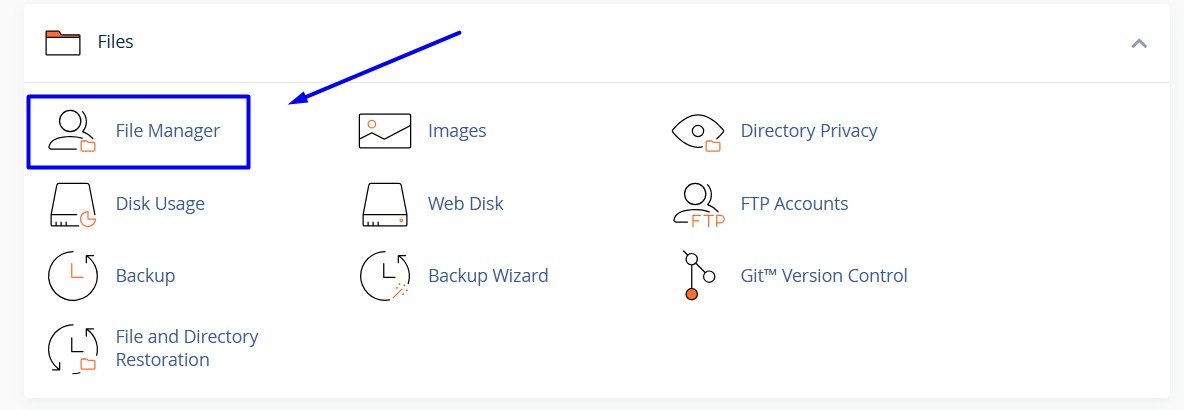
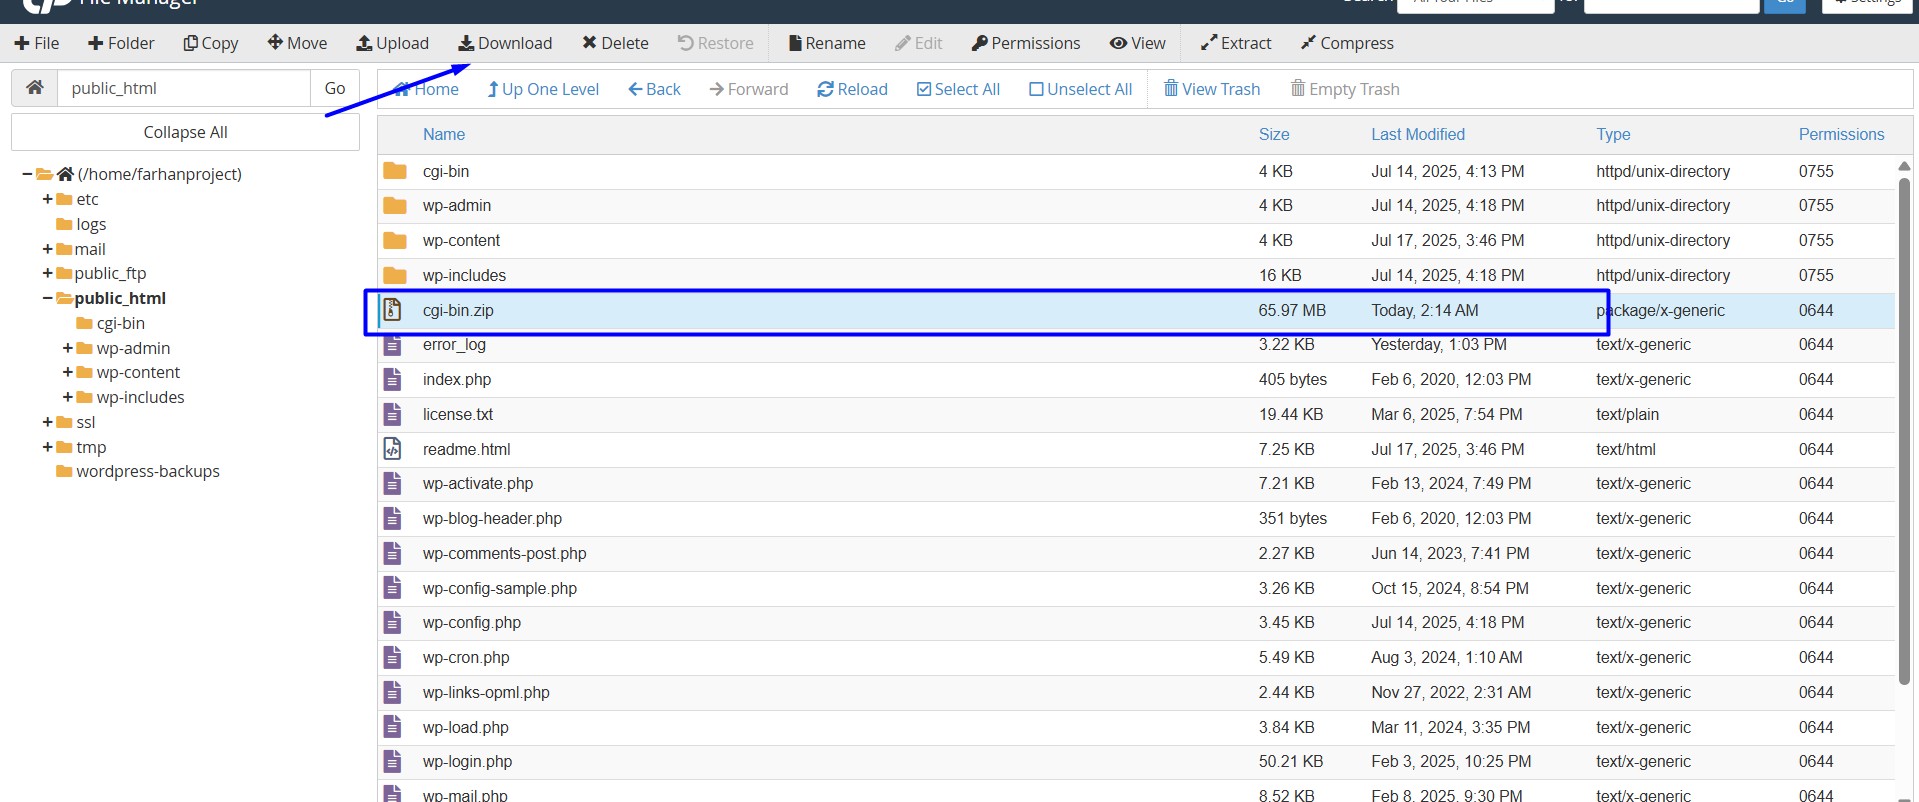
Step 2: Search and locate the file section, and click File Manager
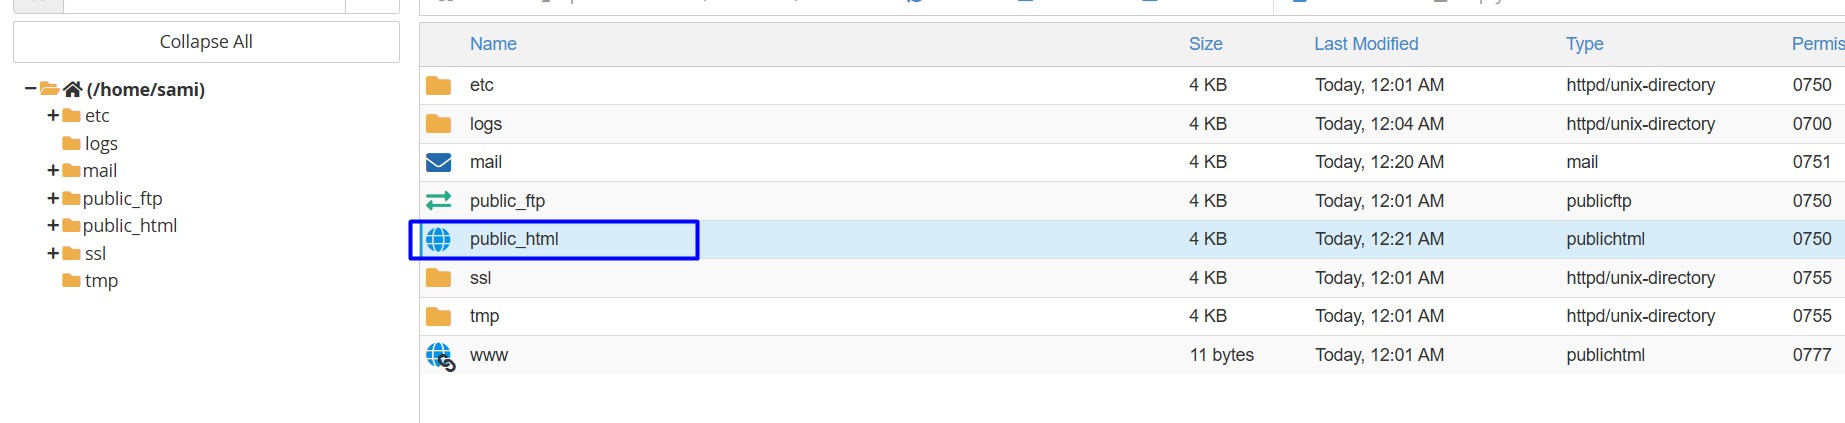
Step 3: Enter public_html directory.
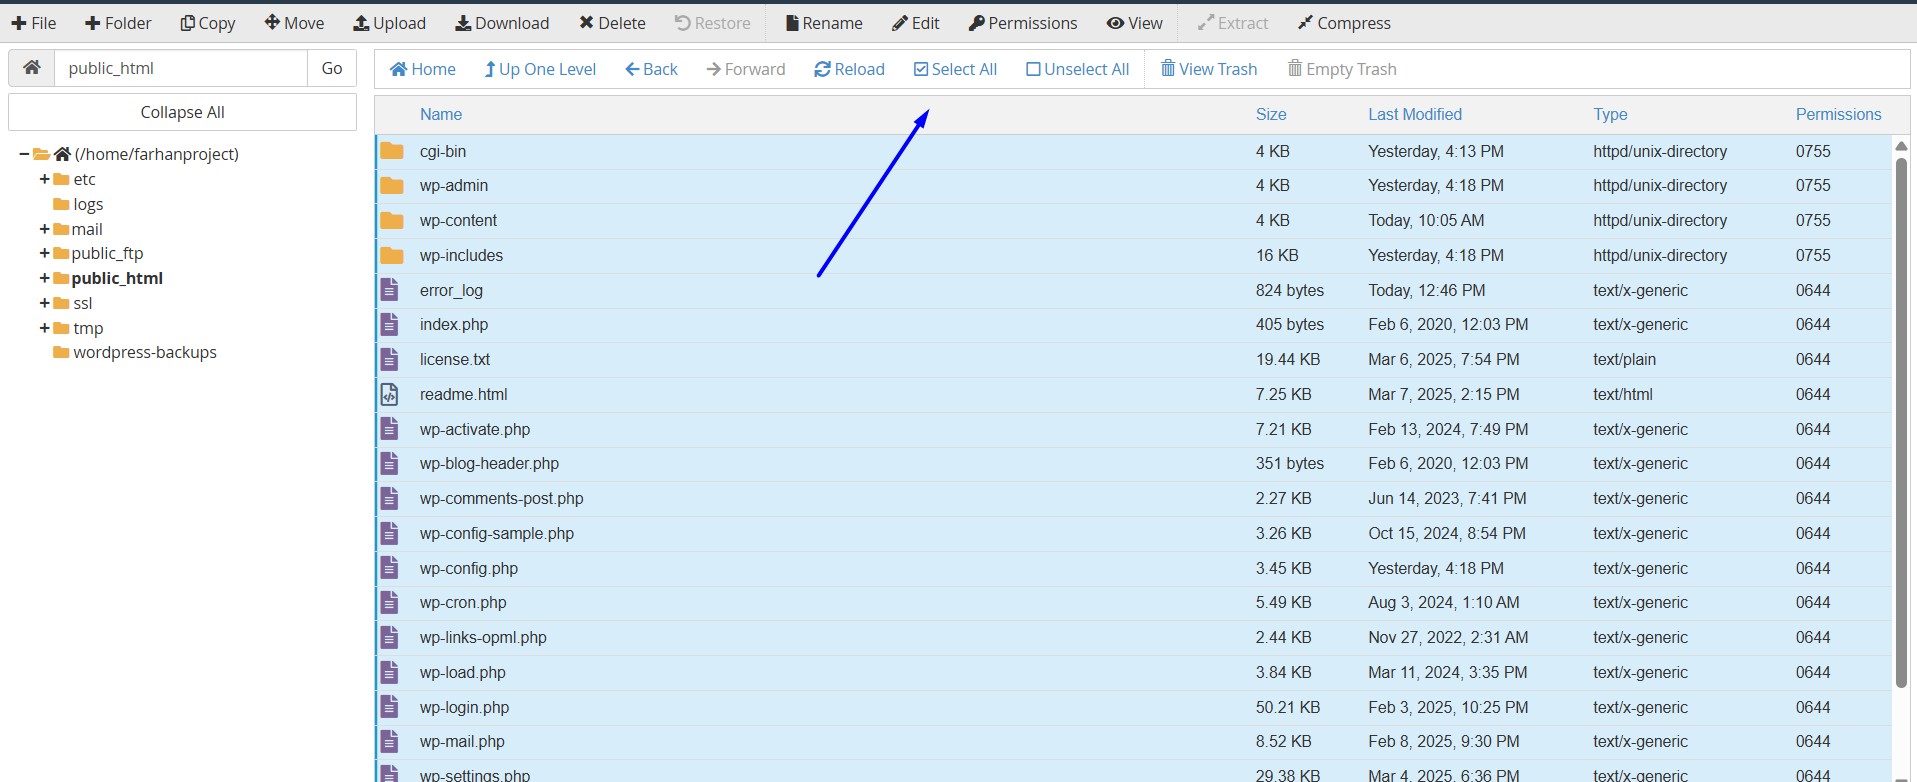
Step 4: Click “Select All file” option on top
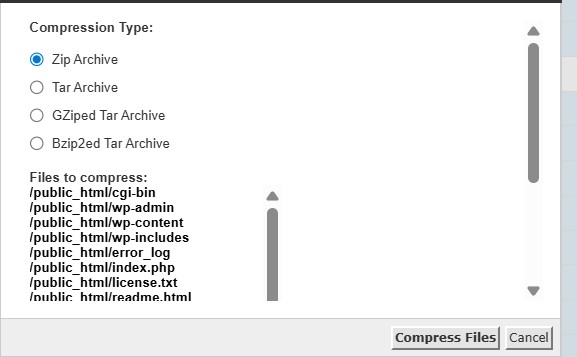
and then Click Compress and choose compression type.
Step 5: Right click on the .zip file and download it.
Step 6: Download Database
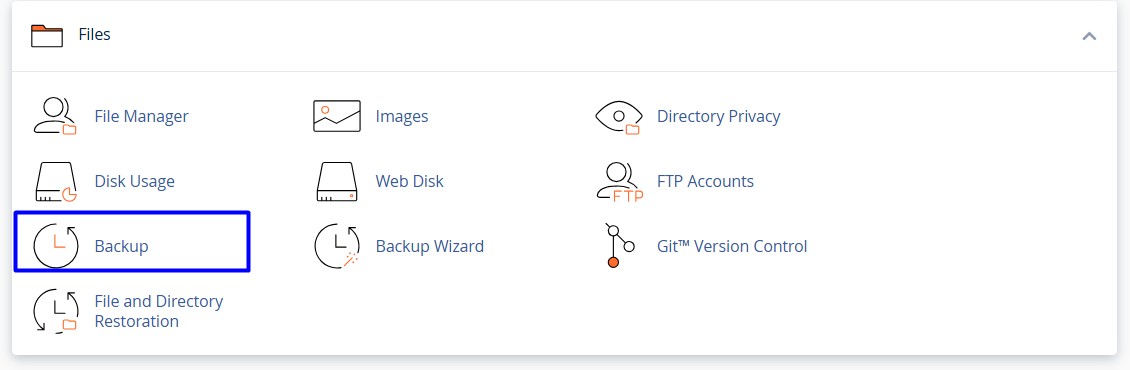
On cPanel menu, Under the ‘Files’ section, click on the ‘Backup’ option.
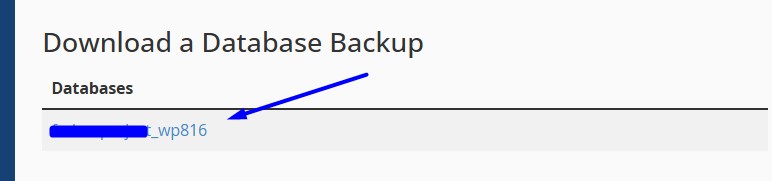
STEP 7: Under Download a MySQL Database Backup, Click on the ‘Databases’ to download.
If you want to take full back of the website then click the full website backup option.
Migrate to Plesk Control panel:
Step 1 : Login to Your Plesk Control
Login using Server Hostname or IP address :8443. Example, 54.65.125.2:8443
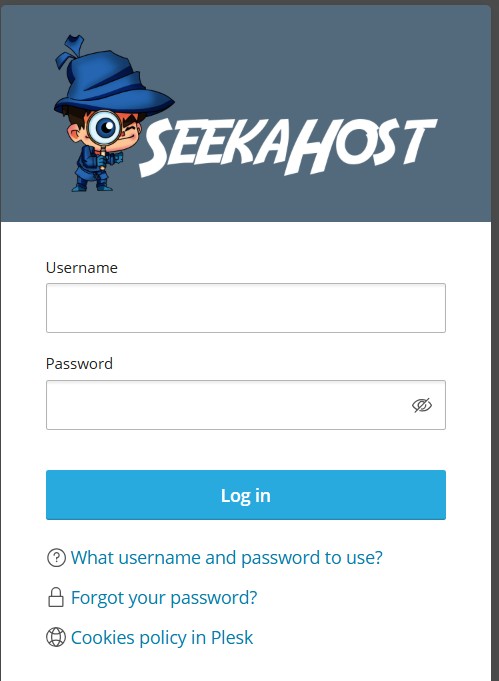
Step 2: Once you login into Plesk control panel, Click ‘Files‘ option and httpdocs folder
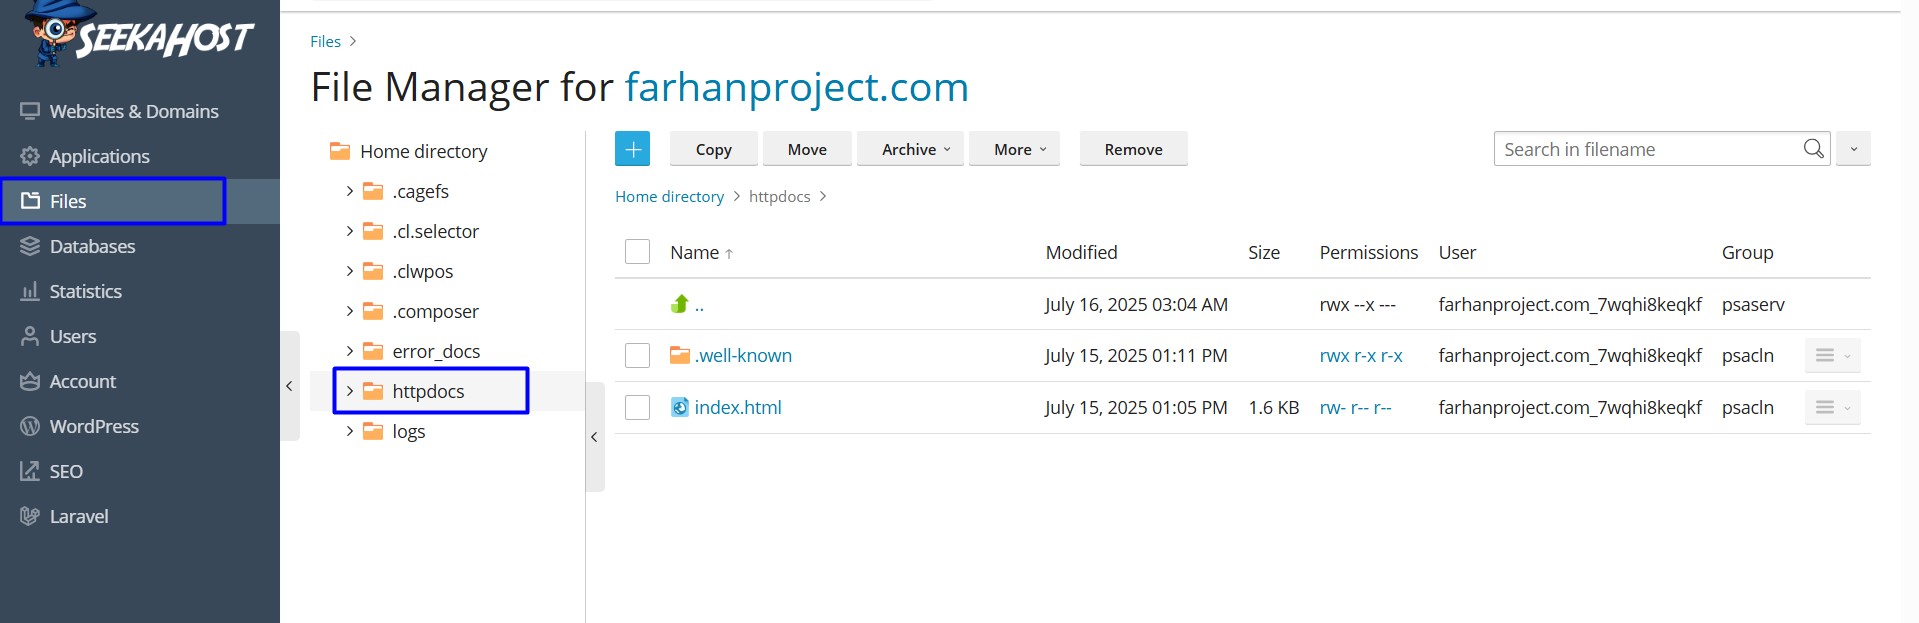
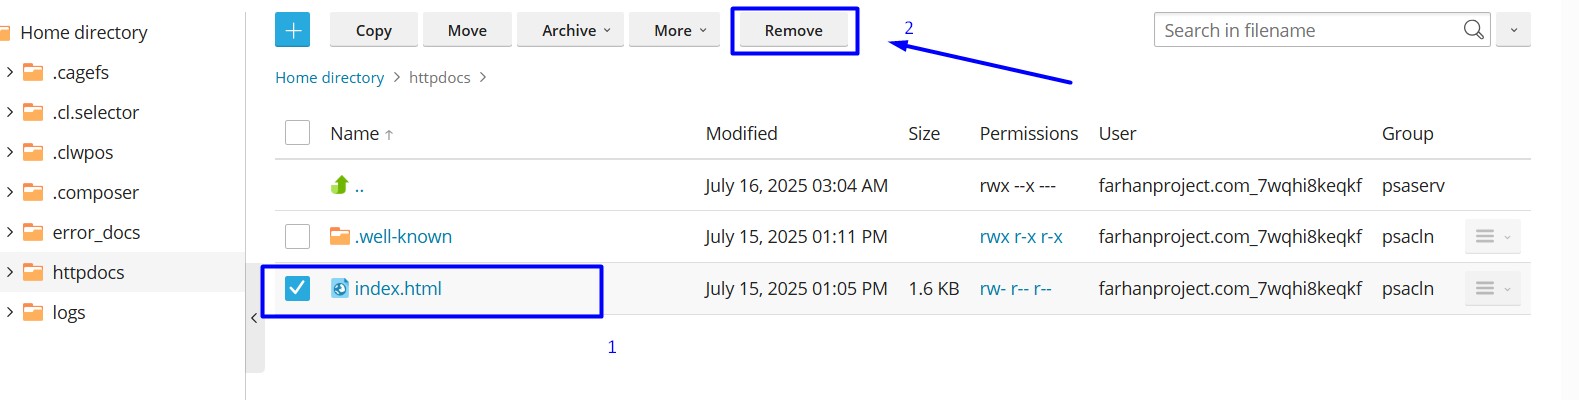
Step 3: Remove the Default Plesk Index.html file.
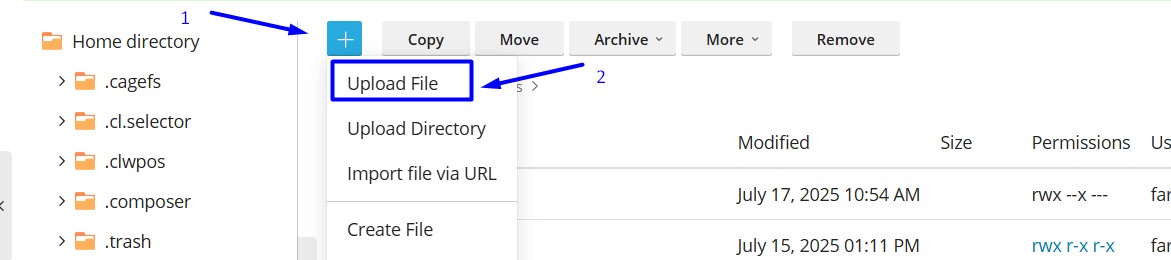
Step 4: Click ‘+‘ Button on top of the section and click ‘upload File’ to upload the zip file downloaded earlier.
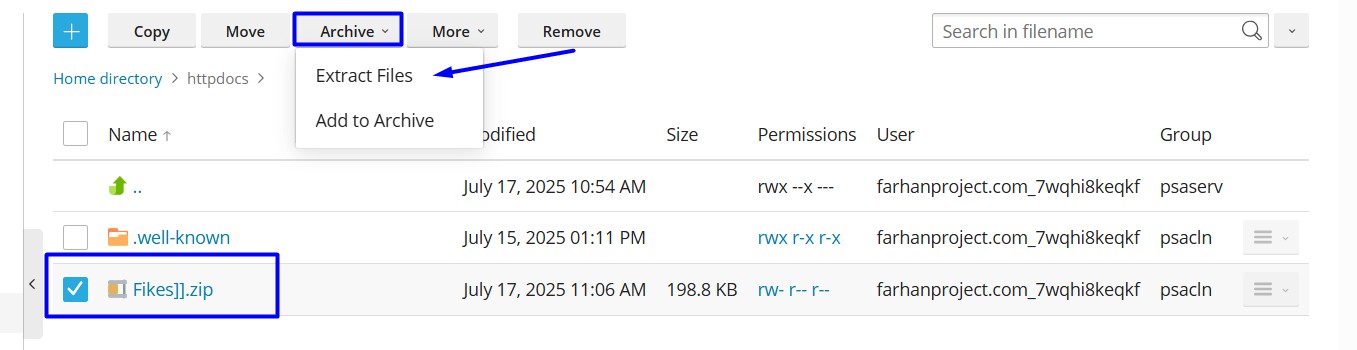
Step 5: Right click on the zip file and on top click Archive -> Extract Files to extract the zip file.
Step 6: Create Database and Assign User
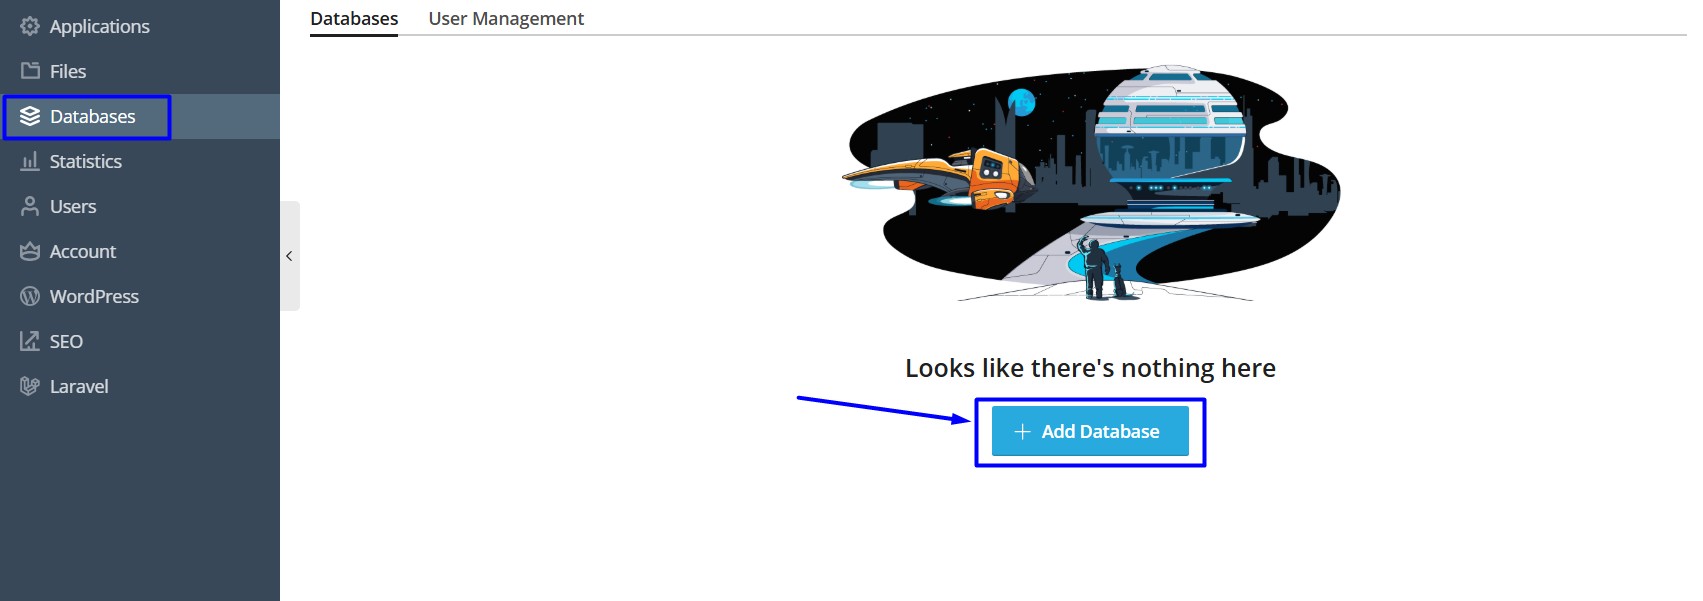
On Plesk panel, Click Database on left side and click Add Database.
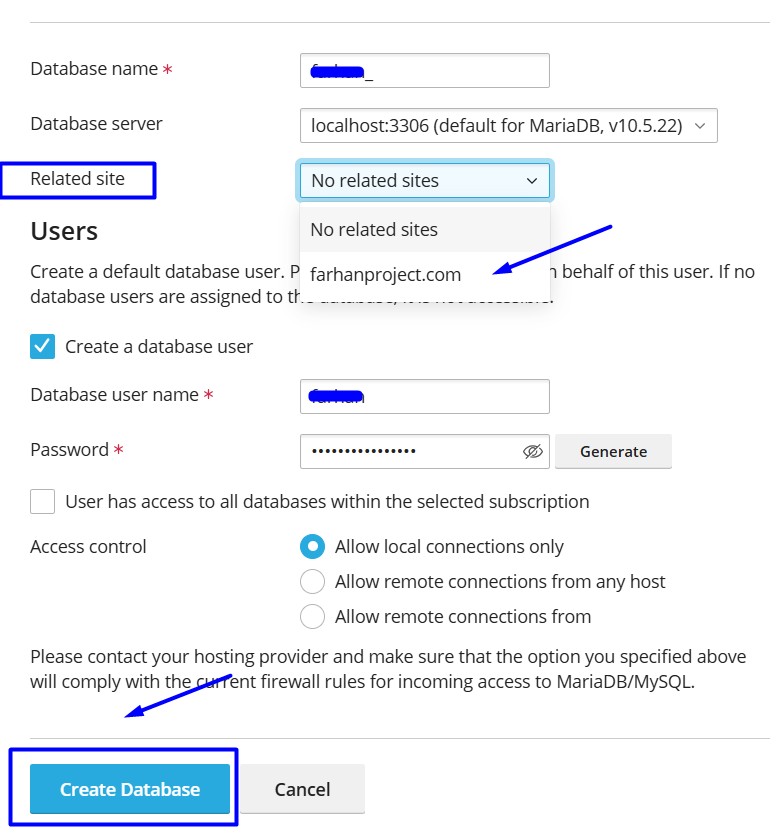
Step 7: Enter the database details for the website.
- Database name : Enter name of the database
- Related site: Select specific site your are selecting it for
- Database User name: Enter database name
- Password: Enter password or click generate password
- Access control: Choose “Allow local connections only”.
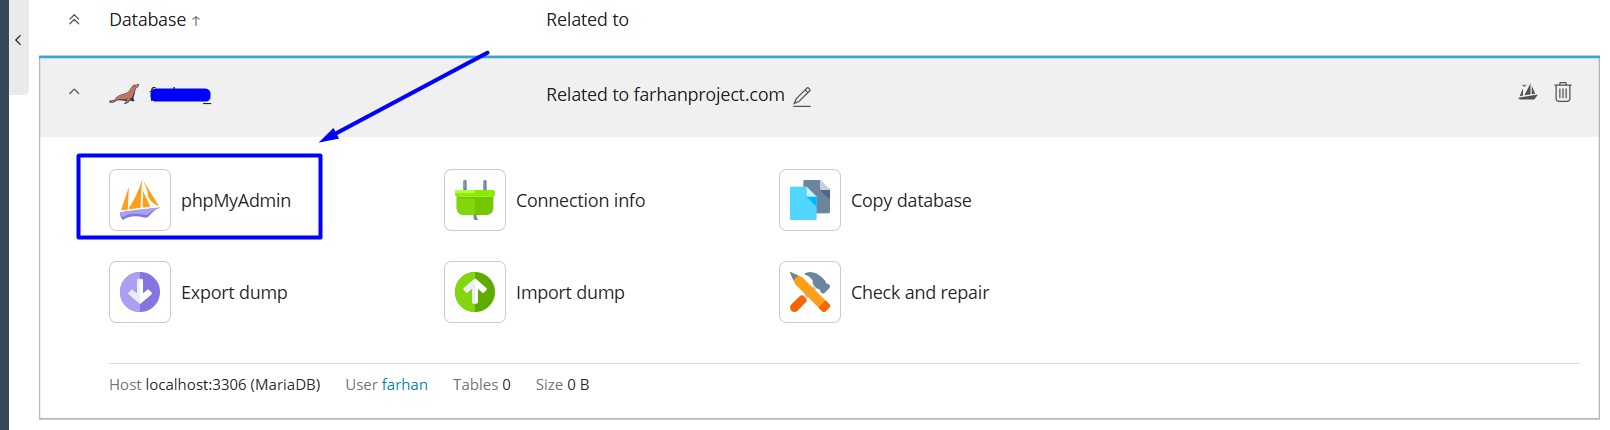
Step 8: Click phpMyadmin
Step 9: Select database on left side, Click Import option on top. Click Choose file button to upload the SQL file from your local system.
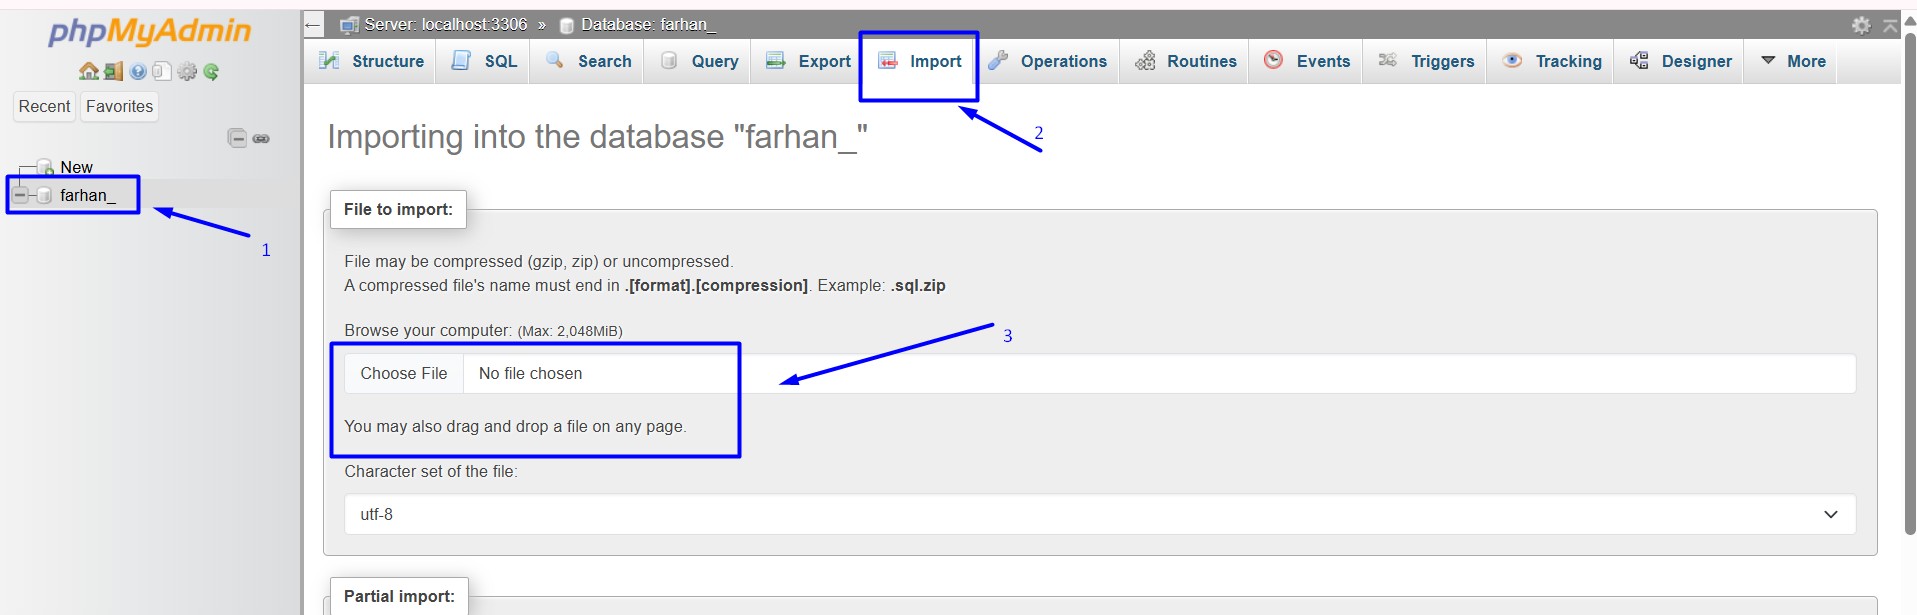
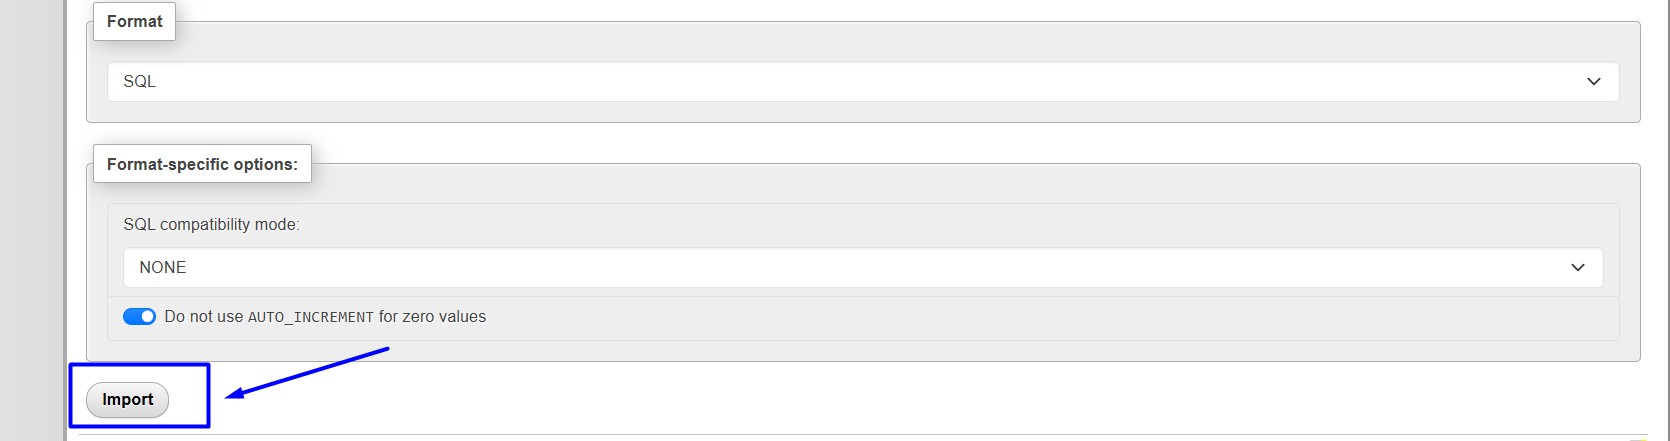
Step 10: Once uploaded, click Import button on bottom to successfully import the database.
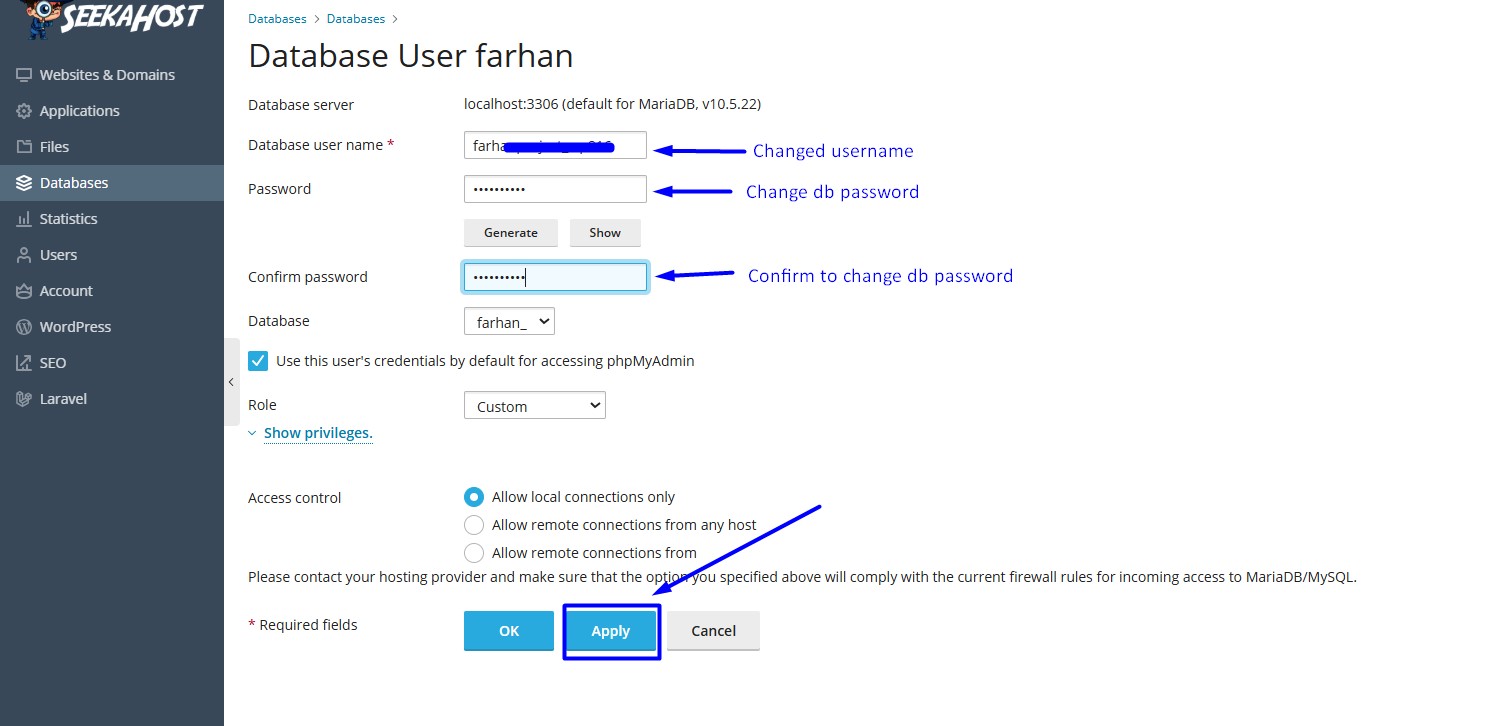
Step 11: Now go to the File Manager -> httpdocs directory -> edit the wp-config.php file. Set the same database name, database username, and password updated in the plesk on wp.config.php.
Useful Resources: