 SeekaHost.com Client Area
  SeekaHost.app
  SeekaHost.co.uk
  SeekaHost.in
How to Schedule a Backup of All Virtual Servers

By Swetha
Table of Contents
Schedule a Backup for the website will help you recover your website data if there is any disastrous server crash or website hack. Most importantly you can revert the process if you have done anything mistakenly but couldn’t revert. Rather than taking a backup manually, you can Schedule a Backup of All Virtual Servers in your account so that you can save time and data automatically.
You may be familiar with other control panel using their interfaces and scheduling backups but what is the difference in scheduling backup on Virtualmin or Webmin server?
Let’s find out in this article.
Schedule a Backup of All Virtual Servers:
Step 1: Log in to Virtualmin for your domain using domainaname:10000. For example, if the domain name is article.com, then article.com:10000. If you can’t log in via Virtualmin, get the access to Webmin URL and log in with your domain credentials.
In case you want to change the password, you can reset the password inside your Virtualmin account under change password.

Step 2: Go to “Backup and Restore” and click “Scheduled Backup”. Here it will show the list of existing schedule backups which you can manage or will ask to create a backup and schedule it.
Step 3: Click “Add a new backup schedule” to create a backup and schedule it.

Also Read: https://www.seekahost.com/backup-and-restore-in-virtualmin/
Schedule 1: Virtual Servers
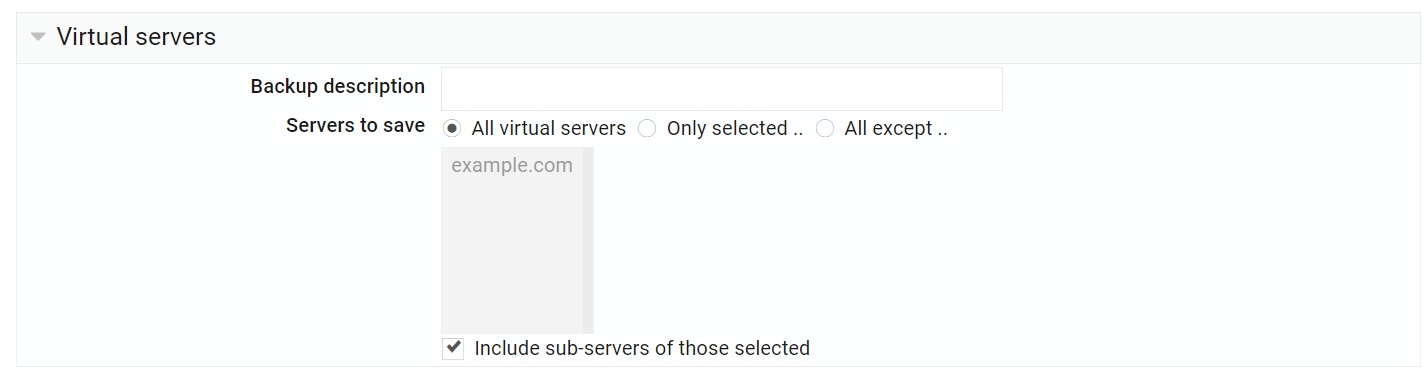
1. Backup Description:
If you want to know what kind of backup you will be taking while checking, later on, you mention it as a description here.
2. Servers to Save:
From the three options, choose “All the virtual servers” so that both the main domain files and addon/subdomain files will be backed up as listed in the text box.
- “Only selected” will take a backup of the selected domains.
- “All except” option will exclude certain addons/sub domains in the backup.
- Include sub-servers of those selected – Any sub-servers, sub-domains or aliases of those selected above will also be included in the backup.
Schedule 2: Features and Settings:
If you want to make any changes to enable any particular features, click “Only those selected below” and select it or leave it as it is. By default, it will include all the features.
Schedule 3: Destination and Format
1. Backup Destinations:
-> You can choose one of the following destination formats to store your backup file:
- File under Virtualmin-backup/
- FTP server
- SSH server
- Webmin server
- Amazon S3
- bucket Rack space Cloud Files
For the best and easy option, choose “File under Virtualmin-backup” and continue the steps.
-> After choosing it, specify the path name you want to set to store the backup. If you to store it in an already created folder inside the “Virtualmin-Backup” folder, click the select icon and choose the folder name.

-> If you want to delete the existing backup, click “Yes, after” and mention the days in number.
NOTE: If no text box shows, click any other option and choose again this option.
2. Additional destination options:
- Do strftime-style time – If enabled, you can create a custom timeframe folder with today’s date.
- Transfer each virtual server – It will be enabled by default which you can leave as it is.
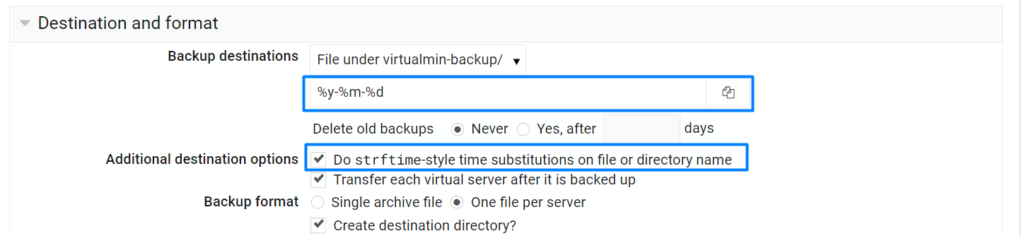
3. Backup format:
- Single archive file – To take backup of both main and addon/subdomains as a single file
- One file per server – To take a backup of both the main and addon/subdomain as two different files.
If click “Create destination directory?”, each domain will be backed up into its own separate file.
4. Action on error:
If there is any error or issue while the backup schedule going, you can choose between three options either halt backup immediately or continue with other features and servers or continue but don’t purge old backups. The action will be performed accordingly and process the backup.
- Halt backup immediately – Any error encountered during the backup process such as the failure of one of the features will cause the entire backup to halt.
- Continue – It will not halt the backup for a single feature failure. Automated backups, it is helpful and at least save a partial backup.
- Continue, but don’t purge old backups – the purge will still be done even if the backup fails.

5. Include sub-servers in the backup:
Any sub-servers or aliases of the main domain will be included in the backup if choose yes.
6. Backup compression format:
The default option will compress the backup in tar.gz. format. You can choose another format if you don’t want the default format.

7. Backup level:
|
NOTE: To restore full account files, you must restore both full and incremental backups.
Schedule 3: Destination and Format
1. Email backup report to:
Reporting the backup status to the mentioned mail id in the text box. If you click the check box “Only send an email on failure”, it will send only if there are any errors encountered.
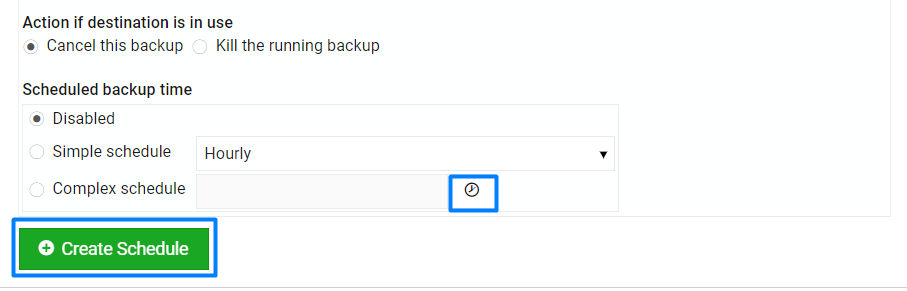
2. Action if the destination is in use:
If you or any process running on the destination folder where the backup is stored, then an action will be performed based on the selection below,
- Cancel this backup – It will allow the running backup to complete and immediately fail this one.
- Kill the running backup – It will terminate the backup that is already executing and allow this one to start
3. Scheduled backup time:
- Disabled – To turn off the backup schedule for now.
- Simple schedule – Schedule the backup on the specified time interval.
- Complex schedule – If need more control over specifying the time interval, click the icon clock and select the exact hours, minutes and days the backup will be run.
NOTE: You can check the running backup under the option “Running backups”
Related Articles:
Hope the above information helps you finish the task without any help.
If you are a registered user in SeekaHost and have any queries to be clarified or issues to be sorted, you can raise a ticket through the client area dashboard or email [email protected]. For immediate interaction or guidelines, contact our support team available in Live Chat at the right bottom corner of the website.