 SeekaHost.com Client Area
  SeekaHost.app
  SeekaHost.co.uk
  SeekaHost.in
What is a Nameserver and How to Change a Custom or Private Nameserver

Easy to understand explanation of what a nameserver is. What it does and how to register or change it to your new Web hosting site. Using SeekaHost to purchase the Domain we will then link it to our hosting by using the Nameservers. Also known as ns1 or ns2. We also go through how to register or change a Private Nameserver in case if your trying to create a Personal Blogging Network (PBN)
What is a Nameserver?
As people buy domains from many different sites, there needs to be a way to connect them from the Domain hosting company to the WordPress hosting company. Simply creating the WordPress site and adding the domain wont connect the two together unless you might have purchased the domain from the same provider as your WordPress hosting.
There are also Private Nameservers. These are for PBN Blog sites that run on sepperate IP’s rather that one that is generally used by a company for a WordPress site. We will also go through the step you will need to take to register or change them over as it involves an extra step.
How to Change Nameservers
- Copy Your Nameserver 1 and 2 from WordPress Hosting Site.
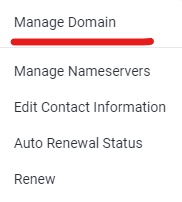
- Go to Manage Domain from your Domain Hosting.
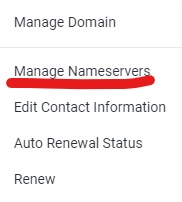
- Select Manage Nameservers.
- Select Custom Nameservers
- Paste In The Nameserver 1 and 2 into the correct boxes.
Detailed Guide to Changing Custom Nameservers
- Get started by heading over to your WordPress Hosting dashboard and find your sites information. It will provide you with your nameserver 1 and name server 2. Also known as ns1 and ns2. Copy these or keep them handy as you will be copying and pasting them shortly.

- Head over to your Domain Hosting dashboard and find the Manage Domain option.
- From here you should now be able to see a Manage Nameservers option also, select that.
- From here you can choose the option to use Custom Nameservers. Once you’ve selected custom nameservers you can paste the Nameserver1 and 2 from your WordPress hosting site from the first step.
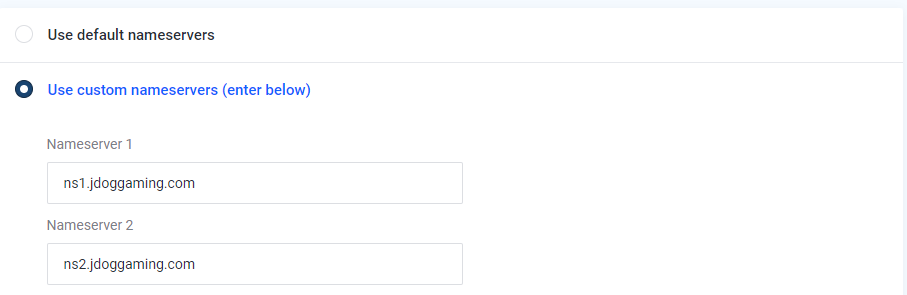
- Copy your Nameserver 1 and 2 from your WordPress Hosting site in to the correct boxes. You can now go ahead and save the changes. Please allow some time for it to be properly propagated and you should shortly after be able to activate your SSL certificate.
Why Would I Need to Change my Nameserver
There are many reasons and the main one being that your WordPress Hosting company might be different to where you have got your domain hosted. As we previously mention in the What is a Name server section. It is a way of connecting your domain to your website. For WordPress sites all the name servers are connected to the same IP used generally by the company. This is easy and using the steps above you can change your name servers over. A Private Blog Network is slightly different and runs on its own individual IP for each blog. To learn more please continue down to Change Private Name Servers or you can watch our video tutorial below.
How to Change a Private Nameserver
In case you are running a Personal Blogging Network (PBN) we have also included how to change or register private nameservers. This is vital step as the hosting will need to know the individual IP for your blog to make the connection between your domain work properly.
As it includes all the steps above, we will only include changing the Private Nameservers in this section and once done, will re direct you back to the article above about changing the name servers over.
- On your PBN Blog dashboard you need to find where it gives your site information. From here you can find your Blog IP and Nameserver 1 and 2. Take a note of both.

- On your Domain Hosting dashboard, head to Manage Domain and then Private Name Servers.
- In the top box called Register a NameServer Name you will need to fill out 2 things. First the Nameserver part you need to write ns1. Underneath you need tp fill in your Blog IP you took note of earlier.
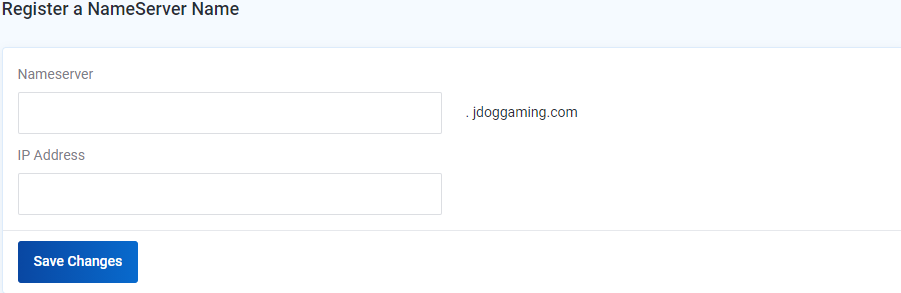
- Save Changes and the repeat with the second by typing ns2 in the Nameserver box and the Blog IP again in the IP address section.
- Once saved you can now go ahead and change the custom nameservers. To do this either scroll up to the Detailed Guide to Changing Custom Nameservers section. Or use the quick guide below.
Quick Guide to Changing Custom Nameservers
- Copy Your Nameserver 1 and 2 from WordPress Hosting Site.
- Go to Manage Domain from your Domain Hosting.
- Select Manage Nameservers.
- Select Custom Nameservers
- Paste In The Nameserver 1 and 2 into the correct boxes.
Conclusion
So we hope we have answered your question of What is a Nameserver. And using the guide above you should now successfully managed to register or change your nameservers over. Thank you for reading and for many more content like this make sure to check out our blog page our YouTube, and of course my personal page with WordPress tutorials.