 SeekaHost.com Client Area
  SeekaHost.app
  SeekaHost.co.uk
  SeekaHost.in
How to Increase PHP Memory Limit in Virtualmin

Table of Contents
The topic of “How to increase PHP memory limit in Virtualmin or Webmin“ will be covered in this article to familiarise you with the interface of a function.
As we can do on the cPanel interface to do changes we want are pretty simple to change and easy to find. However, in the case of Virtualmin or Webmin which is similar to WHM, even the basic configuration finding is a little difficult to find if a user gets familiarized with the cPanel interface. But that’s not the end at all. Once we use it, everything will get familiarized.
By default for every PHP installation, you will be getting 32MB. For most of the sites, 32MB is not enough. So, in that case, you have to increase the PHP memory limit. It is a scripted one, just like a highway’s speed limit is per vehicle.
You may face an error like Fattal error: Allowed Memory Size or like below
Fatal error: Allowed memory size of 23556632 bytes exhausted (tried to allocate 3349917 bytes) in /home/xxxxx/public_html/wp-includes/plugin.php online xxx
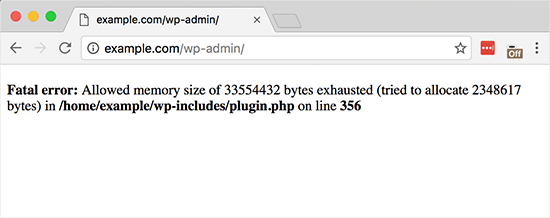
If you’re facing the above-given error, then there was an issue with your newly installed or activated themes or uploading images. In that case, you have to increase the PHP memory limit of your website by following the below-given steps.
Methods to Increase the PHP memory limit in Virtualmin:
- Assigned PHP configuration.
- Assigned PHP configuration folder.
- Through .User.ini file.
Change 1: Assigned PHP configuration
Step A: Login to Virtualmin for your domain using domainaname:10000. For example, if the domain name is article.com, then article.com:10000. If you can’t log in via Virtualmin, get the access to Webmin URL and log in with your domain credentials.
Incase if you want to change the password, you can reset the password inside your Virtualmin account under change password.

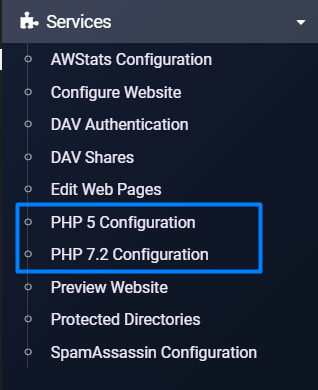
Step B: Go to Services -> PHP 5/7.2 Configuration whichever your website PHP version is assigned currently.
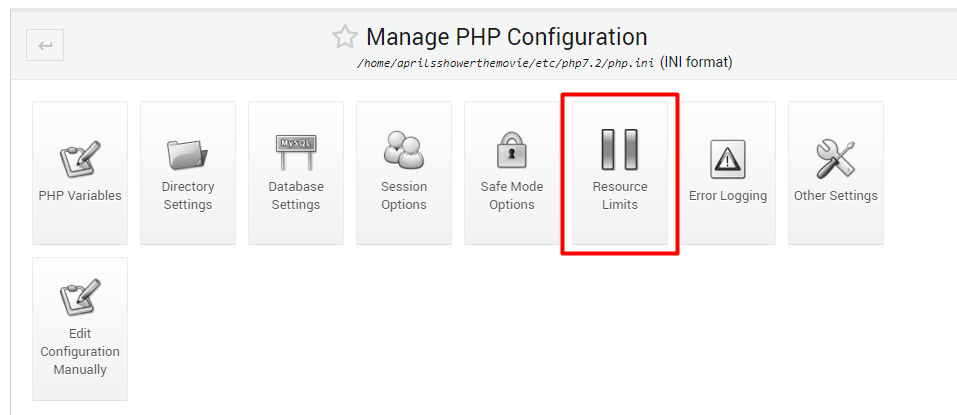
Step C: In this step, you have to click the Resource Limits button and it will take you to the PHP memory limit page.
Step D: Here you have to enter the value of the PHP memory limit that you would like to increase for your website. Once you have entered the value on the given memory allocation box, then you have to click the “Save” button to save the currently entered value as the PHP memory limit.
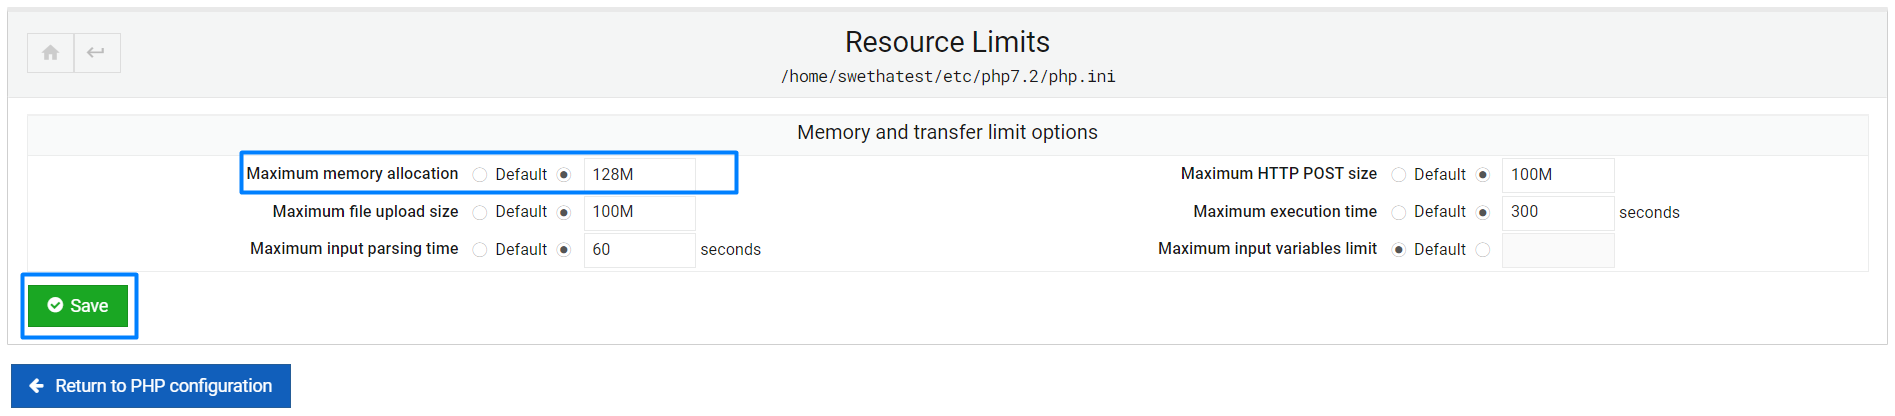
Now click save to make the effect apply.
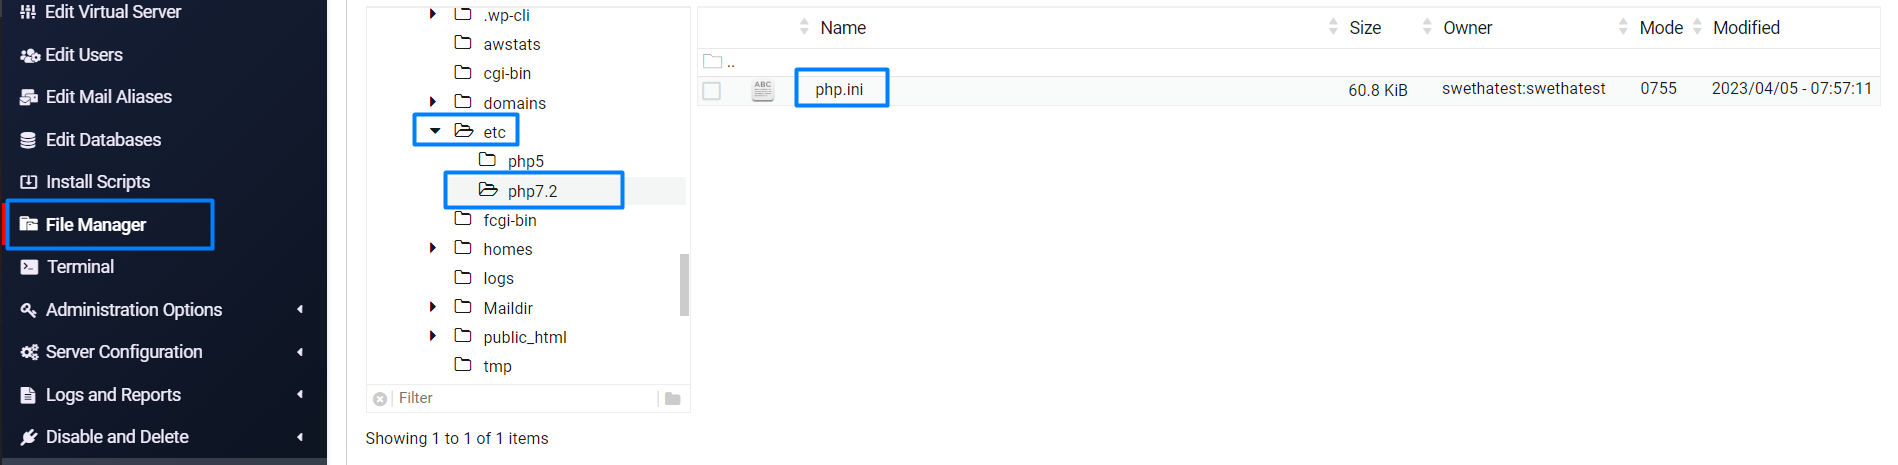
Change 2: Assigned PHP configuration folder.
Go to file manager -> etc -> PHP (assigned version) 7.2 -> Right-click on the file and click the edit option. Search the name and change the value.
Change 3: Through .User.ini file.
You can change the same values as above or update the memory limit in Virtualmin by creating the file “.user.ini” and updating the below code with the values you want for that factor.
[PHP]
display_errors = Off
max_execution_time = 90
max_input_time = 60
max_input_vars = 1000
memory_limit = 512M
post_max_size = 50M
upload_max_filesize = 50M
IMPORTANT INFORMATION:
The value set in the .user.ini file will be taken as a priority or currently in effect value than the value set in the PHP 7.2 configuration.
Related Articles:
Hope the above information helps you finish the task without any help.
If you are a registered user in SeekaHost and have any queries to be clarified or issues to be sorted, you can raise a ticket through the client area dashboard or email to support@seekahost.com. For immediate interaction or guidelines, contact our support team available in Live Chat at the right bottom corner of the website.