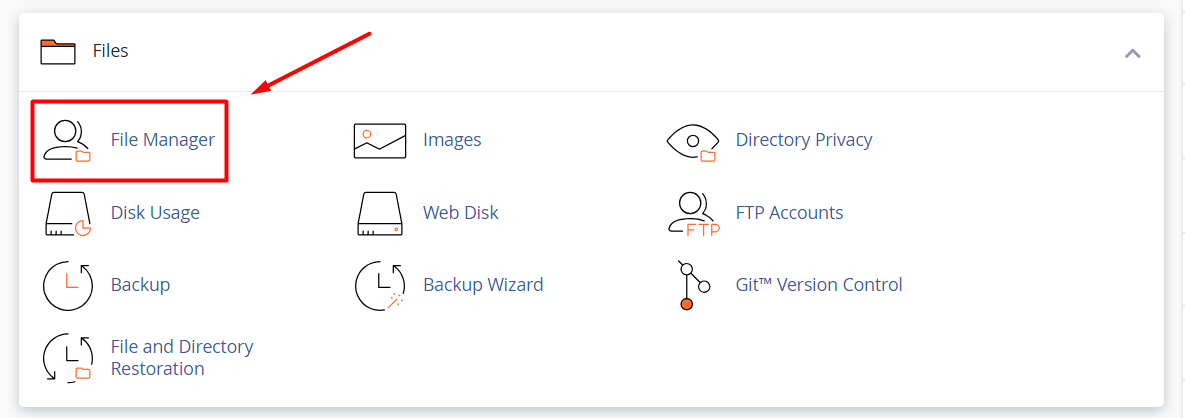
How to Solve WordPress Issues Through cPanel?
Most of the users face problems in WordPress due to some errors. Every user thinks that the error may occur in WordPress software itself. Even though the problems are occurring in WordPress, the main source for these kinds of situations can also be happened by cPanel. The users are not aware of the necessary tools in cPanel. The great thing is that you can also solve it by using cPanel. In this article, we have guided you on how to handle the common WordPress problems through cPanel.
Below, we have listed the common problems occurring in WordPress.
Problems When Uploading Media Files
Every user uploads the media files in their site such as Images, Videos, Gifs, etc., But the users are not aware of the size of the media files. For example, consider you have already added media files to your site. Now, you are trying to upload some images or videos which is of huge size. At this point in time, the user faces an issue i.e, the media files are not able to upload. This is occurred because of the memory limit.
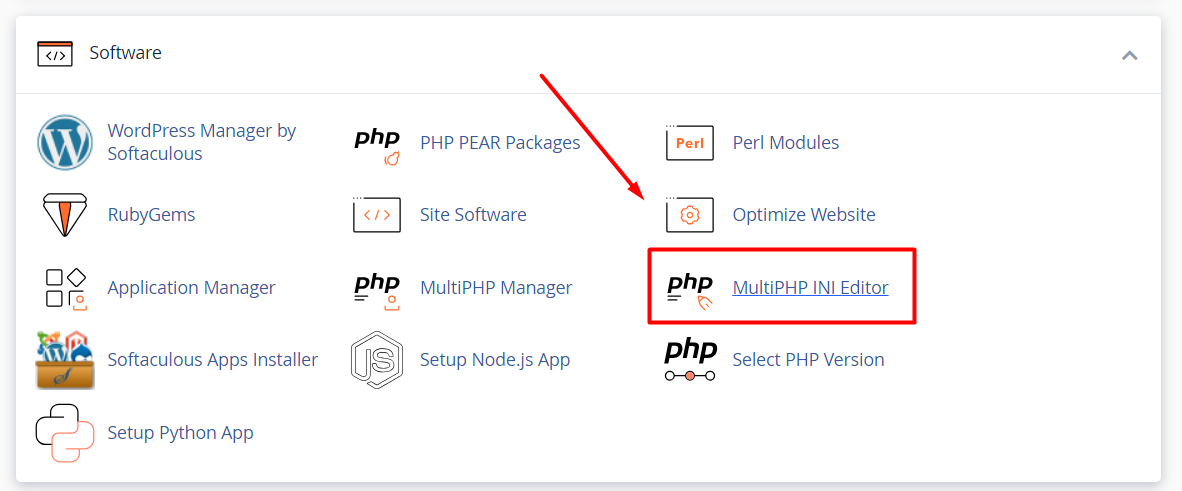
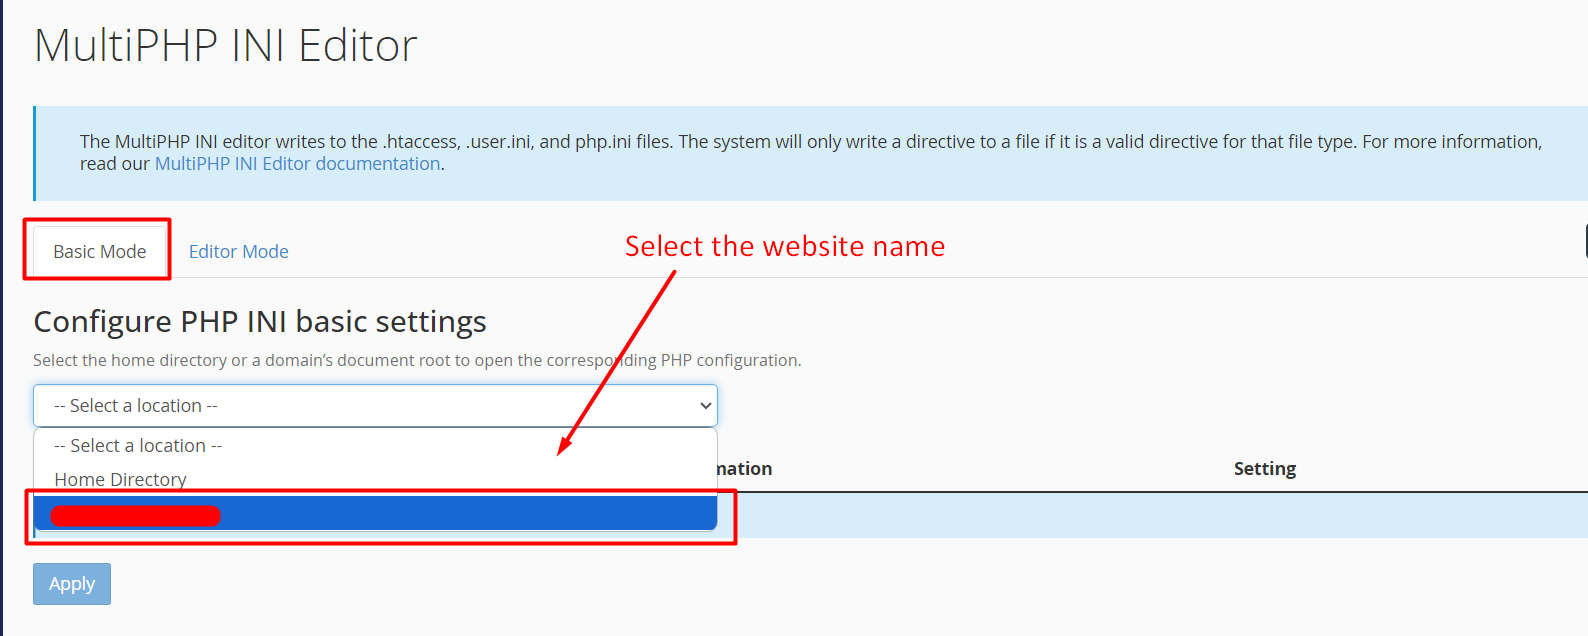
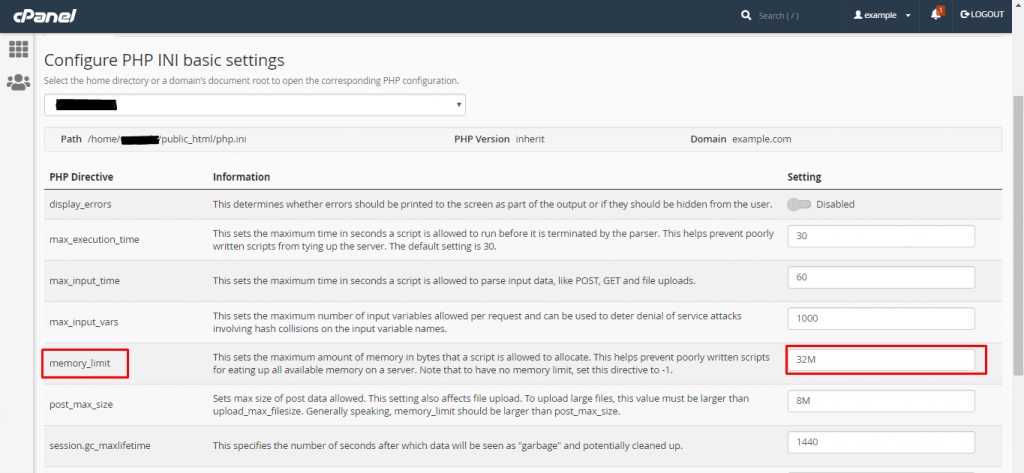
For every website, there will be a memory limit by default. If you face this kind of issue you can simply solve it through cPanel. Yes, in cPanel you can find a tool called ‘Multi PHP ini Editor’ which is available under the software section of the cPanel.
By using this tool, you have to increase the file upload limit size. Once you have increased the limit and saved the changes, you can easily upload the media files in WordPress.
Bandwidth Usage
Bandwidth is the most important factor for each and every website. Also, it is a precious thing for both the user and the website. If you have a lot of traffic to your site, then the bandwidth of your site must be reached. Hence, you have to know the importance of bandwidth which is necessary.
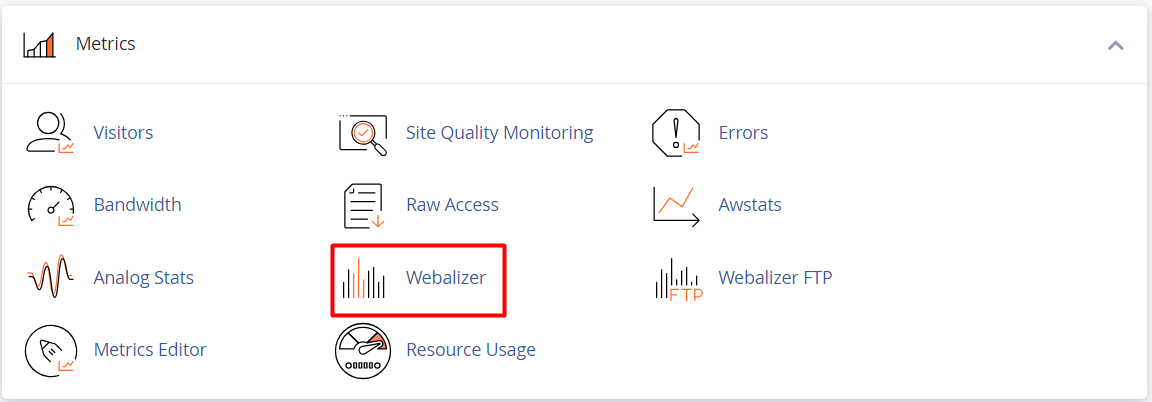
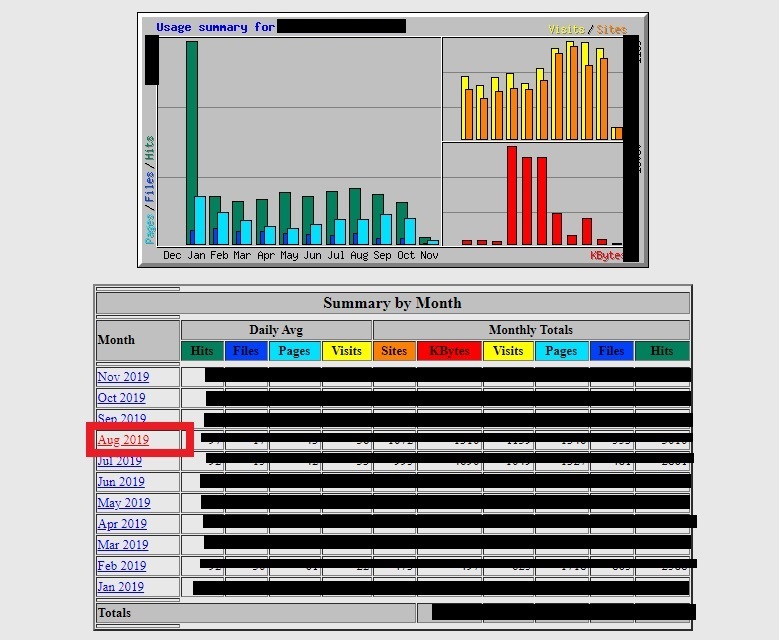
You can also reduce uploading the media files, which is a better way for most of the sites. In order to find who is consuming the bandwidth of your site, you can make use of the tool in cPanel. Webalizer is a tool, which is used to show the data traffic of a site. By using this site, you can analyze it in many ways. At times, bots will be the major reason for consuming the bandwidth.
PHP Versions
Sometimes, your WordPress might get some issues while installing plugins or themes, etc., for your site. The user may have updated all the plugins and themes etc., in WordPress. But the most important is the PHP Version. The user may not aware of the PHP versions. To update the PHP version for your sites, simply click on ‘Select PHP Version’ under the Software section of the cPanel.
There you can update the PHP versions for your site or you update according to the needs.
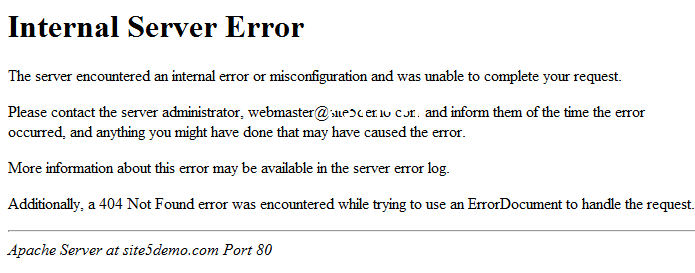
Internal Server Error
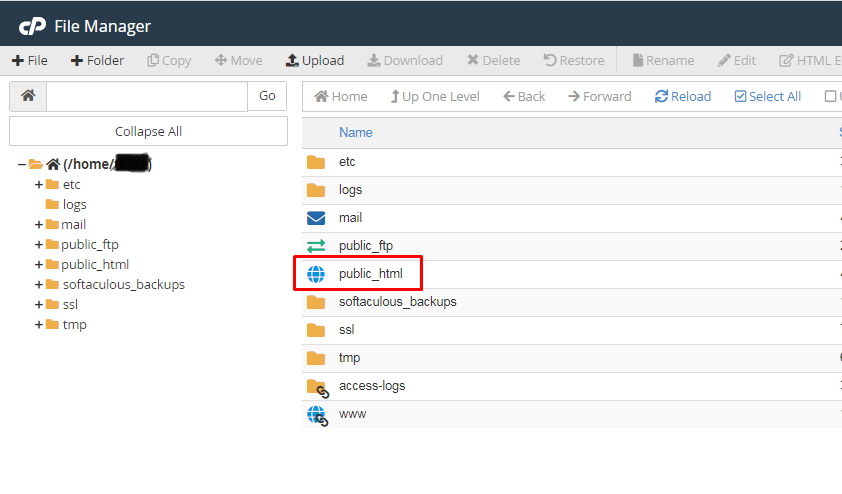
The common error is faced by most of the users. This happens when some changes occur in the .htaccess file. If you have made some changes to the .htaccess files, you can face this kind of issue. If not, you can face due to the plugins or theme malfunctions.
These are the common WordPress problems that can be handled through cPanel.
[Tweet “How to Handle the WordPress Problems Through cPanel?”]
If you are a registered user in SeekaHost and have any queries to be clarified or issues to be sorted, you can raise a ticket through client area dashboard or email to [email protected]. For immediate interaction or guidelines, contact our support team available in LiveChat at the right bottom corner of the website.

 Client Area
  SeekaHost.app
  SeekaHost.co.uk
  SeekaHost.in


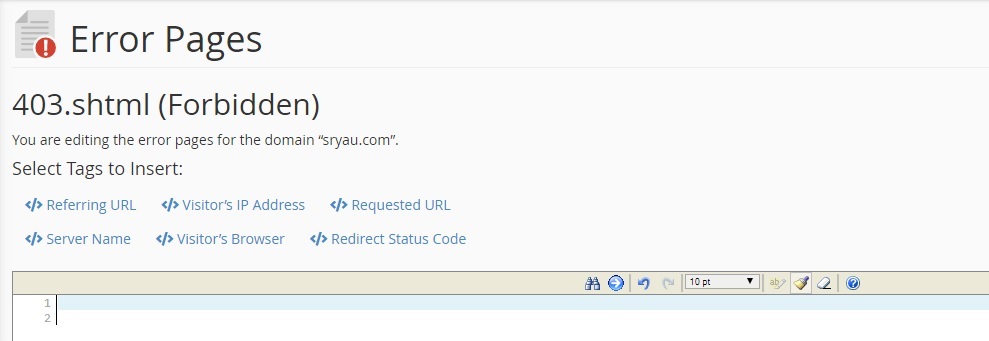
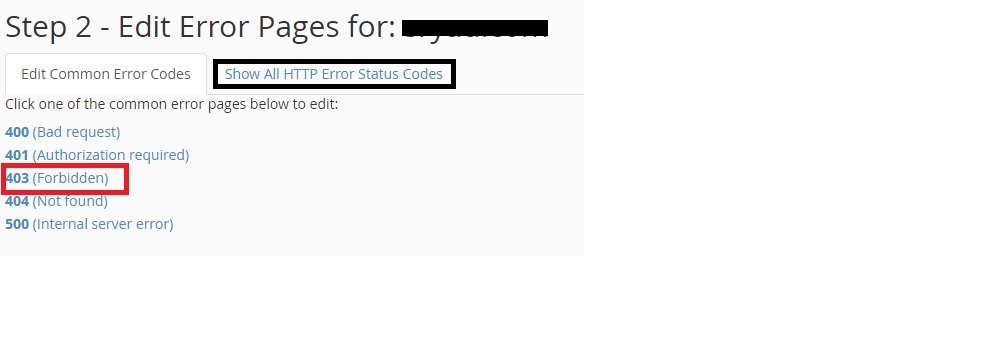 STEP 5: Editing Error Pages